
A kitchen sink installation is one of those projects that looks simple until a cutout is off by a quarter inch or the drain refuses to line up. I usually treat it as two jobs at once: fitting the sink cleanly into the countertop and making sure the plumbing beneath it stays dry, quiet, and easy to service. Done well, the new sink feels like part of the kitchen. Done poorly, it becomes a constant source of drips, movement, and frustration.
The practical details that decide whether the job goes smoothly
- Drop-in sinks are usually the easiest replacement; undermount sinks need more support and more curing time.
- Measure the cabinet, countertop opening, faucet holes, drain location, and sink depth before you buy anything.
- Most failures happen in the plumbing, not at the basin itself: loose trap parts, tired shutoff valves, or rushed sealing.
- A straightforward swap often takes 2 to 4 hours of active work, plus sealant cure time.
- If the drain has to move, the countertop opening changes, or a disposer is involved, the job gets more technical fast.
Choose the sink style that matches the countertop
The first decision I make is not about the faucet or the drain. It is about the sink style, because the countertop material usually decides what is realistic. A top-mount sink is easier to fit into an existing opening, while an undermount sink is cleaner-looking but demands more precision, better support, and a countertop that can actually carry the load.
| Sink style | Best for | Difficulty | What I watch for |
|---|---|---|---|
| Drop-in / top-mount | Most DIY replacements, especially when reusing the old cutout | Low to moderate | Rim seal, clip tension, and whether the opening is square |
| Undermount | Stone, quartz, solid-surface, or other countertops built for below-counter support | Moderate to high | Template accuracy, underside support, and cure time |
| Apron-front / farmhouse | Full kitchen updates where the cabinet can be modified to accept the exposed front | High | Cabinet clearance, weight, and front-panel alignment |
For a standard replacement, I usually recommend staying as close as possible to the old sink style and dimensions. That keeps the job from turning into countertop work, and countertop work is where time and cost start climbing. If you are changing from a top-mount to an undermount, I would slow down and verify the countertop material first. That choice determines how much of the project is a clean swap and how much becomes structural work.
Measure the opening before you buy anything
Most sink problems start before the box is even opened. I want three things confirmed up front: the sink will physically fit the cabinet, the cutout matches the new basin, and the plumbing underneath can still line up without strain. A sink can be the right size on paper and still fail in the real cabinet if the drain sits too close to a brace or the faucet holes are in the wrong place.
Check the cabinet and cutout
Measure the cabinet width, the front-to-back depth, and the existing opening at several points. Cabinets are not always square, and old countertops can be slightly irregular. I also check whether the sink rim or bowl will hit a cabinet brace, garbage disposal, or pull-out drawer below.
Confirm the drain and faucet layout
If you are reusing the faucet, count the number of holes and match the spacing. Standard kitchen setups may use one, three, or four holes depending on the faucet, sprayer, soap dispenser, or air switch. At the drain, I look at where the tailpiece lands and whether the trap arm will still line up with the wall connection without being forced upward or downward.
Inspect the shutoff valves and supply lines
This is a small detail that saves a lot of trouble. If the shutoff valves are corroded, stiff, or weeping already, I would replace them before the new sink goes in. The same goes for old supply hoses. A fresh sink does not help much if the first thing under it is a valve that barely closes.
Once the fit is confirmed, the next step is setting the sink so it seals properly the first time. That is where the physical installation begins.
Set the new sink in place without stressing the counter
The cleanest installs are usually the least dramatic ones. I start by turning off the water, disconnecting the supply lines, and removing any drain parts or disposer connections under the old sink. Then I cut through the old sealant, loosen the mounting clips, and lift the sink out carefully so I do not chip the counter edge. A utility knife helps, but I am careful not to score laminate or stone while cutting old caulk.
Dry-fit first
Before any sealant goes down, I test the new sink in the opening. It should sit flat, not rock, and leave even contact all the way around. If it rocks, the opening may need trimming or the sink may simply be the wrong size for the cabinet.
Use the right seal and the right amount of support
For a top-mount sink, I usually run a continuous bead of sealant under the rim, lower the sink into place, and then tighten the clips evenly. I do not crank them down so hard that the rim distorts. For an undermount sink, the process is more demanding: the sink must be positioned under the cutout, supported from below, and secured with the hardware the manufacturer provides. With heavy sinks, especially stone or cast-iron models, temporary bracing matters more than people expect.
Let the sealant cure before you test it hard
Silicone often skins over quickly, but that does not mean it is ready for full use. I treat the cure time as part of the installation, not as an optional wait. If the sink is undermount, the support should stay in place until the adhesive or sealant has actually reached usable strength. That patience prevents a sagging basin later.
Once the sink is mechanically fixed and sealed, the real plumbing work begins. That is where a lot of otherwise good installations go wrong.
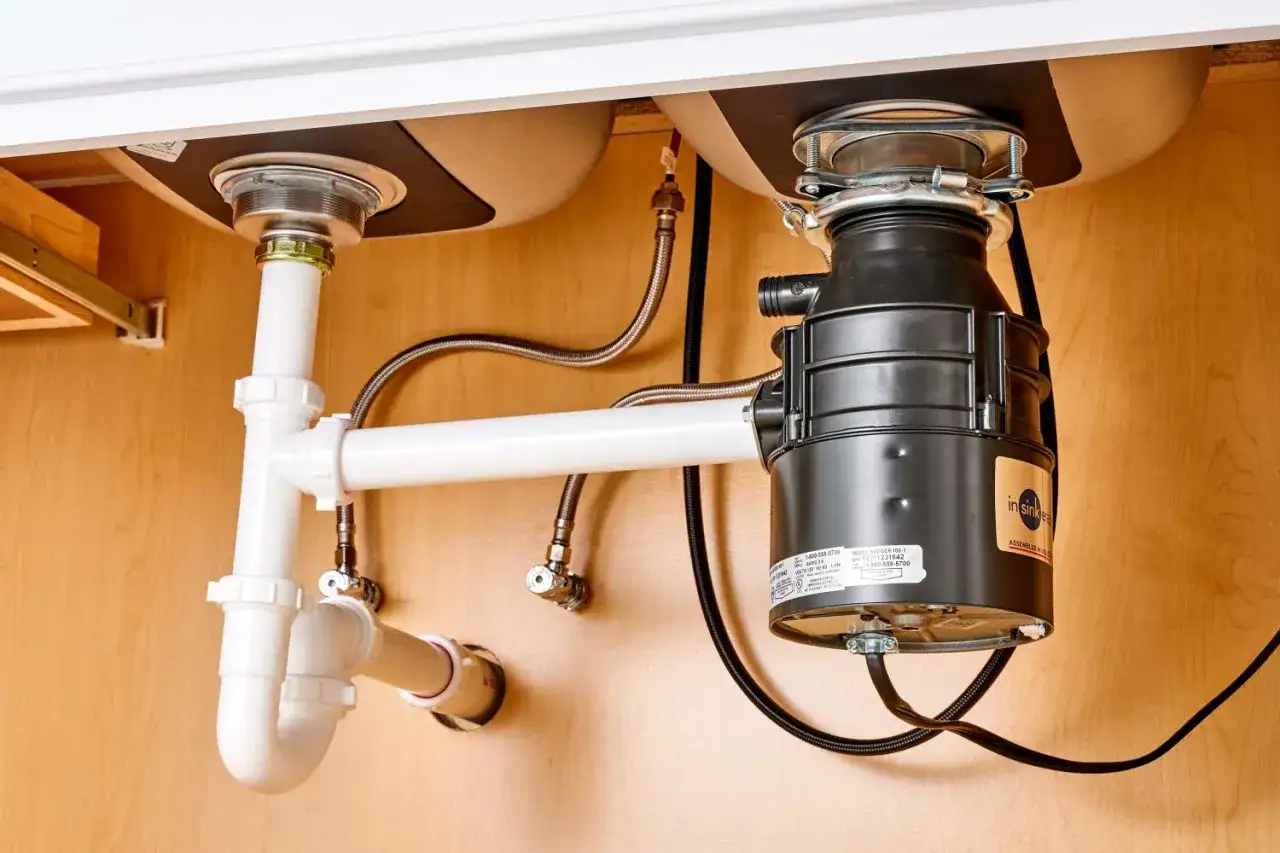
Plumb the drain so it drains freely and stays dry
I always remind people that a sink install is only half finished when the bowl is in place. The drain assembly, supply lines, and trap determine whether the sink is pleasant to live with or annoying every single day. The curved section under the sink, the P-trap, holds water so sewer gas cannot come back through the drain. If that part is wrong, you usually notice it quickly.
Build the drain from the sink down
The basket strainer or disposer flange, tailpiece, trap adapter, and trap pieces all need to line up without being forced. I dry-fit the parts first, because slip-joint fittings are forgiving only up to a point. If the pieces are under tension, they usually leak later. A kitchen trap assembly in the US is often 1 1/2 inch, but I still match the exact parts to the sink and wall connection rather than assuming the old hardware will be fine.
Replace supply lines if they are tired
Braided supply lines are inexpensive compared with a water-damage repair. If the old lines are discolored, brittle, or twisted, I replace them. The same logic applies to angle-stop valves: if they do not shut off cleanly, they should not stay in service under a new sink.
Read Also: How to Snake a Drain - The Complete DIY Guide
Test before the cabinet gets packed
My test is simple. I run hot and cold water, fill and drain the bowl several times, and then wipe every joint with a dry paper towel. That catches slow seepage before it ends up hidden under cleaning supplies. If there is a disposer, I run that too and check the flange and discharge connections again after a few minutes.
When the drain runs well and every joint stays dry, the job feels finished. But there are a few mistakes that can still undo a good-looking install, and they are worth calling out separately.
The mistakes that create leaks later
Most callbacks I see come from a handful of avoidable problems. They are usually not dramatic errors. They are small choices made too fast.
| Mistake | Why it causes problems | Better approach |
|---|---|---|
| Buying the sink before measuring the opening | The bowl may fit the cabinet on paper but fail at the cutout or brace level | Measure first, then choose the sink |
| Using an undermount on the wrong countertop | Some tops do not handle the support or water exposure well | Match the sink style to the countertop material and reinforcement |
| Overtightening clips and fasteners | It can warp the rim, crack the seal, or stress the sink body | Tighten evenly and stop when the sink is secure and flat |
| Reusing old supply lines and valves that already look tired | A new sink does not fix a failing shutoff or brittle hose | Replace worn lines and valves while the cabinet is open |
| Testing too soon | Sealant may appear dry before it is actually ready | Follow the full cure time before loading the sink hard |
I also see trouble when people force the trap into position instead of adjusting the pipe lengths. A drain should fit because the parts were measured and trimmed correctly, not because the pipe is being bent into place. That habit is a leak waiting to happen, which is why budget and timing deserve a reality check before the cabinet door goes back on.
What the job usually costs and how long to plan for
For a straightforward replacement in the United States, I would budget a few hundred dollars if a plumber is handling the work, and more if the project includes new valves, a faucet, a disposer, or countertop changes. A simple DIY swap can stay relatively modest if the sink, sealant, supply lines, and trap parts are all standard and the existing plumbing is in good shape. Once the opening changes or the drain needs to be rerouted, the price can move up quickly.
| Scenario | Typical planning range | What pushes it higher |
|---|---|---|
| DIY materials only | Roughly $75 to $300 for a basic replacement | New faucet, new disposal parts, or upgraded sink materials |
| Professional labor for a straightforward swap | Roughly $300 to $800 | Local labor rates and whether small plumbing parts are included |
| Complex replacement | Can move past $1,000 | Countertop modification, drain relocation, valve replacement, or cabinet changes |
Time is similar: I usually think in terms of 2 to 4 hours of active work for a simple top-mount replacement, plus drying or cure time. Undermount sinks take longer because the support, adhesive, and cure window matter more. If the project involves moving plumbing or cutting stone, I would stop thinking in hours and start thinking in half-days.
Call a plumber if the shutoff valves do not close, the wall drain sits in the wrong place, the countertop is cracked or fragile, or the job starts touching venting or electrical work. Those are not signs of failure. They are signs that the project has crossed into a level where a bad guess gets expensive fast.
The small checks that keep the sink tight after the first week
I treat the first few days after installation as a proving period. After the initial cure time, I recheck the rim, the clips, the trap joints, and the supply connections with a dry hand or paper towel. If there is any trace of moisture, I fix it immediately instead of waiting to see whether it grows into a bigger leak.
It also helps to watch the cabinet floor under the sink for the first week. Swelling, discoloration, or a stale smell usually means water is escaping somewhere. That may be a slow drip from a supply nut, a bad trap seal, or a sink rim that was not bedded properly. Catching it early is the difference between a quick touch-up and a damaged cabinet base.
That extra inspection time is boring, and it is also the reason a good sink install stays good. If the sink sits flat, the plumbing is relaxed, and the cabinet stays dry, the project is finished the right way.