An acid wash brick treatment can remove mortar haze, soot, and years of grime, but the chemistry is unforgiving. The difference between a clean wall and a damaged one usually comes down to prep, dilution, dwell time, and rinsing discipline. In this article, I break down when acid belongs on brick, what to use, how to apply it safely, and when I would switch to a gentler method instead.
Key facts to know before you start
- Acid cleaning is best for mortar smears, smoke residue, and certain mineral stains, not for loose dirt that water can handle.
- Most new masonry should cure for 14 to 28 days before cleaning; some high-strength mortars can be cleaned sooner if the manufacturer allows it.
- Always test a hidden area first and compare the dried result before treating the whole wall.
- Keep the brick pre-wet, work in small sections, and rinse before the cleaner dries on the surface.
- Buffered masonry cleaners are usually safer than straight muriatic acid for residential work.
- Never mix acid with bleach or other cleaners, and never treat the job like a pressure-washing project.
When acid cleaning makes sense and when it does not
I reach for acid only when the stain actually calls for chemistry. That usually means mortar smears, construction haze, soot, smoke residue, or certain mineral deposits that sit in the pores of the brick rather than on top of it. If the wall is just dusty, greasy, or covered with loose dirt, water and a masonry sponge are usually enough.
Where people get into trouble is using acid as a universal fix. Old or soft brick, spalling faces, failing mortar joints, and historic masonry all deserve more restraint. Acid can make a weak surface look clean for a moment and then leave it rougher, lighter, or patchier than before. I would also avoid using it on materials that are not true brick, especially if the wall includes calcareous stone or decorative components that can etch.
Timing matters too. Fresh masonry needs time to cure, and rushing the cleanup can erode the joints before they have hardened properly. For most projects, I want the wall to be fully ready, the stain type identified, and a test spot approved before I think about cleaning the whole face. Once that part is clear, the real question becomes which cleaner gives enough power without creating a new problem.
Choosing the right cleaner for the job
For most homes, I prefer the mildest product that still gets the result. A buffered masonry cleaner or a mild acid detergent is usually a better first choice than straight muriatic acid, because it gives more room for error and is less likely to leave burn marks or streaking. Stronger is not better if the wall does not need it.
| Cleaner type | Best use | Risk level | My take |
|---|---|---|---|
| Buffered masonry cleaner | Mortar haze, light soot, routine post-construction cleanup | Lower | My first choice for most residential brick |
| Mild acid detergent | Older brick, fireplace soot, moderate mineral staining | Moderate | A good middle ground when water alone is not enough |
| Unbuffered muriatic acid | Stubborn residue on compatible masonry | High | Last resort, and only after a test patch proves the wall can take it |
If the product label gives a dilution range, I start at the weakest end and only step up if the test area needs it. I would not guess at strength on a whole wall. The cleaner should be matched to the brick, the stain, and the amount of risk you are willing to tolerate. That selection is much easier once the work area is set up properly, which is where most DIY mistakes begin.
The preparation that prevents burns and streaks
Preparation is what keeps the chemistry controlled. I want the area organized before the first drop of cleaner hits the wall, because once acid starts reacting, there is no good reason to be scrambling for gear or rinse water.
- Chemical-resistant gloves
- Tight-fitting safety goggles, not just glasses
- Long sleeves, long pants, and closed-toe shoes
- Two buckets, one for mixing and one for rinse water
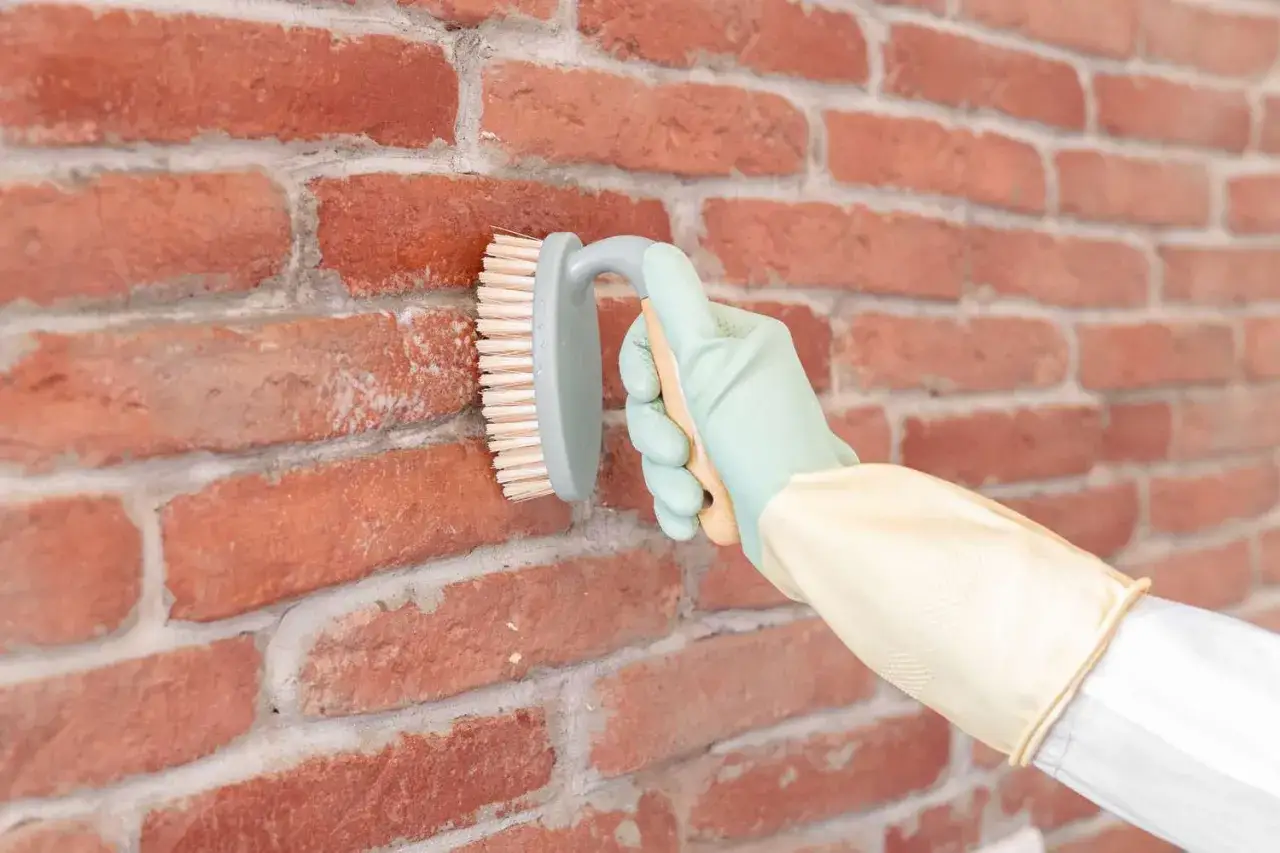
- Long-handled scrub brush or masonry brush with non-metal bristles
- Clean water for pre-wetting and rinsing
- Plastic tarp, drop cloths, or towels to protect adjacent surfaces
- Measuring cup or marked container for dilution
The two rules I never bend are simple: add acid to water, not water to acid, and never mix acid with bleach or another cleaner. If the project is indoors or enclosed, ventilation matters just as much as gloves. A dust mask is not enough for acid fumes, so I would treat airflow and respiratory protection as real safety issues, not optional extras.
One more detail saves a lot of streaking: do not apply acid to dry brick. Pre-wet the wall thoroughly so the cleaner sits on the surface instead of getting sucked deep into the pores. That one step lowers the chance of acid burn and makes the cleaning more even. With the setup done, the actual wash is more about control than force.
A step-by-step wash that protects the brick
The best results come from small sections, short dwell times, and a lot of rinsing discipline. I prefer to think of the process as controlled cleaning rather than scrubbing.
- Dry brush the surface first. Remove loose dust, cobwebs, and grit so the cleaner can reach the stain instead of the debris.
- Pre-wet the brick thoroughly. Use clean water and make sure the wall is damp all the way across the section you plan to clean.
- Mix the cleaner to the label. Measure carefully and never improvise the strength on the fly.
- Work in manageable sections. About 20 square feet at a time is a sensible pace for most DIY jobs.
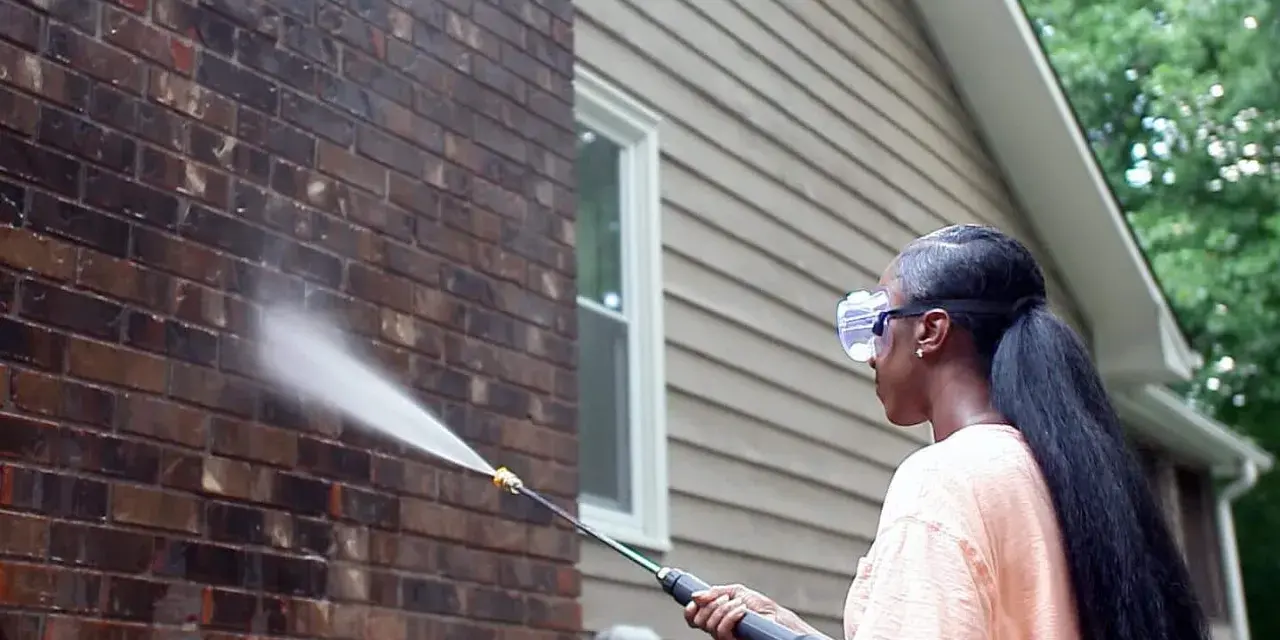
- Apply evenly and keep the surface wet. If you are spraying, a wide fan pattern at low pressure is safer than a narrow, aggressive spray.
- Let the solution dwell briefly. For many brick-cleaning jobs, 3 to 5 minutes is enough, but porous brick may react faster and the label always wins.
- Scrub lightly, then rinse thoroughly. Use a clean brush dipped in water and rinse before the surface can dry with residue on it.
If you are using a sprayer, I would keep the pressure modest. Once pressure gets too high, it stops helping and starts driving cleaner into places it should not go. I also avoid hot, sunny days because the solution dries too quickly and leaves patchy results. When the section is cleaned, I move on only after the rinse is complete and the wall looks even under natural light.
The real mistake is believing that harder scrubbing will fix a bad setup. Usually it does not. It only shortens the life of the mortar and makes the finish less predictable, which leads straight into the common failures people run into.
Mistakes that cause acid burn and joint damage
Most bad outcomes come from a handful of avoidable habits. Once you know what they look like, they are easy to spot early.
| Mistake | What it causes | Better approach |
|---|---|---|
| Skipping the test patch | Unexpected color change, streaking, or surface burn | Try a hidden spot and let it dry before making a decision |
| Using too-strong a mix too soon | Etching, dull faces, damaged mortar | Start with the mildest workable dilution |
| Letting the cleaner dry on the wall | Streaks, burn marks, residue locked into the pores | Work smaller, keep the section wet, and rinse on time |
| Cleaning before mortar has cured | Weak joints, erosion, crumbling edges | Wait for full cure unless the mortar manufacturer says otherwise |
| Using wire brushes or heavy pressure | Scratched brick faces and damaged joints | Use a soft or stiff nylon masonry brush and low pressure |
| Mixing cleaners together | Toxic fumes or unpredictable reactions | Use one cleaner at a time and rinse fully before changing products |
When a wall comes out blotchy, the cause is usually not mysterious. It was either too strong, too dry, too hot, or treated too aggressively. If the first pass did not work, I would rather repeat a mild, controlled application than jump to a harsher mix. That approach is slower, but it protects the brick and gives you a cleaner finish in the end.
When a gentler method is the smarter choice
Not every brick surface needs acid, and some should never see it. If the stain is light, I start with warm water, a masonry sponge, and a small amount of detergent. For interior brick, especially around fireplaces, that is often enough. For exterior walls with dust or general grime, a mild masonry cleaner can save a lot of risk.
| Situation | Best first move | Why it matters |
|---|---|---|
| Loose dust or cobwebs | Dry brushing and water | Simple cleaning avoids unnecessary chemical exposure |
| Grease or light soot | Warm water and a mild detergent | Often enough without affecting color or mortar |
| Light efflorescence | Dry brushing, then a masonry-safe cleaner | The goal is to remove salts without forcing moisture deeper into the wall |
| Old, soft, or historic brick | Test a very mild cleaner or call a mason | These surfaces can be permanently marked by overcleaning |
My rule is to use acid only when the stain justifies the risk. If a gentler method gets you 80 to 90 percent of the way there, that is usually the better choice. Acid should solve a specific problem, not become the default answer for every dirty wall. Once the wall is clean, the last job is making sure it stays that way without inviting new damage.
What a careful cleanup should leave behind
A good cleanup does more than make the brick look brighter for a day. It leaves the face even, the mortar intact, and no powdery residue behind in the joints. After rinsing, I let the wall dry fully and inspect it in daylight. That is when streaks, missed spots, or faint haze usually show up.
If the surface still needs attention, I would correct it with another mild pass on a small area rather than increase the strength immediately. If stains keep returning quickly, the issue is probably moisture migration or a leak rather than surface dirt. In that case, cleaning the wall again only hides the real problem.
For maintenance, keep the routine simple. Light cleaning on exposed exterior brick once or twice a year is usually enough, while fireplaces and interior walls often need only spot cleaning. A breathable sealer can help in some cases, but I would only use one if it suits the brick and the environment. The safest long-term approach is still the same one I use on every wall: start mild, stay organized, and stop as soon as the brick is clean enough.