
Replacing a kitchen faucet is one of the better plumbing projects for a homeowner who can work patiently under a sink. The job is mostly about matching the new fixture to the existing holes, shutting water off cleanly, and reconnecting the lines without stressing the fittings. In this guide, I cover the prep, removal, installation, leak check, and the point where calling a plumber makes more sense than pushing ahead.
The main things to get right before you start
- Match the faucet to the sink holes first. A one-hole model can usually cover extra holes with a deck plate, but a multi-hole faucet will not fit a one-hole deck without changes.
- Shut off both supply valves and relieve pressure. Open the faucet handles after closing the valves so the lines drain down.
- Plan for the cabinet work, not just the faucet body. Most of the frustration happens under the sink, where access is tight.
- Flush the new fixture before you call the job done. A quick flush removes debris that can clog the aerator or cause a nuisance drip.
- Stop if the plumbing is corroded, frozen, or wall-mounted. That is where a simple replacement turns into a bigger repair.
Match the new faucet to your sink before you buy it
I always start by looking at the sink from below. The number of holes, the mounting style, and the space behind the basin decide whether the replacement is straightforward or annoying, and they decide it before I buy anything.
| Sink setup | What I look for | What usually works |
|---|---|---|
| 1 hole | Single opening in the deck | Single-handle, pull-down, pull-out, or touchless faucet |
| 2 holes | Faucet plus accessory opening | Compatible faucet or a model that supports the accessory layout |
| 3 holes | Common kitchen layout | One-hole faucet with a deck plate, or a faucet built for three holes |
| 4 holes | Extra opening for sprayer or dispenser | Faucet plus accessory kit or a cover plate that matches the deck |
If your current faucet is wall-mounted, I treat that as a separate project. Deck-mount swaps are the normal DIY case; wall mounts usually involve different rough-in dimensions, so the safest move is to measure first and buy second. Pull-down and pull-out styles are still deck-mount jobs, but I check the hose path and counterweight space before I commit. Once the fixture fits the sink, the rest of the work becomes much more predictable.
Gather the right tools and clear the cabinet
You do not need a truck full of tools, but you do need the right ones within reach. A cramped cabinet is no place to discover that the basin nut is half an inch farther back than your wrench can reach. A basin wrench is the long wrench made for faucet nuts in tight cabinets, and it earns its keep the first time a standard wrench will not fit.
- Adjustable wrench
- Basin wrench
- Bucket or shallow pan
- Old towels or rags
- Flashlight or headlamp
- Safety glasses
- Plumber's tape or thread sealant only if the fitting calls for it
- Silicone caulk or the sealant specified by the faucet manufacturer
- New supply lines if the old ones are worn, too short, or not reusable
- A small tray for screws, clips, and washers
I also clear everything out from under the sink and take a photo of the current plumbing before disconnecting a single nut. That picture saves time when I am reconnecting a sprayer hose, filter line, or disposal switch later. If there is an electrical outlet under the sink, I shut off power to it before I begin. With the cabinet cleared, removal is quicker and a lot less frustrating.
Remove the old faucet cleanly
Most of the hard work is just access. Once the water is off, the old faucet comes out by disconnecting the supply lines, releasing the mounting hardware, and lifting the body out of the deck opening. I do this slowly because a stubborn fitting can turn into a broken valve if I rush it.
- Close the hot and cold shutoff valves under the sink. If there are no stop valves, shut off the main water supply.
- Open the faucet handles to bleed off the remaining pressure.
- Put a pan or bucket under the supply connections, then loosen the nuts on the hot and cold lines.
- Disconnect any side sprayer, soap dispenser, or filtration tube attached to the old faucet.
- Remove the mounting nuts or brackets from beneath the sink. A basin wrench helps when the nut is buried behind the basin wall.
- Lift out the faucet, then clean the deck surface so the new gasket can seat properly.
If a nut refuses to budge, I stop before I force it. Penetrating oil, better access, or a basin wrench is smarter than twisting the valve body and creating a second repair. Once the old fixture is out, the new install starts with a clean surface and a lot less guesswork.

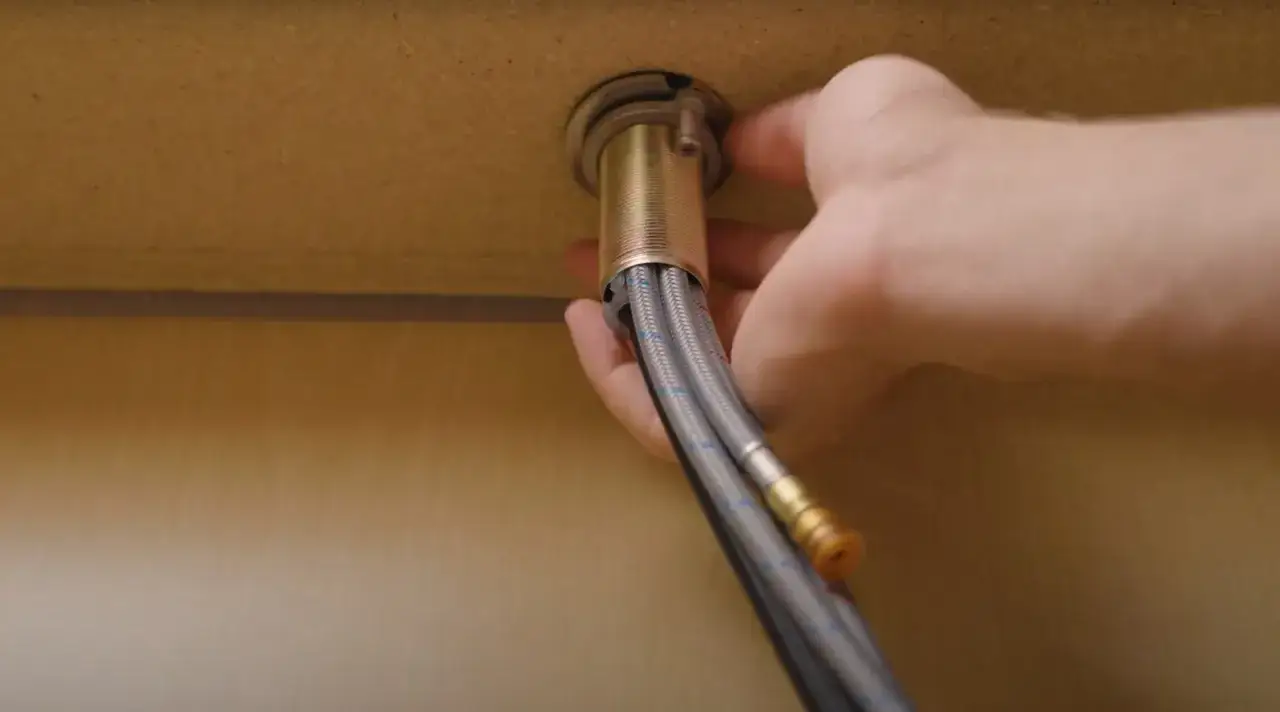
Install the new faucet and reconnect the lines
This part looks simple, but the order matters. I dry-fit the faucet first, make sure the deck plate or gasket matches the sink, and only then start tightening from below. Different models vary, especially pull-down and touchless units, so I always check the model instructions before I tighten the first nut.
- Set the gasket or deck plate in place exactly as the faucet calls for it. Use the seal supplied with the model unless the instructions say otherwise.
- Feed the supply lines and any sprayer hose through the opening before the faucet body is fully seated.
- Center the faucet, then install the washers and mounting nuts from underneath.
- Tighten the nuts evenly so the faucet does not twist. I stop as soon as the base feels secure and the handle lines up correctly.
- Connect hot to hot and cold to cold. If the faucet includes a pull-down weight, position it where the hose can move freely without rubbing on the cabinet walls.
- Reconnect any accessory lines, then turn the shutoff valves back on slowly.
I do not fully trust the install until I have run the faucet and checked the underside with a flashlight. The last step is flushing the lines with the aerator removed, which is where a lot of small problems show up before they become real leaks.
Flush, test, and catch leaks before they become problems
Delta recommends flushing the new faucet lines for about two minutes before the aerator goes back on, and that is the habit I follow. It clears out solder dust, pipe debris, and stray bits of sealant that can make a brand-new faucet behave badly in the first few days.
- Look for drips at the shutoff valves, supply nuts, and faucet base.
- Run both hot and cold water, then switch the handles a few times to make sure the flow stays even.
- Check the sprayer hose for kinks or slow retraction.
- Wipe every connection dry, wait a few minutes, and inspect again.
- Leave a paper towel under the cabinet overnight if you want a very clear leak check.
A slow seep at the base usually points to the gasket or deck plate, while a drip at the valve side usually means the supply connection needs to be reseated. Catching that on day one is much easier than discovering it after the cabinet floor has already taken on water. Once the system holds dry, the question becomes whether the project was worth doing yourself or whether the next one belongs to a plumber.
Know when the job stops being a DIY swap
This is the part people underestimate. A faucet change is cheap only when the plumbing underneath is still cooperative, and that is not always the case in older kitchens.
- The shutoff valves are seized, corroded, or keep dripping after you close them.
- The sink or countertop holes do not match the new faucet and would need drilling or modification.
- The faucet is wall-mounted or tied into a special rough-in layout.
- The cabinet is so tight that you cannot reach the mounting hardware safely.
- There are signs of hidden leaks, water damage, or brittle supply lines that should be replaced as a set.
Lowe's notes that basic replacement faucets can start under $50, while feature-heavy models can run into the hundreds. If you hire the work out, Home Depot lists professional faucet installation at an average of $195, typically $97 to $369. That is often money well spent when the existing valves are old, the access is terrible, or the job has already grown beyond a simple swap.
Keep the old faucet nearby until the new one proves itself
I never throw the old faucet away immediately. I leave it nearby until the replacement has run through a full leak check and a normal day of use, because the old part is still the best reference if I need to compare hose length, mounting style, or accessory routing. If the new fixture is dry, centered, and easy to use after a few tests, the job is finished in the way that matters: cleanly, without a second trip under the sink.