Dusty condenser coils make a refrigerator work harder, run longer, and lose efficiency faster than most people expect. In this guide, I break down how to clean refrigerator coils safely, which tools are worth using, how often the job should be repeated, and the mistakes that cause the most trouble. I also point out when cleaning is unnecessary because some newer models use sealed, never-clean condensers.
The safest approach starts with the manual and a soft brush.
- Unplug the refrigerator before you touch the coils or remove any grille.
- Use a vacuum with a soft brush and a long coil brush to lift dust and pet hair.
- Most homes do well with cleaning every 6 to 12 months, but pets and heavy dust shorten that interval.
- Check the owner’s manual first, because some newer models have sealed condensers that do not need routine cleaning.
- Keep the area around the fridge clear so airflow is not blocked again two weeks later.
Why dirty coils affect cooling so quickly
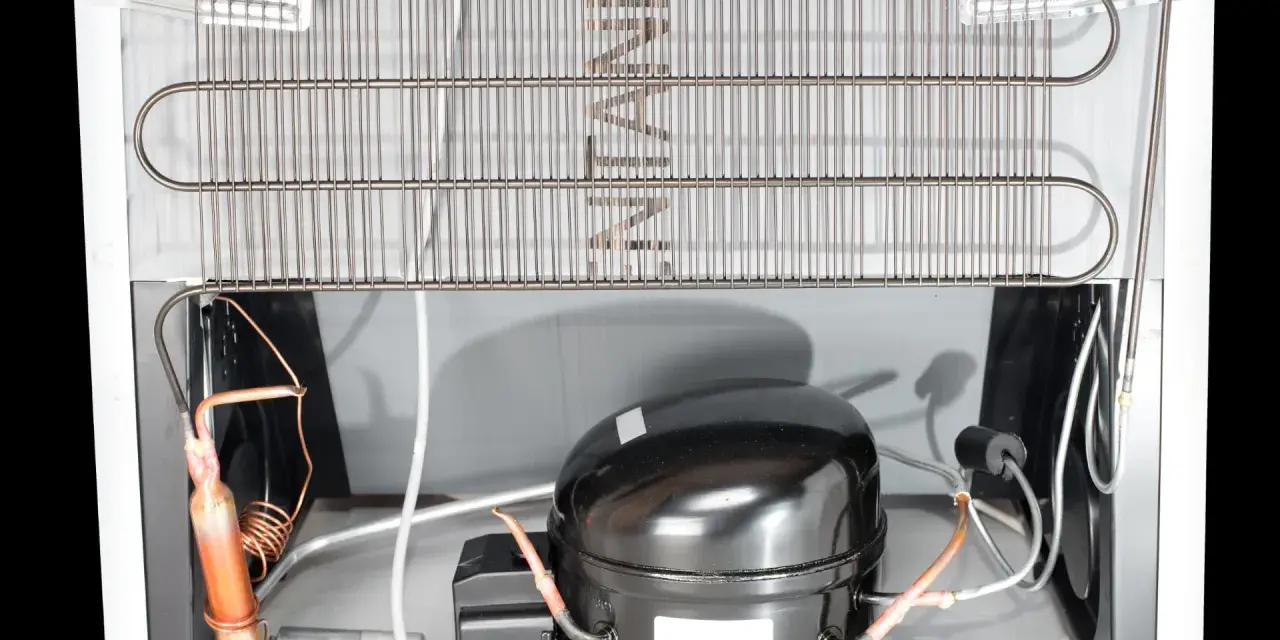
The condenser coils are the heat dump for the refrigerator. When they collect a layer of dust, lint, or pet hair, heat leaves the system less efficiently and the compressor has to run longer to compensate. I usually look for three clues: the unit seems louder than normal, the compressor runs for long stretches, and the cabinet feels warmer than it should near the back or lower front.
That extra runtime does not always cause an immediate breakdown, but it does add wear and often shows up as sloppy cooling performance. In a kitchen where crumbs, pet hair, and floor dust collect quickly, dirty coils are one of the first maintenance issues I check before assuming the refrigerator has a bigger problem. Once you know what the coils do, the rest of the job becomes a lot easier to handle correctly.
The tools I actually use
I keep the setup intentionally small. You do not need a chemical cleaner for this job, and you do not need to scrub the coils like a stovetop. A vacuum, a soft brush, and enough room to work are usually enough.
| Tool | What it does | Why it helps |
|---|---|---|
| Vacuum with soft brush | Lifts loose dust and hair without scraping the fins | Best first pass for most refrigerators |
| Long coil brush | Reaches between tight spaces and behind the base grille | Useful when dust is packed deep into the coils |
| Flashlight | Shows where the coils and fan openings are | Makes the job faster and prevents guesswork |
| Microfiber cloth | Wipes the grille, floor, and surrounding trim | Helps keep dust from going right back into the unit |
| Screwdriver or nut driver | Removes a grille or access panel if the model requires it | Needed on some units, but not all |
My preference is to clear the surrounding floor first so I can move the refrigerator only once. That small bit of organization matters more than most people think, because the dust you remove from the coils usually ends up on the floor and under the kick plate. With the tools ready, the actual cleaning takes less time than the prep.
The cleaning process that works without damaging anything
- Unplug the refrigerator and give it a moment to settle before you move it.
- Pull the refrigerator forward carefully so you can reach the access area without crushing the power cord or tubing.
- Remove the base grille or rear access panel if your model uses one, then check whether the coils sit behind the grille or at the back.
- Use the vacuum with the soft brush attachment to remove loose dust, pet hair, and crumbs from the visible coil surface.
- Follow with a long coil brush to loosen material that sits deeper between the fins, then vacuum again to pick up what falls free.
- Wipe the grille and surrounding floor area before you reinstall the panel, because leaving debris there defeats part of the cleanup.
- Push the refrigerator back slowly, plug it in, and listen for the compressor and fan to settle into a normal cycle.
I usually work from top to bottom on the exposed surface and then sweep outward toward the floor. That keeps dust from dropping back onto already-cleaned sections. If your model has rear-mounted coils, the same logic applies: loosen first, vacuum second, and avoid pressing hard enough to bend the fins. When the job is done properly, the fridge should sound less strained within a few hours, which leads naturally to the mistakes that are easiest to make.
Common mistakes that create more work later
Most bad results come from rushing the process, not from the coils themselves. A careful minute at the start saves a lot of frustration later.
| Mistake | Why it is a problem | Better move |
|---|---|---|
| Cleaning while the fridge is still plugged in | Creates a clear safety risk around moving parts and live wiring | Always unplug first |
| Using water or spray cleaner directly on the coils | Can leave moisture where it does not belong | Use dry tools for the coils themselves |
| Bending the fins with a stiff metal tool | Reduces airflow through the coil surface | Use a soft, non-metal brush |
| Blowing dust around without collecting it | Just moves the mess into the room or deeper into the appliance | Vacuum after loosening debris |
| Pushing the fridge back too quickly | Can pinch the cord or block airflow again | Check spacing and route the cord before you stop |
One mistake I see often is treating coil cleaning like a cosmetic wipe-down. It is not. You are clearing a heat exchange surface, so the safest method is deliberate and dry, with the vacuum doing most of the heavy lifting. From there, the next practical question is how often this should actually be done.
How often I clean coils in real homes
The best schedule depends on the room, the pet situation, and the refrigerator design. In a clean, low-dust kitchen, once a year may be enough. In a home with shedding pets, nearby laundry, or frequent cooking dust, I would shorten that to every 3 to 6 months.
| Home situation | Practical interval | Why |
|---|---|---|
| Low-dust home, no pets | Every 12 months | Dust buildup is usually slower |
| Average household | Every 6 to 12 months | Good balance of effort and protection |
| Pets, rugs, or visible lint | Every 3 to 6 months | Hair and lint pack into the fins faster |
| Newer model with sealed condenser | Follow the manual instead of a fixed schedule | Some units are designed not to need routine coil cleaning |
I always check the manual before I start, because a few refrigerators use a sealed or never-clean condenser design, and forcing maintenance on those models is unnecessary. That is the exception, not the rule, but it matters enough to verify. If cleaning the coils does not restore normal cooling, the problem is probably somewhere else, and that is the last thing I would check.
What to check when cleaning does not fix the cooling problem
If the refrigerator still struggles after the coils are clean, I move from maintenance to diagnosis. The first things I inspect are the door gaskets, the temperature setting, the airflow around the cabinet, and whether the interior is packed so tightly that cold air cannot circulate. A blocked vent inside the fridge can feel like a compressor problem when it is really a spacing problem.
I also listen for the condenser fan and compressor. If the fan is not running, if the compressor cycles oddly, or if the back of the unit feels unusually hot even after the dust is gone, the issue may be mechanical rather than cosmetic. At that point, a service call makes more sense than repeated cleaning. The useful habit here is simple: keep the coils clean, keep the area around the fridge open, and treat any new cooling issue as a separate symptom instead of assuming the dust was the only cause.
For me, coil cleaning is one of the few refrigerator chores that pays off immediately and keeps paying off over time. A vacuum, a soft brush, and a little patience are usually enough to protect cooling performance, and the job becomes even easier when the space around the appliance stays organized and uncluttered.