A stubborn bathroom sink stopper is usually less mysterious than it looks: a small linkage, a few threads, and a little buildup holding everything in place. This guide explains how to remove sink stopper hardware, identify the common styles found in U.S. bathrooms, clean the parts, and reassemble the drain without creating a leak. I’ll focus on the common pop-up assembly first, because that is the one most people run into under a vanity cabinet.
The quickest way to get the stopper out cleanly
- Clear the cabinet first and place a bucket under the drain so any drip stays contained.
- On a standard pop-up drain, remove the pivot nut and horizontal rod before trying to lift the stopper out.
- If there is no rod under the sink, you probably have a push-pop, toe-touch, or flip-it style instead.
- Clean the stopper, gasket, and rod while the parts are out, because buildup is often the real problem.
- Stop forcing the hardware if the drain body turns, the threads are stripped, or corrosion has locked the parts together.
What the stopper type under the sink tells you
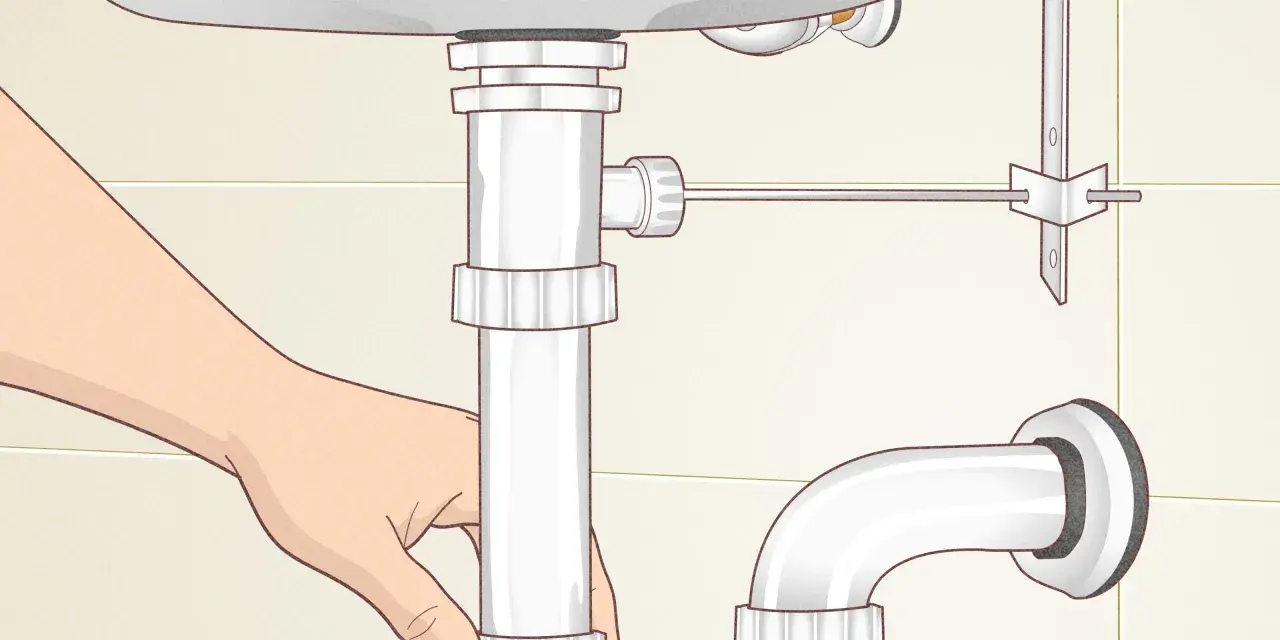
I always start by looking under the basin. A standard bathroom sink in the United States usually has a vertical lift rod behind the faucet, a horizontal pivot rod entering the drain body, and a clevis linking the two. If that linkage exists, you are likely dealing with a pop-up assembly. If it does not, the stopper may be a twist-out or push-pop design, and the removal method changes immediately.
| Stopper style | What you’ll usually see | How it comes out | What matters most |
|---|---|---|---|
| Standard pop-up | Lift rod, clevis, and horizontal pivot rod under the sink | Loosen the pivot nut, slide out the rod, then lift the stopper from above | This is the most common bathroom sink setup |
| Push-pop | No under-sink linkage; the top cap pops open and closed | Twist the cap about 90 degrees and pull it up | Some brands release only when the cap is fully open |
| Toe-touch or lift-and-turn | A cap or plunger that screws into the drain body | Open the drain, twist counterclockwise, then lift out | Check for a set screw or a threaded shaft |
| Flip-it | A simple top lever or flip control | Open it, then twist and pull the assembly out | Usually the easiest style to remove |
| Overflow lever or trip-lever | A lever on the overflow plate near the top of the sink | Remove the overflow faceplate and pull the rod assembly out | Less common on sinks than the standard pop-up style |
Once I know the style, I can work methodically instead of guessing. That saves time, and it also keeps me from pulling on the wrong part and damaging the finish. With the mechanism identified, the next step is setting up the cabinet so the removal itself stays simple.
Gather the right tools and make room to work
I keep the setup basic: a bucket, a towel, a flashlight, an adjustable wrench or slip-joint pliers, and a small brush for the cleanup. Gloves are worth wearing because drain hardware picks up a surprising amount of grime, and a towel around the jaws helps protect chrome or brushed finishes from scratches.
- Bucket or bowl to catch drips when the pivot nut comes off.
- Towel or rag to protect the cabinet floor and the nut’s finish.
- Flashlight so you can see the clevis, pivot nut, and washer clearly.
- Adjustable wrench or pliers for a stubborn pivot nut.
- Gloves and an old toothbrush for the dirty part of the job.
I also like to move everything out of the cabinet before I begin. Working around bottles, trash bins, and cleaning supplies is how small leaks become a mess. With the cabinet clear and the tools ready, the standard pop-up removal takes only a few minutes.
Remove a standard pop-up stopper step by step
For the common pivot-rod assembly, I work in this order:
- Open the stopper fully. Lift the faucet rod so the plug sits in the open position and is easier to free.
- Set the bucket under the pivot nut. The pivot nut sits where the horizontal rod enters the drain body, and it can drip when loosened.
- Unscrew the pivot nut. Hand-tight is common, but pliers or a small wrench help if it is stiff. If the entire drain body starts to turn, stop and support it instead of forcing the nut.
- Slide out the horizontal rod. Pull it straight out. The ball end usually rides in a rubber washer, so gentle movement matters more than brute strength.
- Release the clevis if needed. If the stopper rod is still hooked to the strap, loosen the clevis screw and note which hole the linkage uses. I often take a quick photo here so reassembly is obvious later.
- Lift the stopper from the drain opening. Once the rod is free, the stopper should come out by hand. A slight twist can help if soap scum is holding it in place, but do not pry against the rim.
If the stopper still resists, the problem is usually buildup, corrosion, or a bent rod rather than a hidden lock. That matters because the fix is different from simply pulling harder. After the stopper is out, the next job is cleaning it well enough to tell whether it can go back in service.
If your stopper is push-pop, toe-touch, or lift-and-turn
Not every sink uses a linkage under the basin. Some designs come out from the top, and the removal is cleaner once you know which style you have. I use the same rule with all of them: open the drain first, then remove the stopper in the direction the mechanism was designed to move.
| Style | Removal move | Tool level | Practical note |
|---|---|---|---|
| Push-pop | Press down to open, then twist and lift | No tools in most cases | If it will not release, try a gentle 90-degree twist before lifting |
| Toe-touch | Push to the open position, twist counterclockwise, then lift | Usually none, sometimes pliers or a screwdriver | Look for a fastening screw or threaded shaft |
| Lift-and-turn | Open the stopper, then unscrew or lift while turning | Usually none | A small set screw may need loosening first |
| Flip-it | Flip open, then twist and pull out | No tools | This is the fastest style to remove and clean |
| Overflow lever | Remove the faceplate and pull the rod assembly out through the overflow opening | Screwdriver only | Take care not to bend the rod or lose the small hardware |
If your sink has no horizontal rod under the cabinet, stop looking for one. That is usually a sign you have one of these top-access styles instead. Once the parts are on the counter, inspection is the part that prevents repeat clogs.
Clean the parts while they are out
The stopper is usually dirty for a reason: it has been trapping hair, toothpaste, soap scum, and mineral film inside the drain opening. I clean the stopper, the rod, and the drain throat with warm water, a toothbrush, and a mild bathroom cleaner. Vinegar can help on mineral buildup, but I avoid using anything aggressive on finishes I want to keep looking good.
- Check the rubber seal on the bottom of the stopper for cracks, flattening, or hardening.
- Look at the rod ball for wear, pitting, or a groove that keeps it from moving smoothly.
- Inspect the threads on the pivot nut and the drain body for corrosion or stripped spots.
- Replace bent or cracked parts instead of trying to straighten them into service.
- Clear the drain opening with a hair tool or small drain snake if debris is still packed below the stopper.
A good stopper should move freely and still make a seal when closed. If it cannot do both, replacement is usually cheaper than spending time on a part that is already failing. Once the parts are clean, reassembly is straightforward if you keep the linkage alignment in mind.
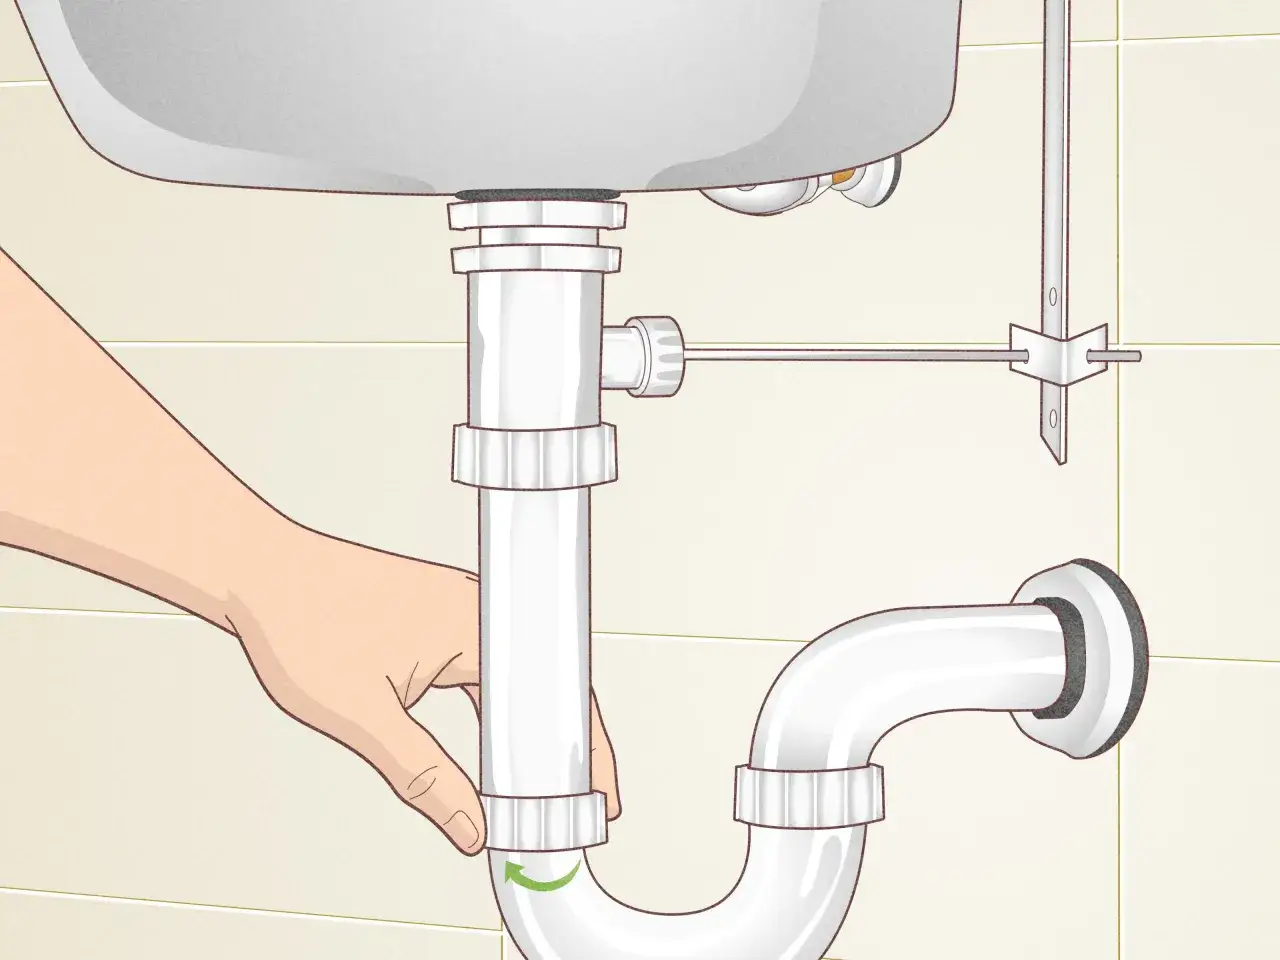
Put it back together and test the seal
I reverse the order I used for removal: stopper first, then the horizontal rod, then the pivot nut, and finally the clevis connection. The goal is not to crank everything tight; it is to get smooth movement and a watertight seal at the same time.
- Set the stopper back into the drain with the opening facing the faucet if the design requires it.
- Slide the pivot rod through the drain body and into the stopper stem.
- Tighten the pivot nut until it is snug, not crushed.
- Reconnect the clevis at the same height you marked or photographed earlier.
- Run a little water and check whether the stopper seals and releases cleanly.
If the sink leaks around the pivot nut, back it off slightly and reseat the washer. If the stopper will not hold water, move the clevis one hole up or down and test again. Tiny adjustments make a bigger difference here than brute force. That also tells you when the hardware is fine but the drain has a deeper issue.
When the stopper will not come out cleanly
Some removals stop being simple because the hardware is worn out, not because the process is wrong. I pause and reassess when the pivot nut is frozen, the rod has rusted into the drain body, the clevis screw is stripped, or the drain starts turning with the nut. Any of those are signs that force will do more damage than good.
- Use a little penetrating lubricant on metal threads if corrosion is the only problem, then give it time to work.
- Do not clamp hard on plated finishes unless you want scratches as a souvenir.
- If the plastic parts are brittle, replace them instead of flexing them repeatedly.
- If the drain body spins or the tailpiece moves in the cabinet, stop and repair the support before continuing.
At that point, calling a plumber is not overreacting. It is cheaper than cracking the drain body, which turns a quick stopper job into a larger repair. The last thing I focus on is how to make sure you do not have to fight the same mechanism again next month.
The small habits that keep the next removal easy
A sink stopper is easier to remove when it stays clean, aligned, and lightly maintained. I rinse out hair and soap buildup before it hardens, test the seal every few weeks, and avoid slamming the rod or forcing the cap when the drain is half-clogged. Those habits keep the linkage from binding and make the next cleanup far less annoying.
If the stopper starts moving stiffly again, I treat that as an early warning instead of waiting for a full blockage. In plumbing, small friction today usually becomes a stubborn repair tomorrow.