A proper toilet wax ring replacement is one of those small plumbing jobs that can prevent bigger damage when a bowl starts to leak, wobble, or smell like sewer gas. The repair is usually simple, but it only works if the flange is sound, the floor is level enough, and the toilet goes back down without twisting or rocking. I’m focusing here on the parts that actually decide whether the fix lasts: what to buy, how to set the new seal, and when the problem is really the flange or subfloor instead of the wax ring.
The repair only works if the base is stable
- Base symptoms matter first: moisture at the bowl base, sewer odor, or a rocking toilet usually points to a failed seal or a flange issue.
- Buy the right parts: a new seal, fresh closet bolts if the old ones are corroded, shims, towels, a scraper, and a sponge are enough for most jobs.
- Choose the seal for the floor: a standard wax ring works on a healthy flange, while low flanges and uneven floors often need a jumbo or wax-free option.
- Set the toilet straight down: twisting or sliding the bowl after contact is one of the fastest ways to ruin the seal.
- Do not ignore the flange: if it is cracked, loose, or set too low, replacing the seal alone is usually a temporary fix.
How to tell the seal is the problem
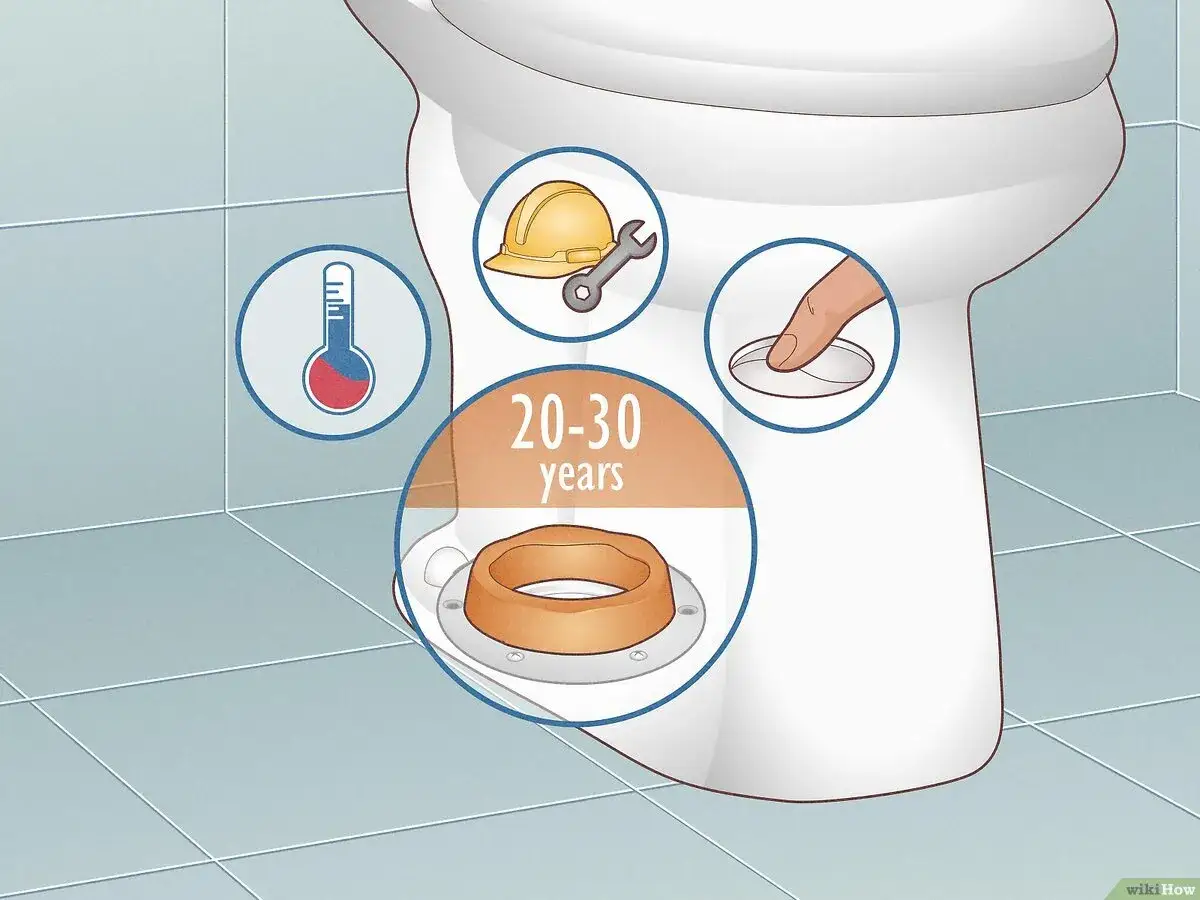
When I’m diagnosing a leak at the base of a toilet, I do not start by assuming the wax is bad. I look for a pattern. A failed seal usually shows up as water around the base after flushing, a persistent sewer smell, or a toilet that moves when you sit on it. If the water is coming from the tank bolts, the supply line, or the bowl-to-tank connection, the wax seal is not the real issue.
| Symptom | What it usually suggests | What I check first |
|---|---|---|
| Moisture at the base after a flush | Seal is compressed unevenly or has failed | Toilet rocking, flange height, bolt tightness |
| Sewer odor near the floor | Gaps in the seal or a loose toilet | Seal centering and flange condition |
| Toilet rocks on the floor | Uneven floor, loose bolts, or missing shims | Stability before reinstalling the bowl |
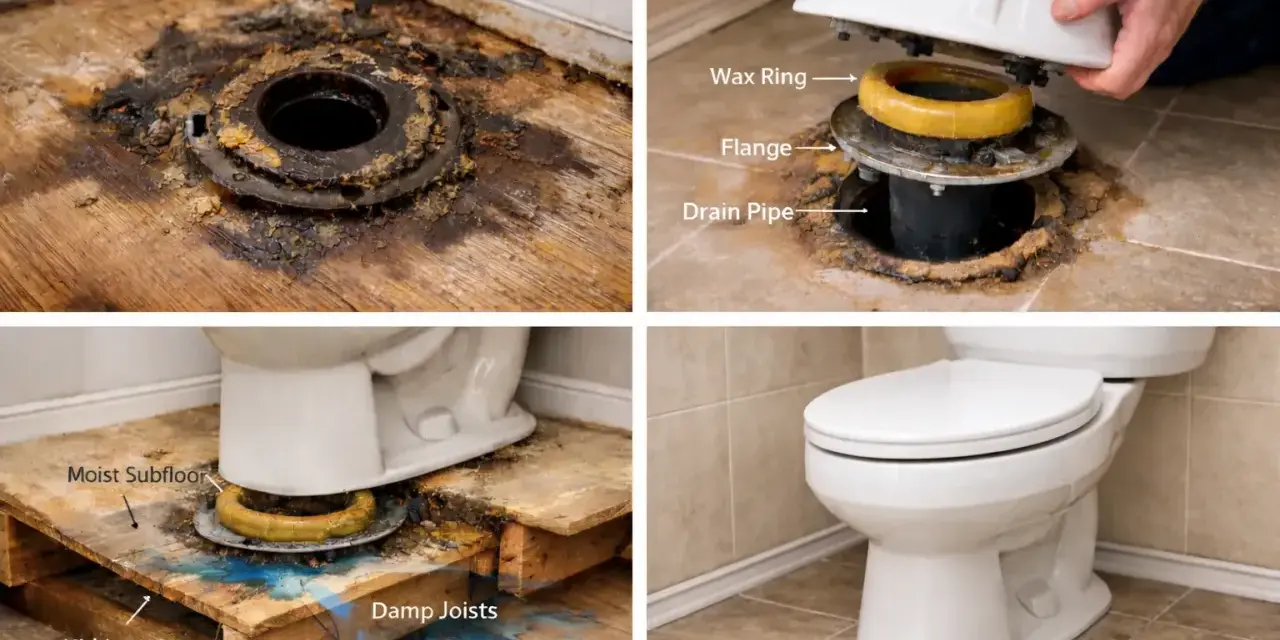
| Soft or stained flooring | Leak has been going on long enough to reach the subfloor | Look below the finished floor, not just at the bowl |
The flange, which is the ring that anchors the toilet to the drain opening, matters just as much as the wax itself. If the toilet base is dry in one spot and wet in another, I usually suspect movement, not just a bad ring. Once I’m convinced the base seal is the source, I gather the right parts before lifting the bowl.
What to gather before you start
In 2026, I usually budget only a few dollars for a basic seal and a little more if the flange height is tricky. A standard wax ring is often in the $5 to $15 range, while a wax-free kit or reinforced option is commonly around $10 to $25. If you hire a plumber, labor often lands somewhere around $45 to $150 depending on access, location, and whether the flange needs repair.
| Item | Why I want it |
|---|---|
| New wax ring or wax-free seal | The actual seal between the toilet and flange |
| Replacement closet bolts and washers | Old bolts corrode fast, and rusty hardware creates weak tightening |
| Adjustable wrench | For loosening and snugging the bowl nuts |
| Putty knife or scraper | For cleaning off the old wax and debris |
| Sponge, bucket, and old towels | For removing water from the bowl and protecting the floor |
| Plastic shims | For leveling a toilet that would otherwise rock |
| Gloves and a flashlight | For cleaner handling and a better look at the flange |
I also keep a rag ready to plug the drain opening briefly, because it cuts odor and keeps dropped parts out of the line. With the parts on hand, the actual reset is straightforward as long as the toilet goes back down in one clean motion.
How I replace the seal without chasing a second leak
There are two habits that matter more than anything else here: keep the toilet dry enough to handle cleanly, and lower it straight down. Once the old seal is crushed or disturbed, it is done. If the bowl has to come back up, I do not try to reuse that ring.
- Shut off the water supply at the stop valve and flush the toilet to empty the tank.
- Hold the flush handle down to drain as much water from the bowl as possible, then sponge out the rest.
- Disconnect the supply line, remove the bolt caps, and loosen the closet nuts, which are the nuts that secure the bowl to the floor flange.
- Lift the toilet straight up and set it on cardboard or an old towel. If it is heavy, get help rather than tilting and twisting it alone.
- Scrape the old wax from the bottom of the bowl and the flange with a putty knife. I clean until the surfaces are clear, not just “good enough.”
- Inspect the flange and the surrounding floor. If the flange is cracked, loose, or sitting far below finished floor height, I stop and fix that issue first.
- Set the new seal according to the package directions. Some installers prefer the ring on the flange, others on the bowl; either can work if the toilet lowers cleanly and stays aligned.
- Lower the toilet straight down over the bolts without rocking it side to side. Once the bowl touches the seal, I do not twist it around to “find” the bolts.
- Press down evenly so the wax compresses, then tighten the nuts gradually and alternately. Stop as soon as the toilet is stable; overtightening can crack porcelain or distort the seal.
- Use shims if the bowl rocks. A shim is a small wedge that levels an uneven toilet so the load is not carried by the wax ring alone.
- Reconnect the supply line, turn the water back on, and test with several flushes.
That sequence works on most standard toilets, but not every floor or flange is friendly to a basic ring, which is where the next choice matters.
When a standard ring is not enough
I prefer the simplest seal that fits the job, not the most complicated one. If the flange is at the right height and the floor is flat, a standard wax ring is still hard to beat. If the flange is low because of tile, flooring changes, or a recessed drain, I usually move up to a jumbo ring or a purpose-made seal instead of trying to improvise.
| Option | Best use case | Trade-off |
|---|---|---|
| Standard wax ring | Normal flange height, stable toilet, straightforward reset | Cheap and proven, but unforgiving if the bowl is misaligned |
| Jumbo or reinforced wax ring | Flange sits a bit low or the toilet needs more material to compress | Still one-time use, but better for marginal installs |
| Wax-free seal | You want repositioning help or a cleaner install on a tricky floor | Costs more and still depends on correct flange setup |
I do not recommend stacking rings as a default solution. It can work in some situations, but a properly chosen jumbo seal is usually cleaner and more predictable. If the floor is unusual, the goal is not to force wax into doing a job it was never meant to do; it is to match the seal to the actual height and shape of the flange.
Mistakes that make the leak return
Most repeat leaks come from installation mistakes, not from bad luck. The ring may be fine, but the toilet moved, the floor was uneven, or the flange needed more help than the installer realized. These are the errors I watch for most:
- Reusing the old ring. Once wax has been compressed, it does not rebound into a reliable seal.
- Twisting the bowl after it touches the ring. Even a small side-to-side correction can channel the wax and leave a gap.
- Ignoring a rocking toilet. If the bowl moves, the seal moves with it, and the leak usually comes back.
- Overtightening the nuts. The goal is a stable bowl, not a crushed flange or cracked porcelain.
- Skipping flange repairs. A cracked or loose flange will keep undermining the seal no matter how carefully the new ring is installed.
- Caulking every side shut. I like a small gap at the back so a future leak can show itself instead of hiding under the base.
There is also a common judgment error: people assume a tiny puddle means the ring failed, when the real issue is that the bowl never sat flat in the first place. Fix the movement first, then trust the seal. If the toilet still moves or leaks after that, the problem is probably deeper than the wax seal.
When the issue is bigger than the ring
At some point, a leak stops being a seal job and becomes a floor or flange repair. I draw that line pretty quickly because I have seen too many repeat calls that started with “just replace the ring” and ended with damaged subflooring. If you see one of these conditions, I slow down and inspect more than the seal:
| What I see | What it usually means | Next move |
|---|---|---|
| Cracked or loose flange | The toilet cannot anchor correctly | Repair or replace the flange before reinstalling |
| Flange sits too low | The seal may not compress enough | Use an extender, a jumbo seal, or both if appropriate |
| Soft or stained subfloor | Water has been leaking for a while | Inspect the floor structure before resetting the toilet |
| Repeated leak after a careful reset | The issue is not just the wax ring | Check the flange, bowl stability, and any hidden cracks |
| Water below the ceiling or in the room underneath | Leak has moved beyond the bathroom floor | Stop and inspect immediately; this is no longer a simple fix |
That is the point where I usually tell homeowners to choose the repair that actually solves the structure, not the symptom. If the flange and floor check out, I finish by watching the repair settle over the next day.
What I check in the first day after the reset
The first flush is not the only test. I want to know that the toilet stays dry after a few uses, that the bowl does not shift under load, and that no odor creeps back in once the room settles. A good reset feels boring, which is exactly what you want.
- Run two or three flushes and check the base with dry tissue or paper towel.
- Put your hand on the bowl and gently test for movement from both sides.
- Look behind the toilet, not just in front of it, because small leaks often show up at the back first.
- Check the supply line and tank base so you do not confuse a second leak with the seal itself.
- Revisit the bathroom the next morning. If the floor is still dry and there is no smell, the repair is probably holding.
If you are still seeing moisture after a few flushes, I would not keep tightening the bolts and hoping for the best. At that point, stop treating it like a simple wax-ring job and inspect the flange or subfloor before the damage spreads.