A screened in patio gives you a middle ground between a bare outdoor slab and a fully enclosed room: you keep fresh air, cut down on bugs and debris, and get a space that feels usable instead of exposed. I focus here on what actually matters before building one in the U.S.: how it differs from a porch or sunroom, which screen materials hold up, what the project usually costs, and which design choices make the space worth using all season. The details matter because a good enclosure feels effortless, while a weak one becomes hot, dusty, and annoying fast.
The most important choices are structural, not decorative
- Start with the structure. If there is no roof or frame, screening the space becomes a real build, not a simple add-on.
- Match the screen to the problem. Fiberglass is the budget default, aluminum is tougher, pet screens resist damage, and solar mesh helps with glare.
- Budget for more than mesh. Framing, doors, drainage, and labor usually move the final number more than the screen fabric itself.
- Plan for how you will use it. Dining, lounging, pet space, and morning coffee all ask for different layouts.
- Maintenance is light, not zero. Cleaning, seasonal inspection, and sealing gaps keep the enclosure comfortable and tidy.
What a screened-in patio actually solves
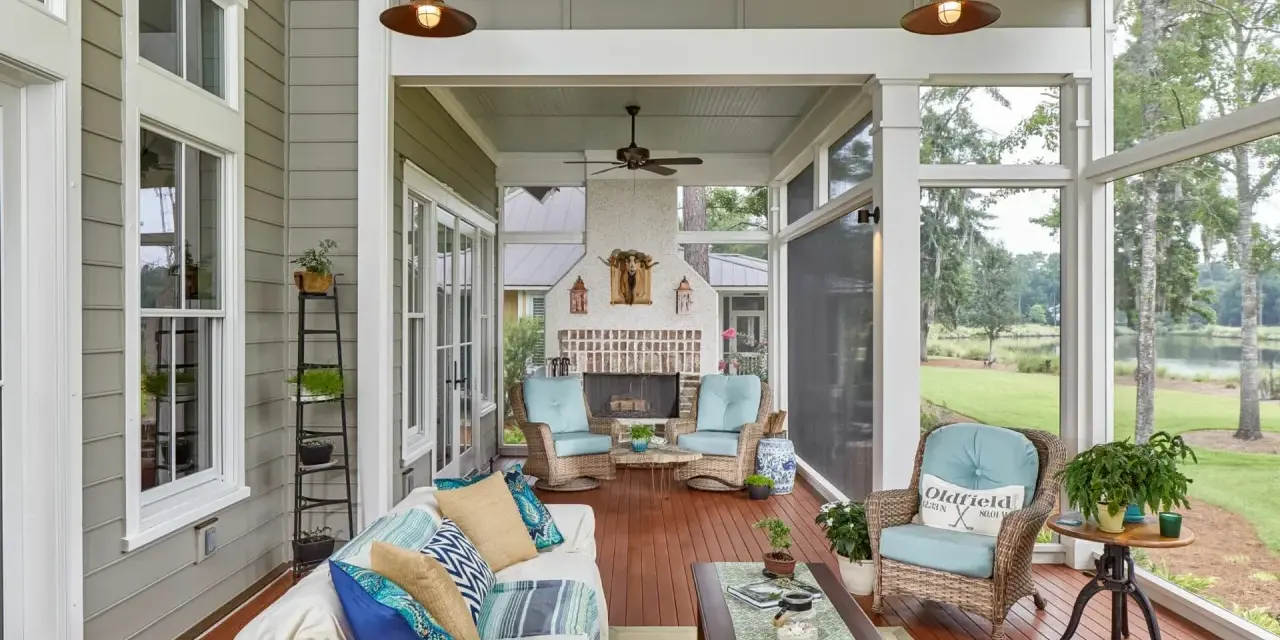
I think of this kind of outdoor room as a filter, not a seal. It softens the main frustrations of outdoor living in the U.S. - mosquitoes, gnats, pollen, falling leaves, and harsh sun - while keeping the space open to air and views. That is why it works so well for people who want to sit outside more often without turning the area into a full interior addition.
If the patio has no overhead structure, you are not just screening it in; you are building support for the enclosure. That difference matters. A covered slab can often be adapted more easily, while an open patio usually needs posts, a roof or rooflike frame, and properly anchored screen panels. In practice, that means the project is as much about structure and weather protection as it is about mesh.
The payoff is straightforward: fewer bug bites, less sweeping, better shade control, and a room-like feel without losing the outdoor atmosphere. What it does not give you is conditioned comfort, sound isolation, or the winter performance of a true sunroom. Once that is clear, the next decision is whether you are working with an existing roofline or building the enclosure from zero.
Where it fits between a porch, patio, and sunroom
Most homeowners are really choosing between three levels of commitment. An open patio is the simplest and cheapest. A screened enclosure sits in the middle. A sunroom is the most enclosed, most expensive option, and the one that begins to behave like indoor living space.
| Option | Best for | Typical cost tendency | Main tradeoff |
|---|---|---|---|
| Open patio | Low cost, casual use, maximum openness | Lowest | Little bug or weather protection |
| Screened enclosure | Bug control, shaded lounging, seasonal dining | Moderate | Still exposed to temperature swings and humidity |
| Sunroom | Year-round use and more interior-like comfort | Highest | More cost, more complexity, less outdoor feel |
In my experience, the best choice is rarely the one that sounds biggest. It is the one that matches the climate and the way the family actually uses the yard. If you already have a solid porch roof and posts, screening is usually the smart middle path. If you are starting from a bare slab, the structure, drainage, and code questions matter more than the decorative finish.
That is also where permits can enter the picture. Any change that affects roof support, electrical work, or structural posts should be treated like a building project, not a weekend décor upgrade. Once the structure is sorted, the mesh and frame materials become the parts that actually determine comfort.
Choosing materials that hold up in daily use
The screen itself matters more than most people expect. Standard mesh is often around 18 x 16, which gives a reasonable balance of airflow, visibility, and insect protection. From there, the right material depends on whether you care most about cost, durability, pets, or sun control.
| Material | What it gives you | Watch out for | Best use |
|---|---|---|---|
| Fiberglass | Flexible, affordable, good visibility | Can stretch or tear sooner than tougher mesh | Budget-friendly family spaces |
| Aluminum | Sharper visibility and better shape retention | Can dent more easily and may not be ideal in harsh salt exposure | High-traffic spaces and a crisper visual finish |
| Pet-resistant polyester | Stronger against claws and accidental impacts | Usually thicker and slightly less discreet | Doors, low panels, and homes with dogs or cats |
| Solar screen | Less glare, better heat control, more UV protection | Darker look and reduced openness | Hot southern or western exposures |
Frame material deserves the same attention. Aluminum frames keep maintenance low, while wood gives a warmer look but asks for more upkeep over time. If you use wood, compatible fasteners matter because the wrong screws can corrode or fail early. I also like to think about color and visibility: darker mesh often disappears better from the inside, which makes the whole space feel less “screened” and more open.
For homes with pets, the weak point is usually the lower section of the door or panel, not the middle of the wall. That is why a tougher mesh in the highest-contact areas can be a smarter spend than upgrading every square foot. After material choice, the question becomes budget, because the cheap-looking line items are rarely the expensive ones.
How much you should budget in the U.S.
Typical U.S. pricing is wide because labor, framing, roof work, and door quality change the project fast. This Old House puts screening an existing porch at roughly $5 to $20 per square foot, while a new screened porch addition commonly lands around $25 to $120 per square foot. For a 12-by-12-foot space, that works out to about $2,000 to screen in an existing structure versus roughly $7,200 to build one from scratch.Those numbers are useful because they show where the real budget pressure sits. The mesh is rarely the problem. The larger costs usually come from these items:
- Structural repairs if the existing slab, posts, or framing need reinforcement.
- Roof tie-in when the space needs overhead protection before screens can even be installed.
- Doors and hardware that close cleanly and keep the enclosure easy to use.
- Flooring or slab fixes if water pools where people will actually sit.
- Electrical work for lighting, ceiling fans, or outlets.
- Permits and inspection when the build changes the structure or utilities.
My rule of thumb is simple: if a contractor’s bid looks low because it only includes the screen panels, it is not a real bid yet. A useful estimate should account for the whole enclosure, not just the visible mesh. But a well-bid project still falls flat if the space is uncomfortable to sit in.
Design it for the way you actually live
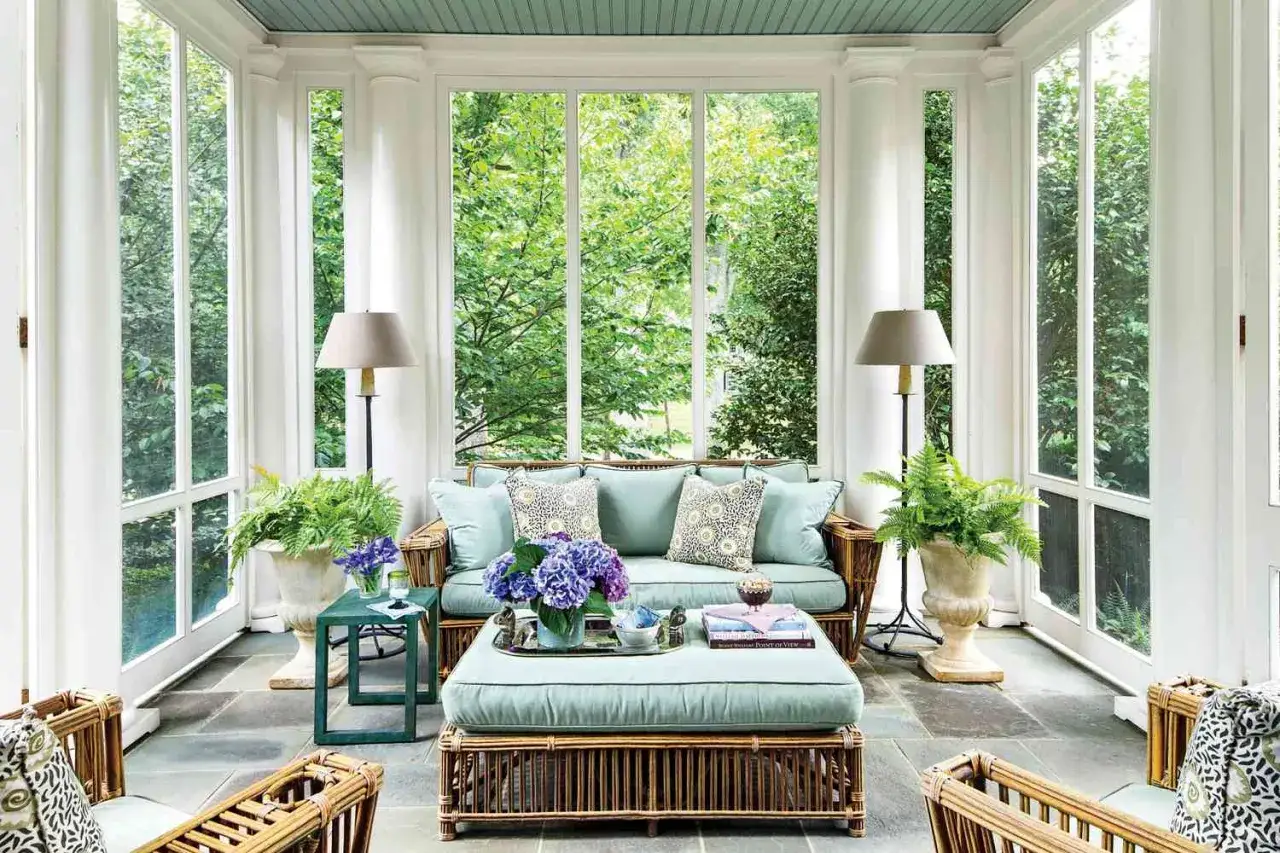
The best screened spaces are not generic. They are shaped around a habit. If you use the area for dinners, I want a clear center path, enough room to pull chairs back, and lighting that works after sunset. If it is mostly for lounging, I prefer deeper seating, side tables, and a fan that keeps air moving without blasting people in one spot.
- Hot climates - use solar screen on the sunniest exposure, then balance it with lighter fabrics and a ceiling fan.
- Humid climates - choose quick-drying cushions, mildew-resistant textiles, and furniture that does not trap water.
- Pet-friendly homes - add tougher lower panels, a self-closing screen door, and flooring that cleans easily.
- Entertaining spaces - add layered lighting, an outlet for serving trays or speakers, and enough circulation room around the table.
- Quiet retreats - keep the layout simple, reduce visual clutter, and avoid overfurnishing the perimeter.
One detail I would not ignore is the doorway. The door is where screens get damaged, drafts sneak in, and bugs test the weakest point. A clean latch, a good threshold, and weatherstripping that seals without sticking all improve comfort more than another throw pillow ever will. That is why the last checks matter as much as the first measurements.
The final checks that keep it comfortable all season
Once the enclosure is built, I would walk the perimeter as if I were trying to find the first problem before it becomes a repair. Look for loose corners, sagging mesh, gaps at the door, and water that collects near posts or slab edges. The U.S. Department of Energy is right on the basics here: use weatherstripping on movable parts, and use caulk where the gap is fixed.
- Clean the screens gently, especially during pollen season, so airflow does not get choked off.
- Inspect the frame and fasteners each spring and fall, then tighten or replace anything that has shifted.
- Check door sweeps, latches, and thresholds so the enclosure closes evenly.
- Watch for moisture near the base of posts, because trapped water is where rot and rust begin.
- After heavy storms, inspect the roofline and screen edges before using the space again.
If the structure is sound, the mesh matches the climate, and the door seals cleanly, the space stops feeling like a project and starts behaving like a room you actually use. That is the real value of a screened-in patio: it gives you a practical outdoor space that stays pleasant long after the novelty wears off.