Building a pergola is one of those outdoor projects that looks simple until the measurements, anchors, and weatherproofing start to matter. This article covers the practical side of how to build a pergola, from choosing the right layout and checking permits to setting posts, framing the top, and finishing the structure so it actually gets used. I’m focusing on the decisions that make the difference between a decorative frame and a sturdy garden feature.
What matters most before the first post goes in
- Size first. Match the footprint to the furniture, walkway clearance, and sun path.
- Permits and setbacks matter. Attached structures, electrical work, and larger footprints often trigger extra rules.
- Use weather-rated hardware. Hot-dip galvanized or stainless fasteners last far longer outdoors.
- Posts need real support. Footings, anchors, and square layout are what keep the frame stable.
- Finish for climate, not just looks. Seal wood, plan drainage, and leave room for maintenance.
Choose the pergola style that fits the yard
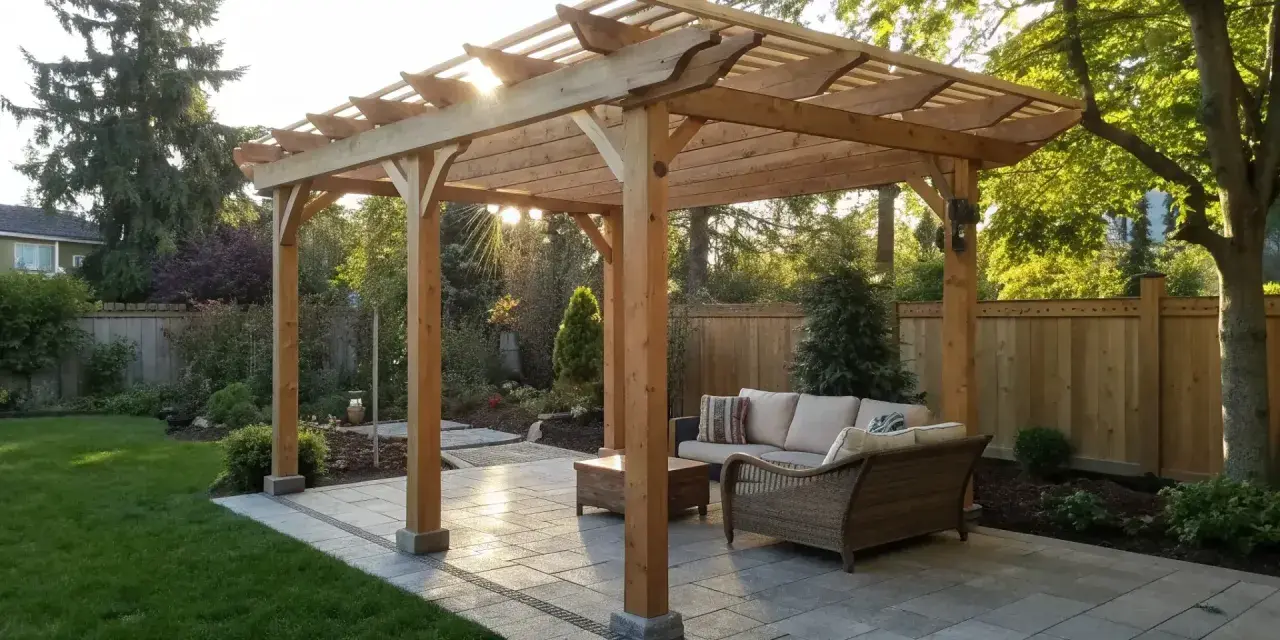
I usually start with use, not aesthetics. A pergola for a dining table needs a different footprint than one over a lounge chair, and a structure that looks balanced on paper can feel cramped once furniture is inside it.
| Layout | Best for | Watch out for |
|---|---|---|
| Freestanding | Flexible placement, a garden focal point, or a seating area away from the house | More footings, more bracing, and a little more planning |
| Attached | Small patios and spaces that should feel like an extension of the home | Ledger attachment, flashing, and permit scrutiny usually increase |
| Kit-based | Faster assembly and predictable parts for a first build | Less customization and fewer options if the site is unusual |
For the footprint itself, I usually see the best results in the 8-by-8, 10-by-10, 10-by-12, or 12-by-16 foot range, depending on whether the space is meant for two chairs or a full dining setup. A clear height around 8 feet or a little more keeps the space from feeling compressed, especially once beams and rafters are in place. If you need real rain protection, a pergola is usually the wrong tool unless you move into a covered or louvered system. Once the layout is chosen, the next step is checking whether the site and paperwork can actually support it.
Check the site, permits, and footings first
The boring part is the part that saves the build. I mark the footprint with string lines, confirm the diagonals, and check that the proposed location leaves space for doors, gutters, roof overhangs, and any nearby utilities.
- Call before you dig and verify underground utilities.
- Check local setbacks, height limits, and HOA rules.
- If the pergola is attached to the house or includes lighting, expect more scrutiny.
- In colder regions, footing depth should reach below the frost line.
- Choose a spot with good drainage; standing water is hard on posts and finish.
- Do not assume a small footprint automatically avoids permits, because size, height, attachment, and electrical work can all change the answer.
If the site slopes, I would rather correct the layout now than fight the frame later. A level and square base is easier to build than a perfect-looking structure that settles unevenly after the first hard season. Once the site is sorted, the build becomes much easier when the material list is right.
Pick materials that survive weather and reduce maintenance
Material choice shapes the whole project. I prefer to decide this early because the lumber, fasteners, and finish all need to work together instead of fighting each other.
| Material | Why I like it | Watch out for |
|---|---|---|
| Pressure-treated pine | Budget-friendly, widely available, and strong enough for a straightforward DIY build | Can twist if the stock is poor; it should also be sealed or stained after it dries |
| Cedar or redwood | Better appearance, good weather resistance, and a more refined finish | Costs more and still benefits from regular sealing |
| Aluminum or powder-coated steel | Low maintenance, modern lines, and consistent kit parts | Less forgiving to modify, so the design has to be right before assembly |
Whatever frame material you choose, use hot-dip galvanized or stainless steel connectors and fasteners. Hot-dip galvanized steel has a corrosion-resistant zinc coating, which matters because ordinary interior screws rust faster than most homeowners expect. I also prefer post bases that keep wood off the concrete or slab so moisture is not sitting against the grain.
For tools, I like to have a tape measure, string line, level, speed square, post-hole digger or auger, circular saw or miter saw, impact driver, clamps, structural screws or bolts, and a wrench set ready before the first cut. With the right parts on hand, the framing sequence is where the project either comes together or starts to wobble.
Build the frame from the ground up
A clean pergola build follows a sequence, and the order matters more than people think. I treat the posts, beams, and rafters as separate problems, then lock them together only after the layout is verified.
- Snap the layout. Mark the corners, then measure diagonals until both sides match. If the diagonals are off by more than about a quarter inch on a small build, I correct it before moving on.
- Dig the footings. Set them deep enough for your climate and soil, and use forms or approved anchors as needed. In freeze-prone areas, the footing should sit below the frost line.
- Set the posts. Use post bases or anchors that keep the wood separated from standing water, then brace the posts plumb in both directions.
- Pour and cure. Concrete needs time to harden before you load the frame, so do not rush the next step just because the surface looks set.
- Install beams. Beams carry the load across the posts, so this is where square and level really pay off. I dry-fit when possible, then tighten the structural connections only after the frame sits correctly.
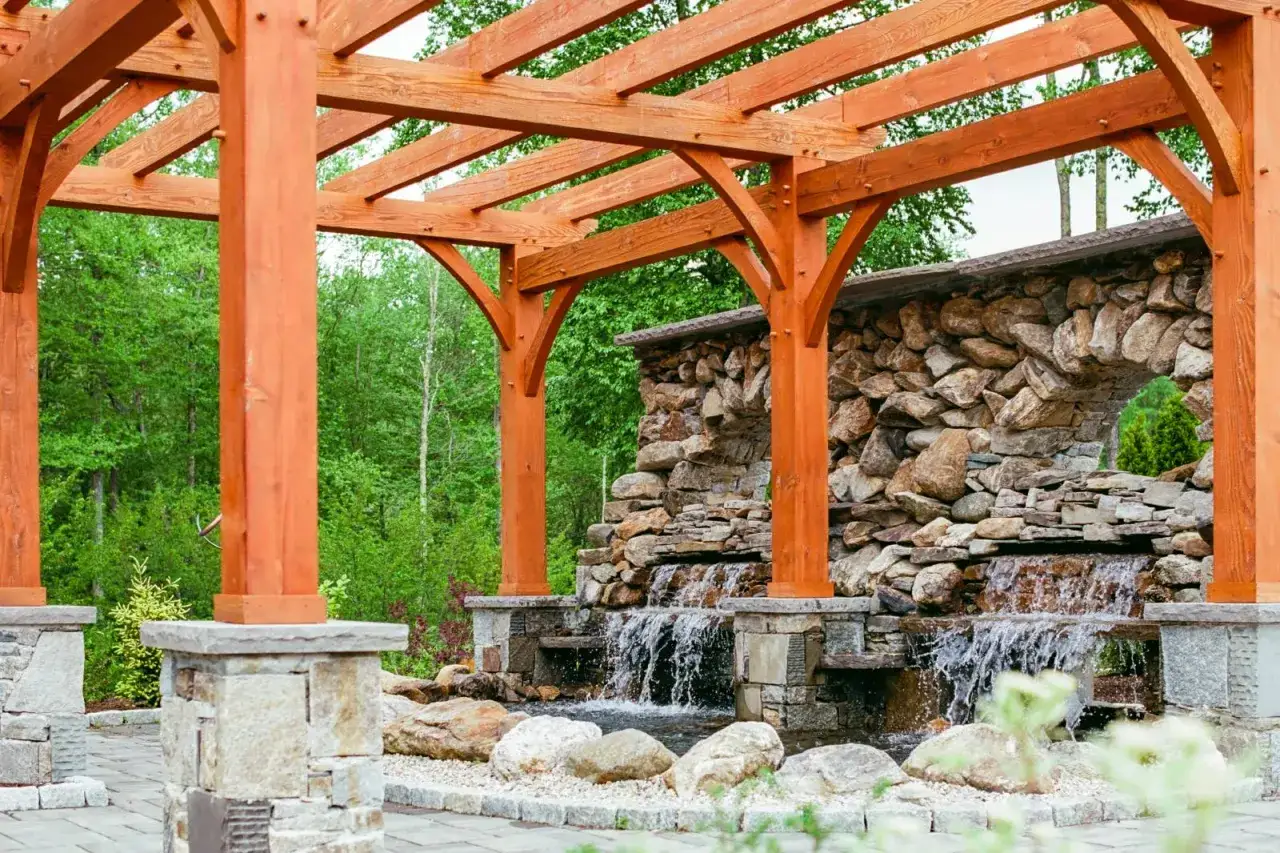
- Add rafters and purlins. Rafters span across the beams; purlins are the smaller pieces that sit on top and create shade. Even spacing, often somewhere between 12 and 24 inches on center depending on the design, gives the pergola a cleaner look.
- Finish and test. Check every fastener, sand any rough edges, and confirm that the frame does not rack or sway before adding lights or climbing plants.
For most DIY builds, the biggest win is not speed. It is resisting the urge to move on before the frame is truly square and rigid. A solid frame is only half the job, because the real cost of a bad build shows up in repairs.
Budget realistically before you start cutting
Money gets tight on pergola projects because small items add up quickly: hardware, concrete, anchors, finish, delivery, and the inevitable extra board or two. In current U.S. pricing, a simple DIY wood pergola often lands around $1,000 to $3,000 in materials, while professionally installed projects commonly fall around $2,000 to $6,000 depending on size and complexity.
| Build type | Typical budget | What changes the price |
|---|---|---|
| DIY pressure-treated wood | $1,000 to $3,000 | Lumber grade, footing work, hardware quality, and finish |
| Professionally installed | $2,000 to $6,000 | Labor, site prep, permits, and the amount of custom work |
| Premium custom systems | Usually higher | Aluminum, louvered roofs, electrical, and more complex structure |
I see people under-budget hardware more often than lumber. They plan for the boards and forget the brackets, post bases, structural screws, concrete, stain, and lighting. If the pergola is going near an existing patio slab, anchoring may simplify some excavation, but only if the slab is sound and the local code allows it. That is why the next section matters more than shaving a few dollars off the lumber bill.
Avoid the mistakes that make pergolas fail early
The failures I see most often are not dramatic. They are the slow, annoying problems that start with a shortcut and end with a repair bill.
- Using undersized posts or beams. The frame may look fine on day one, then start to sag or sway as the wood moves.
- Skipping proper footings. Shallow support lets wind, frost, and soil movement do the damage for you.
- Buying the wrong fasteners. Interior-grade screws rust, stain the wood, and loosen faster than exterior-rated hardware.
- Not re-checking square after the posts are set. If the base is out of square, the top will advertise it forever.
- Making the structure too low or too small. The space ends up feeling awkward, and furniture placement gets frustrating.
- Letting heavy vines take over too soon. Climbing plants look great, but they can trap moisture and add real weight if the frame was not sized for it.
One more issue worth calling out is drainage. If water pools around the bases or splashes against the wood every time it rains, the finish will fail sooner and the lower end of the posts will pay for it. Once those traps are avoided, the pergola can be finished as a real outdoor room.
Finish it so the space works as an outdoor room
A pergola becomes useful when it feels intentional. I like to think about shade, lighting, and seating at the same time, because a beautiful frame that sits empty is just lumber in the yard.
- Seal or stain the wood. On exposed exterior wood, I would plan to inspect the finish every 1 to 3 years, depending on sun and rain exposure.
- Add lighting early. Low-voltage lights, string lights, or wall-mounted fixtures can make the space usable after sunset.
- Use climbing plants carefully. Train them on separate supports at first, then let them move onto the rafters once the structure is proven.
- Choose furniture with breathing room. Leave clear paths to the house and garden so the pergola feels open rather than crowded.
- Keep the base dry. Reduce mulch buildup and standing water around the posts so the finish and structure last longer.
If the goal is everyday use, the pergola should frame a conversation zone or dining zone, not just create overhead lines. The final detail I would keep in mind is that the simplest structure is often the one that stays useful the longest.
The details I would not skip on a first build
If I were teaching a first-time homeowner how to build a pergola, I would start with layout, footing depth, and hardware quality before talking about stain colors or decorative cuts. Those visible details matter, but they do not rescue a structure that is out of square, poorly anchored, or constantly wet at the base.
The best first build is usually the simplest one: a clean footprint, properly set posts, straight beams, even rafters, and a finish that matches the climate. Get those right, and the pergola will feel like part of the yard instead of a temporary project waiting to be repaired.