A washer can look clean and still hold detergent film, lint, hard-water scale, and moisture in the places you never see. I’m walking through the routine I actually trust: what to clean, which products make sense, how front-load and top-load machines differ, and how to keep the smell from coming back.
Here is the quickest safe route to a cleaner washer
- Start with the owner’s manual, then use one cleaner at a time instead of mixing products.
- Run the machine’s Tub Clean, Drum Clean, or Basket Clean cycle when it has one.
- Clean the gasket, detergent drawer, lid, and rim by hand, because those are the usual trouble spots.
- Leave the door or lid open afterward so moisture can evaporate.
- If the odor returns after a full cleaning, check the drain pump filter or plumbing path instead of repeating the same cycle blindly.
Why washers smell even when they still clean clothes
Most washer odors come from a boring mix of residue and moisture. Detergent, fabric softener, body oils, lint, and hard-water minerals leave a thin film behind, and that film becomes a food source for mildew when the machine stays damp. The problem is not that the appliance is failing immediately; it is that the inside of the machine is not rinsed with the same attention your clothes get.
I see the same pattern over and over: a machine that still washes fine, but leaves towels slightly stale or the laundry room smelling musty. Once that happens, the inside needs a reset, not just a stronger perfume or more detergent. Once you know where the grime comes from, the next question is which cleaner is safest for your model.
Choosing the safest cleaner for your model
I start with the manual, then choose one cleaner. I do not stack vinegar, bleach, and baking soda like a science project. The safest routine is usually the simplest one, especially with high-efficiency washers and rubber seals.
| Cleaner | Best for | Why I use it | Caution |
|---|---|---|---|
| Purpose-made washer cleaner | Monthly maintenance and odor control | It is built for drum residue and is the easiest default when you want a low-drama routine. | Follow the package directions and use the right cycle. |
| Liquid chlorine bleach | Mildew, stubborn odor, and visible buildup when the manual allows it | It is effective when a machine needs a more serious clean. | Never mix it with anything else, and ventilate the room. |
| White distilled vinegar | Light odor or mineral film in machines that allow it | It can help with some residue and scale. | I treat it as optional, not routine, because repeated use in the drum is not ideal for every washer. |
| Baking soda | Deodorizing and light scrubbing | Useful for seals, gaskets, and follow-up odor control. | It is not enough on its own for heavy mildew or thick buildup. |
My default is a purpose-made washer cleaner or the machine’s own maintenance cycle. I reach for bleach when there is visible mildew and the manual allows it. Vinegar can help with a light smell or mineral film, but I keep it as an exception rather than the base routine. With that choice made, the actual cleaning process is straightforward.
The cleaning routine I use for the drum, gasket, and drawer
This is the routine I use when a washer needs a proper reset. It takes about 10 minutes of hands-on work, plus the cycle itself. I also keep the supplies together in a small laundry caddy so the job does not turn into a scavenger hunt.
- Empty the machine completely. Remove every garment, sock, coin, hair tie, and stray item from the drum, the rim, and the dispenser area.
- Remove the detergent drawer if your model allows it. Rinse the parts under warm water and scrub away residue with a soft brush or cloth.
- Wipe the gasket, lid edge, and inner door surfaces. Use a damp cloth first, then inspect the folds and crevices where lint and mildew like to sit.
- Treat visible mildew carefully. If your manual allows bleach, use a diluted solution on the seal only, not as a general all-purpose drench. A common manufacturer-style mix is about 3/4 cup liquid chlorine bleach in 1 gallon of warm water.
- Run the maintenance cycle. Use Tub Clean, Drum Clean, Basket Clean, or the hottest and longest empty cycle available, then add the cleaner your manual approves.
- Finish by drying everything. Wipe off remaining moisture and leave the door or lid open so air can circulate.
Never mix bleach with vinegar or any other cleaner. If you want one rule that prevents avoidable problems, that is the one I would keep. The process is a little different depending on whether you have a front-loader or a top-loader.
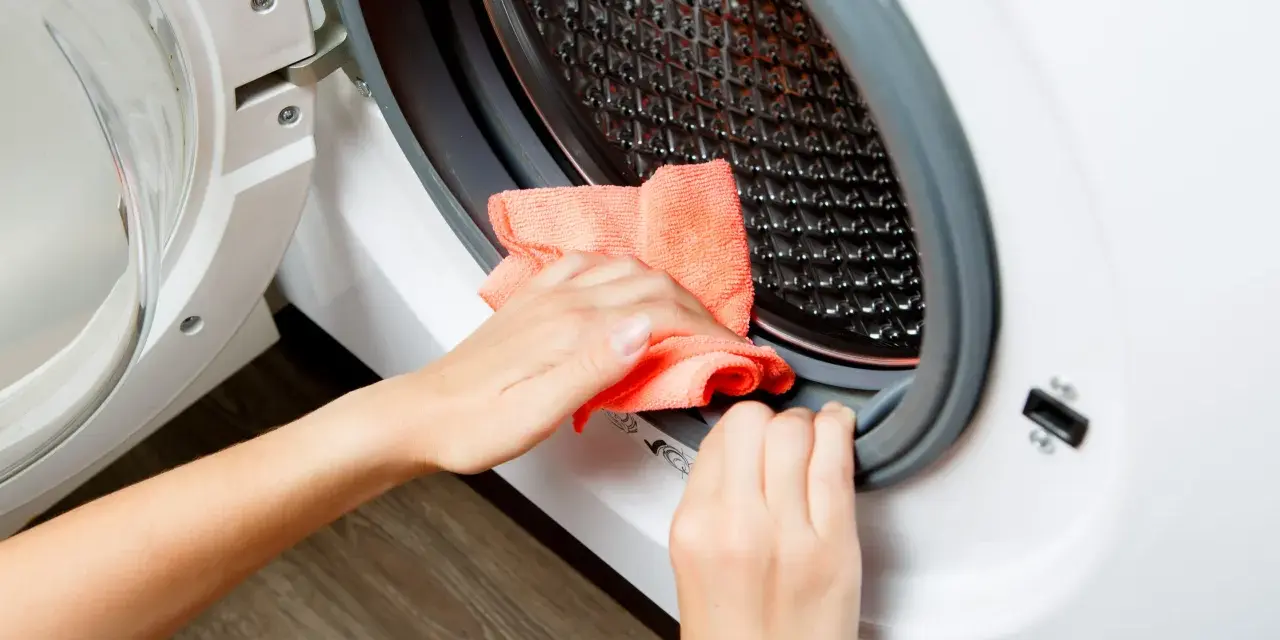
What I do differently on a front-load washer
Front-loaders need the most attention because the rubber door gasket traps moisture, lint, and small objects. When I clean one, I pull the seal back gently and check the folds all the way around. Coins, pet hair, damp lint, and even a forgotten tissue can sit there long enough to create that stale smell people blame on the drum.
- I wipe the gasket after a few loads, not just once a month.
- I dry the seal with a clean towel so water does not sit in the folds.
- I leave the door slightly open after every cycle to let the interior air out.
- I clean the detergent drawer and housing monthly, because residue there often feeds the odor.
- If the washer has a user-serviceable drain pump filter, I clean that on the same schedule.
Front-loaders also punish overdosing. Too much detergent or fabric softener leaves more film on the gasket and in the drum, which is why a cleaner machine often starts with using less product, not more. Top-load washers hide the mess in different places, so they need a slightly different checklist.
What I do differently on a top-load washer
Top-load machines do not have the same rubber gasket, but they are not maintenance-free. The lid, rim, agitator or impeller area, and dispenser can still collect soap film and damp residue. I treat the upper edge of the basket as a hidden problem zone, especially in homes that wash towels, gym clothes, or heavily soiled laundry often.
- I wipe the lid, lid opening, and rim with a damp cloth after cleaning cycles.
- I look for residue around the agitator or impeller housing if the design exposes it.
- I run the washer’s dedicated clean cycle monthly, or the hottest empty cycle if there is no special setting.
- I leave the lid open after use so trapped humidity can escape.
- I clean the detergent dispenser and any removable inserts with warm water and a soft brush.
Because top-loaders dry faster than many front-loaders, people often assume they stay cleaner on their own. They usually do not. Frequency matters just as much as technique, because cleaning too late is always harder than preventing buildup in the first place.
How often to repeat the routine and what to avoid
For most homes, monthly is a solid baseline. If the washer sees heavy use, if you wash a lot of towels and activewear, or if the laundry room stays humid, I would shorten that interval to every 2 to 3 weeks. I also like to run a hot maintenance cycle after a long run of cold-water loads, because cold cycles are convenient but they do not help much with residue.
- Avoid mixing cleaners, especially vinegar and bleach.
- Avoid abrasive pads that can scratch plastic trim, seals, or stainless surfaces.
- Avoid using extra detergent to solve odor; it usually creates more residue.
- Avoid leaving wet laundry sitting in the drum after the cycle ends.
- Avoid ignoring the dispenser drawer, because buildup there often spreads back into the wash.
If the machine still smells fresh after a month, you are probably on the right schedule. If the odor comes back quickly, I stop assuming the drum is the only issue and start checking drainage and moisture paths instead.
When the smell points to a bigger problem
If a full cleaning does not fix the odor, the source may be outside the drum. I check the drain pump filter first if the machine has one, because trapped water, lint, and small debris can keep the washer smelling off even after a thorough clean. After that, I look at the drain hose and standpipe, since a sewage-like smell can come from plumbing rather than the appliance itself.
Persistent leaks, recurring error codes, standing water, or a smell that returns immediately after cleaning are signs that deeper service may be needed. At that point, I would rather inspect the drain path and call for help than keep repeating the same cycle and hoping for a different result. The smallest daily habits usually do the most to keep the washer fresh between deep cleans.
The habits that keep the washer fresh between deep cleans
I get better results from a few simple habits than from any one miracle cleaner. Keep a microfiber cloth and small brush in the laundry area, wipe spills as soon as they happen, and remove wet clothes promptly so moisture does not linger in the drum. If the machine has a door or lid that can stay ajar safely, I use it; airflow is one of the cheapest odor-prevention tools available.
I also keep detergent measured, not guessed. The right dose leaves less residue, the right cycle leaves less moisture, and the right maintenance schedule keeps the whole routine predictable. If I had to reduce the whole job to one sentence, it would be this: clean the parts that trap residue, then give the washer a way to dry out. That is the part that actually sticks.