This guide shows how to polish brass safely at home, when warm water is enough, and when a true polish is worth the extra effort. I’m focusing on the pieces people actually clean in a house: cabinet pulls, lamps, trays, candlesticks, porch hardware, and other brass items that can dull, streak, or pick up fingerprints.
The most important decision is not the shine itself. It is whether the piece is solid brass, brass-plated, or lacquered, because that determines whether you should polish, clean gently, or stop before you damage the finish.
The decisions that matter before the shine comes back
- Start mild. Warm water, mild dish soap, and a soft cloth solve more brass problems than most people expect.
- Check the finish first. Solid brass, plated brass, and lacquered brass need different treatment.
- Use polish only where it belongs. Brass polish is for unlacquered pieces, not for every shiny surface.
- Drying matters. Leaving moisture in creases, around screws, or under handles brings tarnish back fast.
- Match the cleaner to the tarnish. Light grime, moderate dullness, and heavy oxidation do not need the same approach.
Check the finish before you clean anything
I start with the finish because it decides the whole job. A magnet helps with solid brass versus plated brass, but it is not perfect on assembled hardware, because screws and backplates can be steel even when the visible face is brass.
If the magnet grabs the visible surface, I treat the piece as plated or mixed metal and keep the cleaning gentle. If it does not, the item may be solid brass or at least brass on the outside, which gives you more room to polish.
Lacquered brass is a different case. The clear coating is there to slow tarnish, so if the surface is still even and shiny, soap and water may be all it needs. If the coating is cloudy, peeling, or scratched through, I avoid strong DIY acids and treat it as a restoration question rather than a quick clean.
Once that is clear, the question becomes which cleaner matches the amount of tarnish, not which trick is trending.
The safest polishing routine for most household pieces
For most brass objects, I treat cleaning and polishing as two separate jobs. Cleaning removes grease, dust, and surface grime; polishing handles the discoloration that is left behind.
- Wipe away loose dust with a dry microfiber cloth or a soft brush.
- Wash the piece in warm water with a few drops of mild dish soap, or wipe it with a soapy cloth if it cannot be soaked.
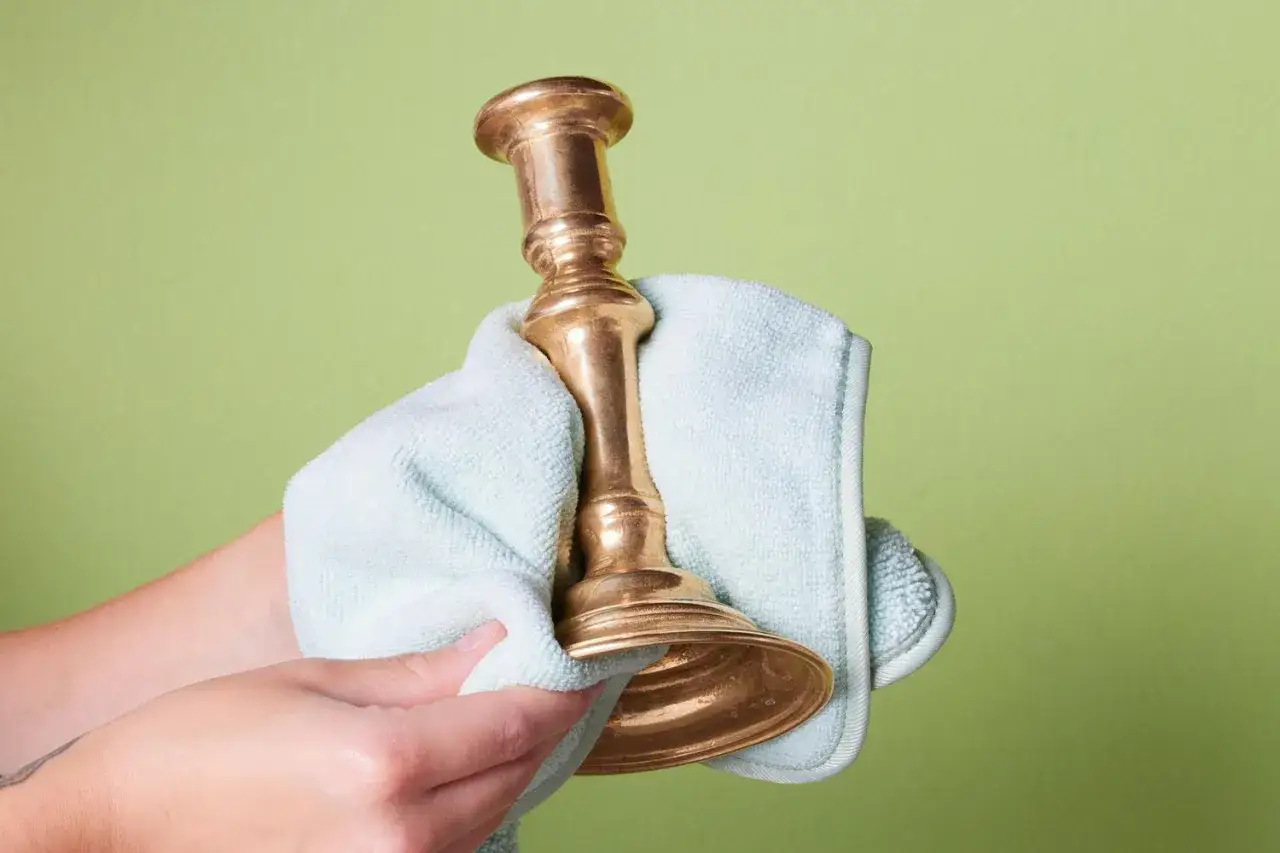
- Rinse or wipe off every trace of soap, then dry the piece right away.
- Test your brass polish or DIY paste on a hidden spot before you cover the whole surface.
- Apply the cleaner with a soft cloth using light pressure, then work it into the tarnish in small circles.
- Use a soft toothbrush for grooves, engraving, and corners, then buff with a clean cloth until the color looks even.
- Stop as soon as the finish looks consistent. Overworking brass removes detail faster than it improves shine.
If a piece only looks dusty or slightly dull, I stop after the washing step. That is often enough for lacquered hardware, and it keeps you from polishing away a finish that was already doing its job.
Choose a cleaner based on the tarnish, not the habit
I prefer the mildest option that still solves the problem. For light grime, soap and water are enough. For real tarnish, I reach for a brass-safe polish or a gentle homemade paste. Acidic mixes can work, but they are tools, not defaults.
| Method | Best for | Typical contact time | Watch out for |
|---|---|---|---|
| Warm water and mild dish soap | Dust, fingerprints, and lacquered pieces that just need a refresh | 5 to 10 minutes | Dry thoroughly so moisture does not sit in seams or around screws |
| Lemon and salt | Light tarnish on unlacquered brass | 5 to 10 minutes of active rubbing | Can dull the surface if you scrub too hard or use it too often |
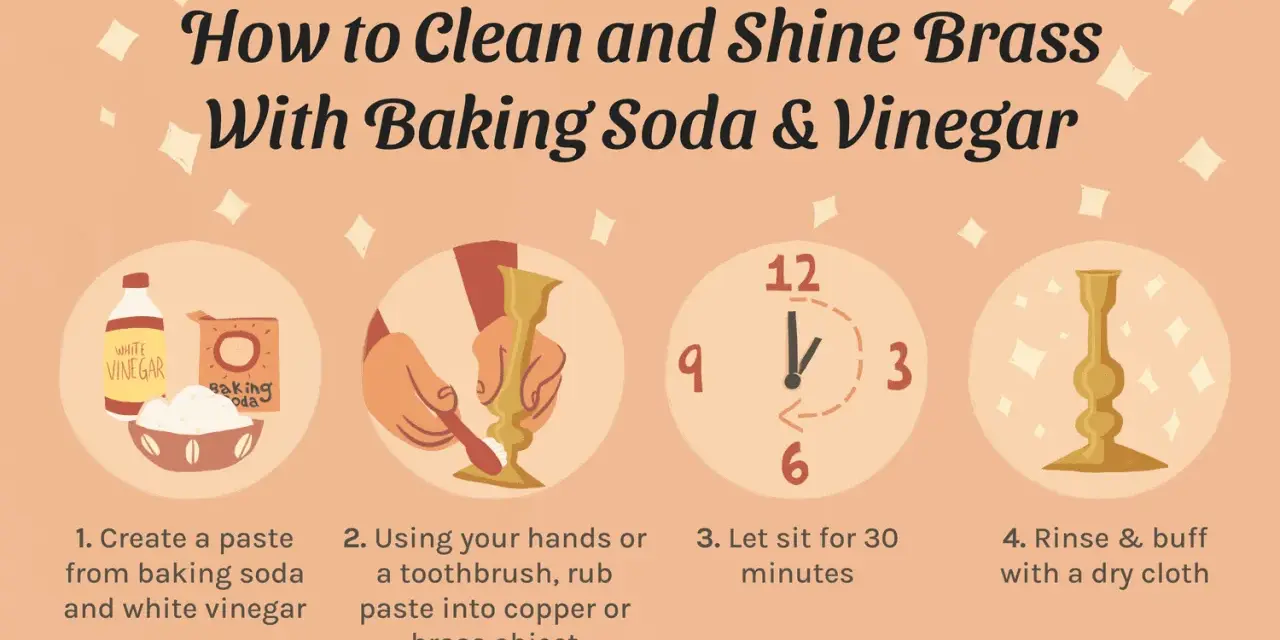
| Baking soda paste | Moderate tarnish and detailed pieces | 10 to 20 minutes | Rinse well so residue does not settle into crevices |
| Commercial brass polish | Stubborn tarnish and a more even final shine | Follow the label, often 5 to 10 minutes of buffing | Use only on compatible finishes, especially unlacquered brass |
A clean cloth matters as much as the formula. If the cloth carries grit, it can scratch the surface and make the next polish harder. I also avoid abrasive powders and scouring pads unless I am working on a rough, unlacquered piece that can tolerate them.
If you prefer kitchen remedies, lemon-and-salt is the least fussy, while diluted vinegar or baking-soda pastes are better for heavier buildup. The trade-off is simple: the more aggressive the cleaner, the more careful you have to be with the finish.
Treat hardware, décor, and detailed pieces differently
Cabinet pulls do not behave like candlesticks, and neither behaves like an antique tray. The piece’s job in the house changes how aggressively I clean it.
Cabinet pulls, knobs, and door hardware
These get skin oils, so they tarnish faster than display pieces. I clean them often with soap and water, dry them completely, and only polish when the dullness is obvious. Around hinges, backplates, and screw heads, I work lightly so I do not drive polish into joints or onto nearby wood.
Lamps, trays, and decorative objects
Decorative brass gives you more freedom, but that does not mean more pressure is better. A lamp base or tray can handle a more complete polish if it is unlacquered, yet I still stop once the color is even. On outdoor lanterns or porch pieces, I care more about removing salt, grime, and fingerprints than about chasing a mirror finish that will not last.
Read Also: Clean Your Grill Faster - Expert Tips for Every Type
Engraved pieces and tight crevices
For carved handles, etched trays, and anything with deep seams, I use a soft toothbrush or cotton swab rather than a harder brush. Metal picks and aggressive pads can flatten the crisp detail that makes brass look rich in the first place.
That kind of restraint matters because the next win is not a brighter surface, but a finish that stays bright longer with less work.
Keep brass bright longer with a small maintenance routine
The easiest way to reduce polishing time is to keep tarnish from building up. In a normal home, I get the best results from a few small habits rather than one big restoration day.
- Wipe fingerprints and moisture off brass after handling, especially near sinks and stovetops.
- Dust decorative pieces weekly or biweekly so grit does not turn into a polishing problem.
- Store spare brass items in a dry place, not in a damp basement or bathroom cabinet.
- Use a thin coat of paste wax on unlacquered decorative pieces if you want to slow oxidation.
- Clean high-touch hardware more often than display pieces; monthly is a realistic rhythm for busy kitchen and bath areas.
Humidity, steam, and salt in the air all speed tarnish, so a porch lantern or bathroom fixture will always need more attention than a bookshelf ornament. The trick is to match the schedule to the room instead of trying to keep everything on the same calendar.
Know when polishing is the wrong move
Sometimes the smartest brass care is to leave the surface alone. If the piece is lacquered and still looks intact, polishing is usually unnecessary. If the brass has a deliberate patina, a hard shine may erase the look that made you want it in the first place.
- Stop and reassess if the item is antique, collectible, or emotionally valuable.
- Avoid heavy polishing on brass-plated objects, because you can wear through the thin outer layer.
- Skip aggressive cleaners on pieces with clear coating, decorative paint, glued elements, or nearby wood and leather.
- Do not chase a mirror finish on every item; some fixtures look better with an even, soft glow than with a highly reflective surface.
If the finish is uncertain, I always test a hidden spot and work slowly. That one habit prevents more damage than any product choice, and it leads naturally to the last practical piece of the puzzle: keeping the supplies organized so the next cleaning is quick.
A small brass-care kit turns future polishing into a quick reset
I keep one caddy or drawer section dedicated to brass care so I am not hunting for the right cloth or accidentally grabbing the wrong cleaner. A simple setup is enough: two microfiber cloths, mild dish soap, a soft toothbrush, a brass-safe polish, and a dry towel for the final buff.
- Label the polish if you use more than one metal cleaner in the house.
- Keep one cloth for washing and one for buffing so grit does not move from step to step.
- Store everything together near the sinks or hardware you clean most often.
- Replace cloths that have picked up grit or rough debris; a scratched cloth is worse than no polish at all.
When the supplies are easy to reach, brass care stops feeling like a project. You can clean a handle, a lamp, or a tray in a few minutes, keep the finish under control, and choose shine or patina with intention instead of by accident.