Building a fence on a slope is really a planning problem before it is a carpentry problem. The right layout depends on how fast the ground drops, how much privacy you need, and whether the fence should follow the grade or stay level. In this guide I break down the methods that actually work, the materials that behave best, and the details that keep a sloped fence from looking improvised.
Key points for a fence that works with the grade
- Measure the slope first. The drop across the run tells you whether a racked, stepped, or terraced layout makes sense.
- Racked fences suit gentler grades. They follow the land and look smoother, but the panel system has to allow it.
- Stepped fences suit steeper slopes. They are easier to frame cleanly, especially with pre-made panels.
- Chain link and wood are the most forgiving. Vinyl and ornamental systems can work well, but only if the product is designed for slope adjustment.
- Gates need special planning. Many prefabricated gates do not rake, so placement matters.
- Expect higher labor on uneven ground. Sloped sites usually add time, concrete, and layout work even when the fence itself is simple.
How I read the slope before I set any posts
I start by treating the site like a measurement problem. Stretch a mason line between stakes at the high and low ends, level the line, then measure the vertical drop at a few points; that tells you whether the grade is mild enough to follow or steep enough to step. If the run changes shape in more than one direction, I measure each segment separately, because one straight calculation can hide a lot of trouble.
- Drive stakes at the points where the fence line will start and stop.
- Run a mason line between them and level it with a line level.
- Measure the distance from the line to the ground at the low end.
- Divide the total drop by the number of planned sections to find the average drop per panel.
That average drop per section is the number that matters most. If a 32-foot run drops 16 inches, for example, four 8-foot sections would average 4 inches of drop per section. That may still be fine for a racked layout, but it will feel awkward if you try to force a perfectly level design onto it. Once I know the drop and the run, choosing the layout becomes much easier, which is where the next decision starts to matter.
Racked, stepped, or terraced and when each one fits
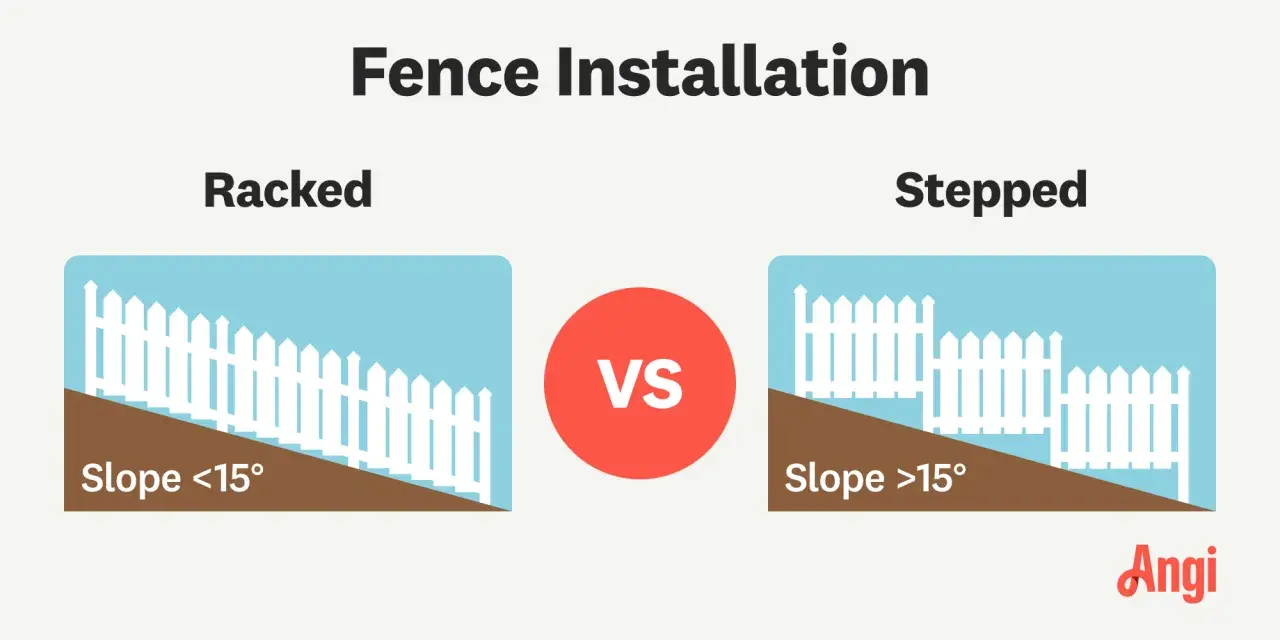
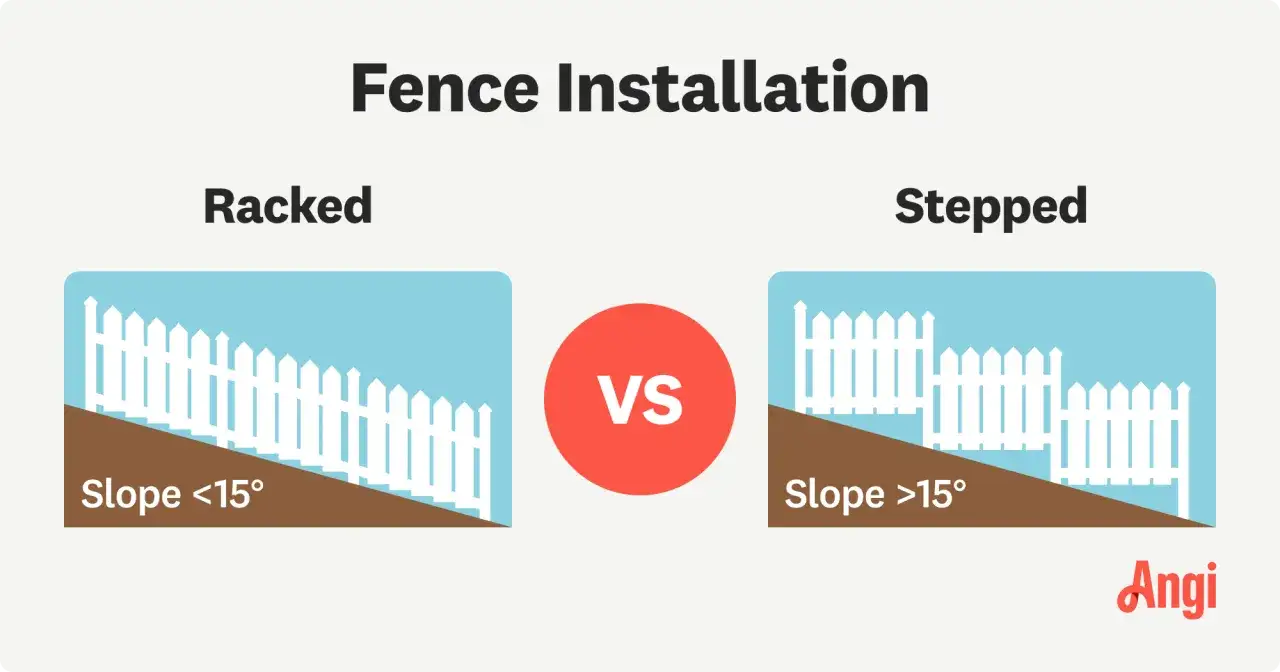
A racked fence follows the grade. A stepped fence keeps each section level and shifts height at each post. Terracing is a bigger site fix, not just a fence trick, and I only reach for it when the slope is too aggressive for a clean fence line on its own.
| Method | Best for | Strengths | Limits | My take |
|---|---|---|---|---|
| Racked or contour | Gentle to moderate slopes | Smoother visual line, fewer abrupt height changes | Requires a panel or rail system that can flex with the grade | Best when you want the fence to feel continuous |
| Stepped | Steeper slopes and pre-made panels | Easy to frame, easy to keep posts plumb, consistent section heights | Visible “stair-step” look, more obvious gaps under panels | Best when the slope is too sharp for a clean rack |
| Terraced | Severe slopes or yards with erosion problems | Creates flatter runs and can improve long-term stability | Usually needs grading work, sometimes a retaining wall, and more cost | Best when the fence is part of a bigger site fix |
As a rough rule, many fence systems can rack on mild slopes of about 10 to 15 degrees, but the real limit is the panel and post system you buy. Vinyl privacy panels are usually the least forgiving, while picket and post-and-rail systems tend to tolerate more movement. Prefabricated gates are the first thing to complain; most do not rake cleanly, so I usually place the gate on the high side or switch to a custom gate when the grade is awkward. If the land is sharply irregular, a short retaining wall or terrace often does more for the fence than trying to make the fence solve the grading problem. That leads directly to the material choice, because not every fence behaves the same way on a slope.
Which fence materials behave best on uneven ground
Material choice matters more on a slope than on flat ground, because some systems forgive custom cutting and some do not. In general, chain link is the easiest to follow the grade, wood is the easiest to customize, vinyl demands the most system-specific planning, and ornamental aluminum sits between clean appearance and tighter precision.
| Material | How it behaves on a slope | Typical installed range in the U.S. | Best use |
|---|---|---|---|
| Chain link | Very forgiving; racks well and handles uneven ground easily | $8-$40 per linear foot | Pets, security, budget projects, long perimeter runs |
| Wood | Highly adaptable; can rack or step with simple field cuts | $10-$45 per linear foot | Privacy, custom looks, yards that need a tailored fit |
| Vinyl (PVC) | Works well only if the system is designed for slope adjustment | $15-$40 per linear foot | Low-maintenance privacy when the grade is manageable |
| Aluminum | Clean and durable, but the layout has to be measured carefully | $17-$90 per linear foot | Decorative boundaries, pool fencing, front-yard curb appeal |
For a slope, I like to think in terms of tolerance. Chain link tolerates the most improvisation. Wood gives the most freedom if you are willing to cut and fit the pieces yourself. Vinyl can look excellent, but it rewards planning and punishes guesswork. Aluminum looks crisp, but the panels, posts, and gates have to line up cleanly or the geometry starts to show. Once the material is matched to the site, the installation sequence becomes much easier to manage.
The installation sequence that avoids expensive rework
I never rush straight into digging. The order matters, because a bad sequence on sloped ground usually turns into a fence that looks fine from a distance but fights you at every post and gate. My process is simple: lock in the line first, then the posts, then the panels, then the gate.
- Call 811, confirm property lines, and check local permit or HOA rules before digging.
- Mark the high and low points, snap a line, and decide the section width before you buy panels.
- Set corner and end posts first, because those posts define the fence geometry.
- On stepped layouts, divide the total drop evenly across the sections so the steps do not look random.
- Set line posts plumb and to a consistent depth, then pour concrete and let it cure according to the mix instructions.
- For a contour fence, keep the bottom rails or bottom edge about 3 to 4 inches above the ground where the design allows it.
- Hang the panels or rails only after the posts are stable, then fit the gate last and test the swing before final backfill and cleanup.
Do not let the panels force the post layout. If the posts are set correctly, the rest of the job becomes a fit-and-finish exercise. If the posts are wrong, no amount of trimming will make the fence look intentional. The gate and drainage details are where even a good installation can still go sideways, so I give those their own attention.
Gates, corners, and drainage need special attention
A sloped project usually fails at the gate or at the point where water starts moving through the fence line. A prefabricated gate does not appreciate being asked to follow a changing grade, and water will expose any weak footing faster than normal foot traffic ever will. I try to handle both issues early rather than patching them at the end.
- Place the gate on the high side when possible, because many prefabricated gates do not rake cleanly.
- Use stronger bracing at corners and gate posts since slope changes add stress to those points.
- Watch where runoff goes so the fence does not become a small dam after a hard rain.
- Improve drainage around posts if the soil stays wet, but do not assume gravel alone will fix a bad grade.
- Consider terracing or a retaining wall if the slope keeps shedding soil and undermining the fence line.
Common mistakes that create gaps, wobble, and rot
- Measuring only one low spot. Slopes often change more than they look like they do from the top of the yard.
- Forcing one panel style across the whole run. A system that racks on one section may look terrible on the next.
- Ignoring the gate early. If the gate cannot swing cleanly, the rest of the fence is already compromised.
- Setting posts too shallow or backfilling too soon. Movement shows up quickly on sloped ground, especially where water works against the footing.
- Leaving the bottom edge too close to soil. Contact with wet ground shortens the life of wood and can make maintenance miserable.
- Mixing stepped and racked sections without a planned transition. The change should look deliberate, not accidental.
The neatest fence is not always the one with the straightest bottom edge. It is the one where the slope changes look intentional and the posts stay stable after the first season. That matters even more when budget pressure enters the picture, because slopes almost always cost more than flat ground.
What I would budget before starting a sloped fence project
On current U.S. pricing, I would treat a sloped fence like a standard fence plus a complexity premium. Installed chain link often lands around $8 to $40 per linear foot, wood around $10 to $45, vinyl around $15 to $40, and aluminum around $17 to $90; the slope itself usually adds another 15% to 25% to labor, and more if access is tight or the grade changes often.
| Material | Typical installed range | What slope changes |
|---|---|---|
| Chain link | $8-$40 per linear foot | Usually stays the most economical, even on uneven ground |
| Wood | $10-$45 per linear foot | Custom cuts and extra post work can raise labor quickly |
| Vinyl | $15-$40 per linear foot | Can get expensive if the panel system is not designed to rack well |
| Aluminum | $17-$90 per linear foot | Looks sharp, but precision and gate work matter more on a slope |
If the run is short and the slope is mild, a careful DIY build can make sense. Once the yard is steep, curved, rocky, or tied to drainage work, I usually recommend a pro, because fixing leaning posts and a dragging gate costs more than getting the layout right the first time. The smartest budget is the one that matches the site instead of pretending the site is flat. That is also what makes the finished fence feel deliberate rather than improvised.
The choices that make a hillside fence look intentional
The best-looking sloped fence is the one that makes a clear decision early and sticks with it. Either follow the grade with a system that can rack, or step the line with consistent heights and accept the rhythm; trying to do both usually creates visual noise. I prefer to spend my effort on the posts, the gate, and the drainage rather than on fighting a layout that the terrain already rejected.
If I had to reduce the whole project to one rule, it would be this: measure the slope, choose the method, match the material, and respect water movement. When those four pieces line up, the fence does more than survive the hill. It looks like it belongs there.