Learning how to install shiplap well is mostly about control: a level starter row, consistent spacing, and clean cuts around trim. In a home-repair project, I care less about chasing a trend and more about whether the wall is flat, the fasteners are hidden, and the finish will hold up after the paint dries. This guide walks through the material choices, prep work, installation sequence, and the mistakes that usually ruin an otherwise solid wall.
The cleanest shiplap walls come from layout, not luck
- Start with a dead-level reference line and nail into studs every time.
- Buy about 10% extra material for cuts, outlets, and mistakes.
- Pine and MDF are good for dry accent walls; PVC or cedar make more sense in humid rooms.
- Stagger end joints so the wall does not look patched together.
- Use caulk to finish, not to hide a crooked first row.
What a shiplap wall actually is and where it works best
Shiplap is a wall treatment made from boards that overlap or lock together with a small reveal between courses. That reveal is the whole look: it gives the wall texture without needing heavy ornament, and it works especially well for accent walls, fireplaces, hallways, mudrooms, bedrooms, and powder rooms. I treat it like finish carpentry with a decorative payoff, which means the wall has to be straight before it can look intentional.
Most interior shiplap is installed horizontally, because that reads cleanly and is easier to keep level across a room. It can also be run vertically if you want a taller, lighter feel, but vertical layout asks for more care around plumb lines, outlets, and ceiling transitions. In either direction, the material will telegraph a wavy wall fast, so I only use it when the substrate is reasonably sound.
Horizontal is the default
Horizontal boards are the safest choice for most U.S. homes because they visually widen a room and give you an easier layout reference. If the wall is a little imperfect, a horizontal pattern is also less likely to call attention to minor dips than a vertical one. For a first project, that matters more than people think.
When I choose vertical boards
I switch to vertical lines when a room feels short or when the design already has strong vertical elements, like tall windows or built-ins. It can look sharp, but it leaves less room for sloppy cutting at the top and bottom edges. If the ceiling line is visibly out of level, I usually avoid vertical shiplap unless I am willing to add trim that cleans up the perimeter.
Once you know where shiplap fits, the next decision is the material itself, because that choice changes both the look and the amount of labor you take on.
Choose boards that fit the room and the budget
The best board is the one that matches the room’s moisture level, the finish you want, and the amount of sanding and painting you are willing to do. True shiplap boards have the rabbeted edge that creates the reveal, while panel products with a built-in nickel gap are faster to install and easier to keep uniform. I use panel-style products when speed matters, and loose boards when I want more control over the final look.
| Material | Typical material cost per sq ft | Best for | Tradeoff |
|---|---|---|---|
| Pine | $2-$4 | Most interior accent walls | Dents more easily than harder stock |
| MDF | $2-$6 | Painted walls in dry rooms | Poor choice for moisture or rough handling |
| Plywood | $2-$3 | Budget DIY projects | Needs cleaner cutting and finishing |
| Cedar | $3-$7 | Bathrooms, laundry rooms, and premium finishes | Costs more than pine or plywood |
| PVC | $3-$7 | High-moisture spaces | Less wood-like in feel and texture |
| Pre-finished boards | $3-$6 | Projects where painting time is limited | Less flexibility on color and sheen |
For a typical accent wall, I usually recommend boards in the 4- to 6-inch range because they are easy to balance in a room without feeling busy. Wider boards can look dramatic, but they also make seams and layout mistakes more obvious. If you are covering a 10-by-10-foot wall, plan on about 100 square feet of coverage and buy extra stock for trim cuts, outlet openings, and end joints.
Material cost is only part of the budget. If you hire a pro, labor commonly adds another layer of cost, and the total project will move based on trim, prep work, and whether the wall needs repair before a single board goes up. That makes preparation the next place where a good project is won or lost.
Measure, prep, and mark the wall before the first board
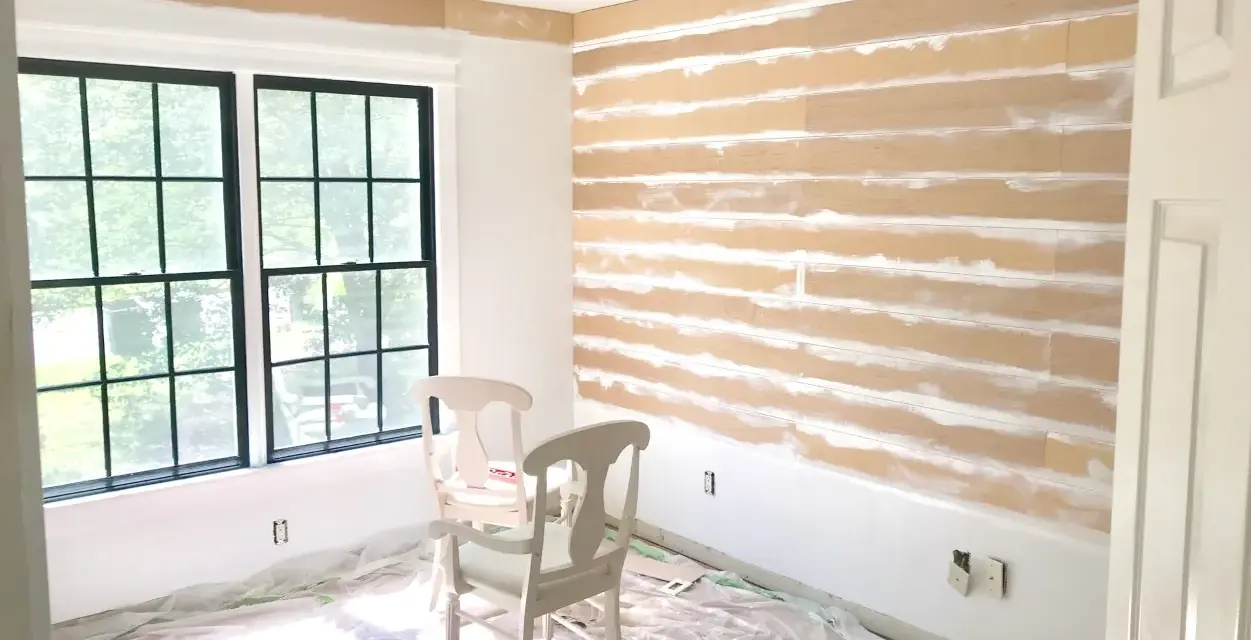
I never start cutting boards until the wall has been stripped down and checked for problems. Remove outlet covers, switch plates, baseboards, and any trim that will get in the way. Then clean the wall, patch holes, sand rough spots, and check for moisture issues before you commit to covering anything. If the drywall is bowed or the wall is visibly uneven, fix that now with shims or furring strips instead of hoping caulk will disguise it later.
Tools I keep within reach
- Tape measure and pencil
- Stud finder
- Laser level or chalk line
- Miter saw or circular saw
- Finish nailer with 2-inch nails
- Spacer sticks or scrap material for a consistent reveal
- Wood filler, paintable caulk, primer, and finish paint
Read Also: Hang Shelves Right - Avoid Sagging & Damage
My prep sequence
- Measure the wall height and width, then add at least 10% extra material for waste.
- Mark every stud from floor to ceiling so the nail pattern stays predictable.
- Snap a level reference line for the first course instead of trusting the floor or ceiling.
- Let wood acclimate to the room for 24 to 48 hours before cutting it.
- Dry-fit a few boards to confirm the reveal, the trim height, and the outlet locations.
One thing I do not skip: I check the first line twice. If the starter row is off, the error gets repeated all the way up the wall, and no amount of caulk fixes that kind of problem cleanly.
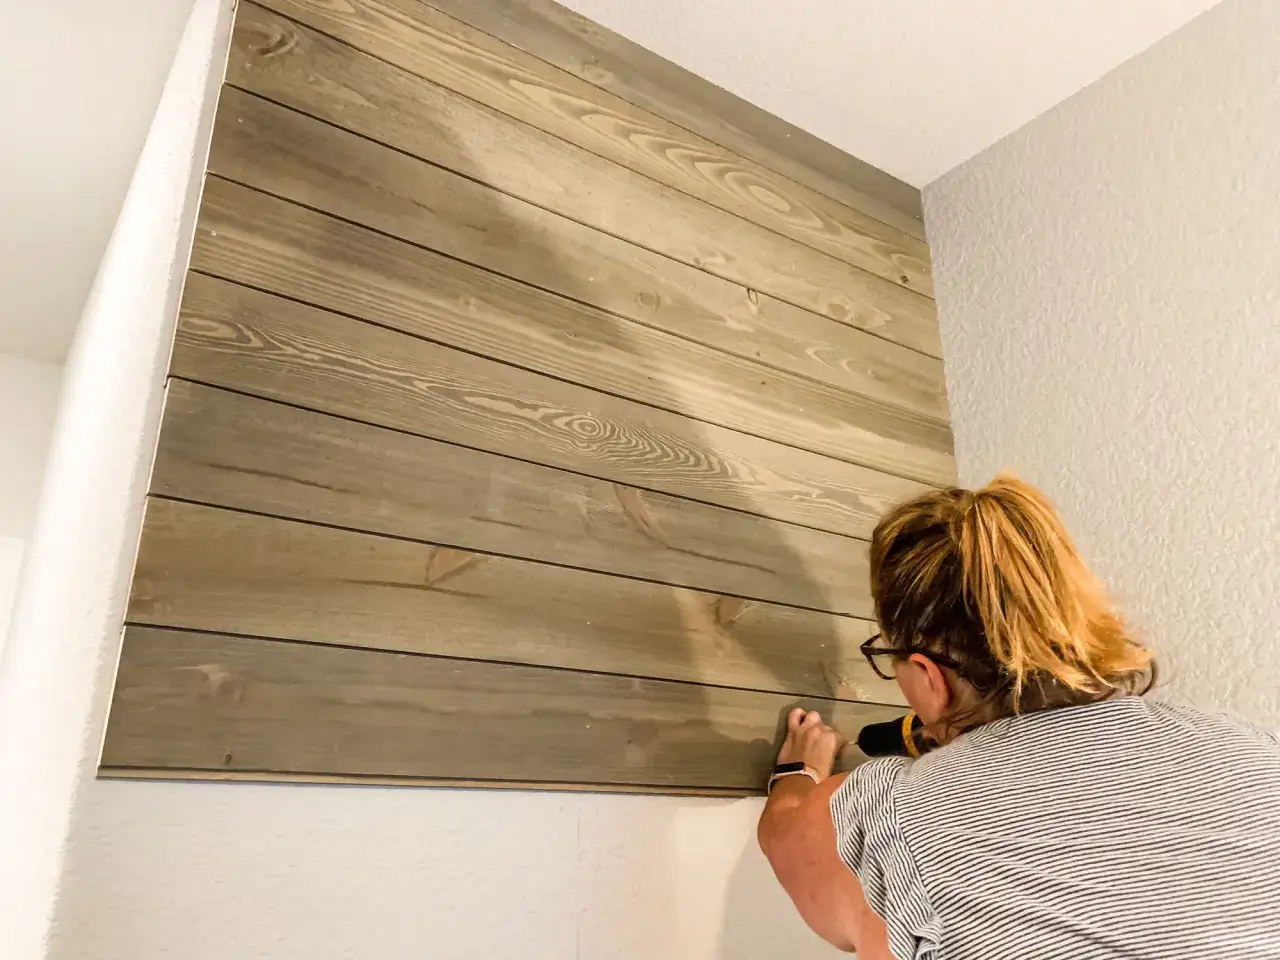
Install the boards so the lines stay level
Once the wall is marked and the boards are ready, the install itself is straightforward if you keep checking alignment. I start at the bottom on a level line, then work upward course by course. Hidden nails are ideal when the profile allows them, but the main rule is always the same: hit studs and keep the board straight.
- Set the first board on the reference line and confirm that it is level before fastening anything.
- Drive nails into the hidden part of the board where the next course will cover them, or face-nail if the product requires it.
- Fasten into every stud you cross, not just one end of the board.
- Use spacers only if the board system does not already create its own reveal.
- Cut the last board in each row so the joint lands on a stud when possible.
- Start the next row with the leftover cut piece to stagger the seams.
- Check level every few rows so a small error does not become a visible drift near the ceiling.
I prefer to tap each board lightly into place before nailing, because it helps the reveal stay consistent. If you are using a pre-routed panel system, follow the manufacturer’s spacing rather than forcing a custom gap; if you are using loose boards, a small, even reveal reads much cleaner than a tight, uneven one. The final row usually needs a rip cut, so I leave that for last and trim it carefully to fit the ceiling line.
That basic sequence works on most walls, but the details around corners, outlets, and trim are what make the finished job look custom instead of improvised.
Handle corners, outlets, and trim without gaps
The edge work is where many DIY shiplap walls start to look hurried. I plan those transitions before I nail the first row, especially if the wall has outlets, windows, or a visible outside corner. It is much easier to think through the ending than to solve it on the fly with a tiny strip of wood.
- Outlets and switches: Shut off power, remove the cover plates, mark the opening carefully, and cut it slightly oversized so the trim plate covers the edge cleanly. If the panel thickness pushes the device too far back, use a box extender.
- Inside corners: Stop the boards cleanly and finish the transition with trim or a tight caulk line. I do not try to force a perfect board-to-board corner unless the room geometry already cooperates.
- Outside corners: Use corner trim or a mitered edge so the exposed end grain does not become the focal point.
- Windows and doors: Aim for full boards near the opening when possible. A full-width board at the edge looks intentional; a narrow sliver usually does not.
- Top and bottom edges: Leave a small perimeter gap and cover it with trim or caulk so seasonal movement has somewhere to go.
When I am working in a bathroom or laundry room, I am even more selective about the perimeter details. Moisture-resistant material, sealed cut edges, and good ventilation matter more there than they do in a dry hallway. That brings us to the errors I see most often, because they are usually the reason a shiplap wall looks off even when the boards themselves are fine.
Avoid the mistakes that make shiplap look amateur
Most bad shiplap jobs fail for boring reasons: the first row was off, the wall was uneven, or the installer rushed the finish work. None of that is hard to prevent, but each one becomes visible from across the room once the paint dries.
- Starting from an unlevel floor: Floors are often out of level, so I always follow a reference line instead of the slab or baseboard.
- Ignoring a wavy wall: Shiplap does not hide bows and dips. If the substrate is bad, shim it or add furring strips first.
- Skipping acclimation: Wood that has not adjusted to the room can move after installation and open gaps.
- Using the wrong material in humidity: MDF is fine in dry interiors, but PVC or cedar is a better call where moisture is common.
- Underfastening the boards: Missing studs or spacing nails too far apart can lead to squeaks, bowing, or loose boards.
- Overusing caulk: Caulk should soften a joint, not hide poor layout.
- Forgetting primer on raw edges: Bare cut ends can flash through paint and make the wall look unfinished.
If you avoid those mistakes, the wall will usually look much more expensive than it was. From there, the final question is cost and upkeep, because both matter if you want the result to stay attractive rather than turn into another repair project.
What the project really costs and how to keep it looking good
Shiplap is still a practical DIY upgrade, but the total cost depends more on your material choice than on the decorative style itself. In the U.S., I would plan roughly this way: pine at $2-$4 per square foot, MDF at $2-$6, plywood at $2-$3, cedar at $3-$7, PVC at $3-$7, and pre-finished boards at $3-$6. If you hire the work out, labor and prep can push the project much higher, so small accent walls tend to be the easiest place to stay on budget.
| Project size | Rough material budget | Typical DIY time |
|---|---|---|
| Small accent wall, about 50 sq ft | $100-$350 | 4-8 hours |
| Standard wall, about 100 sq ft | $200-$700 | One weekend |
| Large room, about 200 sq ft | $400-$1,400 | 1-2 weekends |
For maintenance, I keep it simple: dust the grooves with a soft brush attachment, wipe painted boards with a lightly damp microfiber cloth, and touch up caulk or paint after seasonal movement shows up. In humid spaces, a good exhaust fan matters almost as much as the finish itself. If you repaint later, a satin or eggshell finish is usually easier to live with than a flat finish because it cleans better without looking glossy.
The first row decides whether the wall feels custom or crooked
The cleanest shiplap walls look simple because the planning behind them was not. I always think about the first course, the way the seams will stagger, and where the wall will end before I fire the first nail. That is what separates a finished-looking feature wall from one that just covers drywall.
If you want the result to age well, keep one spare board from the same batch, label the paint, and store a note with the stud locations you used. Those small habits make future repairs faster and keep the wall easy to maintain when the room changes later.