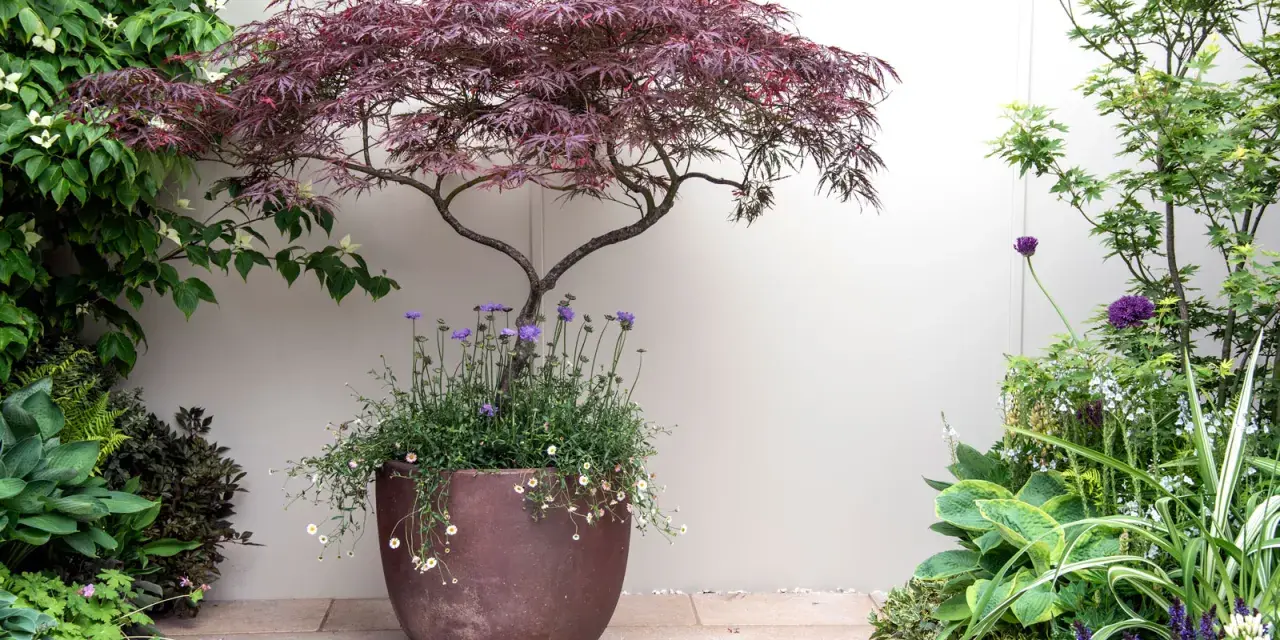
A Japanese maple in a pot can stay elegant for years, but only if the container behaves like a controlled root environment rather than a decorative afterthought. The tree wants steady moisture, sharp drainage, and protection from wind and heat, not a deep planter that stays wet for too long and slowly weakens the roots. In this guide I focus on the practical decisions that matter most: site, container, soil, watering, pruning, and winter protection.
The essentials for keeping a potted Japanese maple healthy
- Choose a compact or slow-growing maple and place it where it gets morning sun or bright dappled shade.
- Use a container with generous drainage and only a little more room than the root ball needs.
- Plant in a fast-draining potting mix, not garden soil.
- Water deeply and consistently, especially in hot or windy weather.
- Prune lightly, keeping the tree’s natural layered shape intact.
- Protect the root ball from winter freeze-thaw cycles and drying wind.
What to look for before you buy or place it
Container culture works best when the tree is already suited to a smaller life. I prefer compact upright forms or laceleaf types because they keep a graceful silhouette without forcing you into constant repotting. According to N.C. Cooperative Extension, the cutleaf forms stay relatively small and can work well as potted specimens, which is exactly why they show up so often on patios and entryways.
Placement matters just as much as the plant itself. In much of the United States, morning sun and afternoon shade is the safest balance, especially in hot inland climates. In cooler regions, the tree can take more sun as long as the root zone never dries out completely. I also try to shelter container maples from strong wind and reflected heat from walls, pavements, or dark fencing, because leaf scorch is often a moisture problem as much as a light problem. Once the tree has a sensible site, the next job is giving those roots the right home.
How to choose the right pot and soil
The container should be large enough to hold moisture, but not so large that the mix stays wet for days. For a young tree, I like a pot that is only one size up from the nursery container. Lowe’s puts it well: keep the new pot only a bit bigger than the root ball, because too much soil can hold excess water and raise the risk of root rot. For a longer-term display, a wider container in the 18- to 24-inch range is usually more practical than a tiny decorative planter.
| Container size | Best use | Why it works |
|---|---|---|
| 12 to 14 inches | Short-term display for a young tree | Works for a season, but dries quickly and fills fast |
| 16 to 18 inches | First serious upgrade | Gives the roots room without creating a waterlogged basin |
| 20 to 24 inches | Longer-term container culture | More stable, better insulated, and easier to water evenly |
I also pay attention to shape. A pot with a broader base is harder to tip over in wind, and that matters on decks or exposed patios. Square or straight-sided containers are generally more stable than narrow, tapered ones. Whatever you choose, the pot needs generous drainage holes, and I like to elevate it on feet or a riser so the holes do not sit flat against a deck surface.
For soil, I avoid backyard dirt completely. A high-quality, fast-draining potting mix is the right starting point, and I prefer mixes that feel light, airy, and slightly coarse rather than heavy and compacted. That gives the roots oxygen, which is the missing ingredient in most container failures. Once the pot is right, the planting step becomes much simpler and much less risky.
Planting and repotting without root shock
Set the tree at the same depth it grew in the nursery pot. Do not bury the trunk deeper to make the surface look tidy. The root flare, where the trunk widens into the roots, should stay visible or nearly visible above the mix. If that flare disappears below the soil line, the tree is much more likely to struggle over time.
When I repot a maple, I handle the root ball gently but not passively. If roots are circling the outside of the pot, I spread them out so they do not keep growing in a tight loop. When moving up in size, I increase only one step at a time; jumping from a small pot to a huge one is a classic mistake because the extra mix stays wet long after the roots have already absorbed what they need. That is why rooted plants usually perform better when the change is gradual instead of dramatic.
After planting, water thoroughly so the mix settles around the roots, then top up any gaps if the surface drops. If the tree has been in the same container for several seasons, I inspect it before new growth starts and again after the summer flush. Once the root ball starts packing the pot or water runs straight through instead of soaking in, it is time to refresh the mix and move up only a modest amount. After the plant is established, daily care becomes the real difference between a tree that merely survives and one that looks refined.
Watering and feeding through the growing season
Container trees dry out faster than landscape trees, and Japanese maples dislike that swing between wet and bone dry. I water deeply, all the way through the pot, and let the excess drain away. Shallow sprinkles do not help much because they wet the top layer while leaving the lower roots stressed. I also avoid wetting the foliage when I can, because leaves that stay damp for long periods are more vulnerable to disease.
There are no fixed rules that work in every yard, but I do use a simple routine: check the soil with a finger, and water when the top layer begins to dry rather than waiting for the tree to wilt. In hot, windy weather, that can mean checking daily. In cooler or shaded conditions, the interval stretches out. Illinois Extension is blunt about the container reality here: plants in pots dry fast, and they need frequent attention because the soil volume is limited.
| What I see | Likely problem | What I change |
|---|---|---|
| Crisped leaf edges and limp foliage | Underwatering or hot wind | Water deeply, then move the pot to a more sheltered spot |
| Yellow leaves, soft growth, sour-smelling mix | Too much water or poor drainage | Pause watering, improve drainage, and check the pot base |
| Pale new growth after spring flush | Spent mix or low nutrition | Feed lightly in late spring or early summer |
When it comes to fertilizer, less is usually better. I feed lightly in late spring or early summer, then stop before late summer so the tree is not pushed into tender growth right before cold weather arrives. A mild, balanced feed is enough for a container maple; I do not try to force fast growth. That slower pace is part of the appeal. It also means pruning can stay restrained, which is where many container trees either keep their shape or lose it.
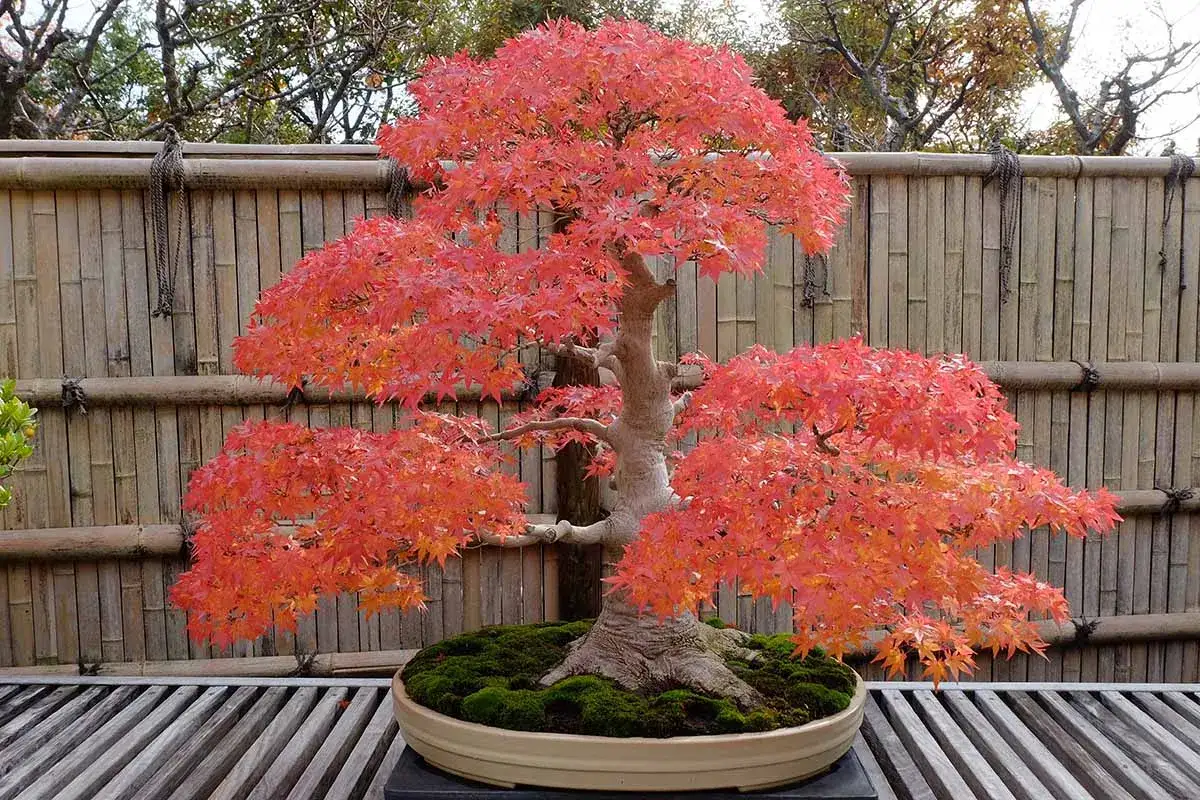
Pruning and shaping without ruining the natural form
Japanese maples do not need routine heavy pruning, and container-grown shrubs need even less. My rule is simple: remove dead, damaged, crossing, or rubbing branches, then stop before the tree starts to look engineered. The goal is to preserve the layered branching and airy canopy that make the species attractive in the first place.
Timing is where people get into trouble. Maples can bleed sap if pruned at the wrong moment, so I keep large cuts conservative and avoid major work when the tree is waking hard in spring. Small clean-up cuts are fine when I can clearly see the structure, but I avoid stripping the tree back. If I need to reduce size, I thin selectively rather than heading back every branch. UMN Extension notes that maples can bleed after late winter or early spring pruning, and that is a good reminder to keep pruning light and deliberate.
I also never top a Japanese maple. Topping destroys the tree’s form, encourages weak regrowth, and leaves a container specimen looking blunt instead of graceful. If a branch is out of place, I trace it back to a natural junction and remove it cleanly. That approach takes a little more thought, but it pays off because the tree keeps its architecture instead of turning into a hedge with a trunk. Once the structure is set, winter is the season that decides whether all that work lasts.
Winter protection and long-term maintenance
Winter is the make-or-break season for container maples in much of the United States, because roots in a pot are far more exposed than roots in the ground. Illinois Extension’s container guidance gets the logic right: the goal is to keep the soil mass insulated and moist, not frozen solid and then thawed repeatedly. I water well before hard freezes, keep the pot in a sheltered location, and protect it from drying wind.
In colder regions, I often sink the pot into the ground or bury it in mulch for the winter so the root zone experiences less temperature swing. If that is not possible, I group pots together, wrap the container, and move it to the lee side of a building where winter sun and wind are less punishing. I do not bring the tree into a warm room; that usually wakes it too early and creates a worse problem than the cold did. The tree still needs dormancy, just with better root protection.
Long term, I keep an eye on three things: root space, drainage, and exposure. If water starts pooling, the mix has collapsed. If the tree is leaning or becoming top-heavy, the container is too small or too light. If the foliage starts burning every summer, the site is too harsh for the cultivar you chose. Those are not dramatic problems, but they are the ones that quietly shorten a tree’s useful life. Catch them early and the maple stays worth the effort for a long time.
The few habits that keep the tree beautiful for years
What matters most is not a long checklist. It is a short set of habits done consistently: choose a manageable cultivar, give it an oversized pot only when the roots can actually use it, keep the mix open and free-draining, water before stress shows, and protect the root ball from winter extremes. That combination is what turns a potted maple from a one-season ornament into a lasting garden feature.
If I had to reduce the whole approach to one sentence, it would be this: treat the container like part of the plant. The pot is not just a holder, it is the tree’s climate. Get that right, and the canopy will reward you with color, texture, and a calm architectural presence that fits porches, courtyards, and small yards especially well. I would rather have one well-managed maple in a good pot than three trees struggling in containers that are too small, too wet, or too exposed.