A bathroom renovation is one of those projects that looks smaller on paper than it feels in real life. A diy bathroom remodel can save money, but only if the room is planned as a system: layout, moisture control, electrical, finishes, and sequencing all have to work together. In the sections below, I break down the realistic scope, the budget ranges I would use in the United States, the order of work, and the mistakes that cost the most to fix.
Key things to know before you start
- Keeping the plumbing layout where it is usually saves the most money and time.
- Budget for a 15% to 20% contingency so hidden damage does not derail the project.
- Ventilation and waterproofing matter more than most cosmetic choices.
- Painting, trim, fixture swaps, and vanity installation are the safest DIY wins.
- Moving drains, adding new electrical circuits, and rebuilding a shower are the tasks most likely to justify a pro.
- Simple refreshes can take a few days, while a full gut renovation often takes weeks of part-time work.
What a realistic bathroom remodel includes
I like to separate bathroom projects into three buckets because the budget and difficulty change fast once water, tile, and wiring enter the picture. The cheapest project is not necessarily the one with the cheapest fixtures; it is the one that avoids unnecessary demolition and keeps the layout stable.
| Scope | What changes | Typical DIY budget feel | Difficulty | Best for |
|---|---|---|---|---|
| Cosmetic refresh | Paint, lighting, mirror, hardware, faucet, maybe a vanity swap | $1,500 to $4,000 | Low | A room with good bones and a layout that still works |
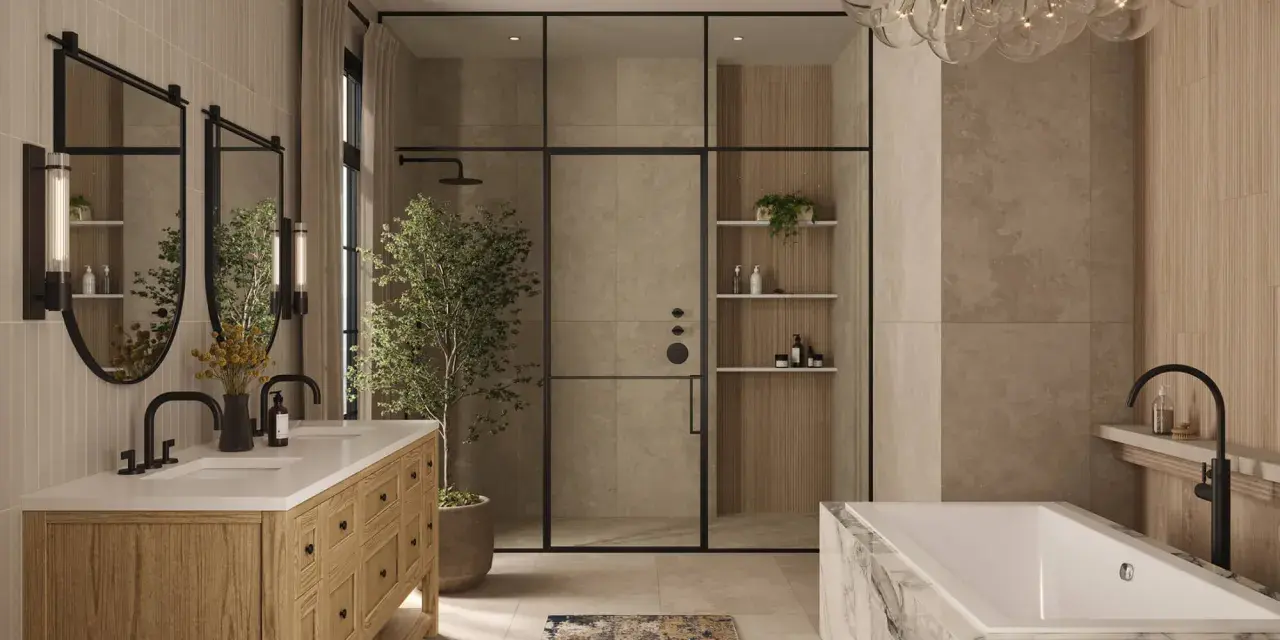
| Pull-and-replace remodel | New toilet, vanity, flooring, fixtures, and possibly a tub or shower surround | $5,000 to $12,000 | Moderate | A dated bathroom that needs a full visual reset |
| Full gut remodel | Demolition to studs, new waterproofing, tile shower, possible plumbing and electrical changes | $12,000 to $25,000+ | High | A room with structural issues, old finishes, or a layout that must change |
The important part is not the label; it is whether you are replacing surfaces or rebuilding the room behind them. Once you know which bucket your project fits, the next job is making early decisions that keep the budget from drifting.
The planning choices that save the most money
The biggest budget mistakes usually happen before demo day. I start by measuring the room, confirming rough-in locations, and deciding which plumbing fixtures will stay where they are. If I can keep the toilet, shower, and drain lines in place, I avoid a lot of hidden labor and almost all of the surprise complexity.
- Measure the rough-ins before you buy fixtures. Many toilets in U.S. homes are built around a 12-inch rough-in, but you should measure your wall-to-bolt distance instead of guessing.
- Buy extra tile. I usually plan for 10% overage on straight layouts and 15% or more for diagonal cuts or patterned tile.
- Order long-lead items first. Tile, vanities, special-order glass, and shower valves can delay the whole job if they arrive late.
- Pull permits before you tear anything out. If you are touching plumbing, electrical, framing, or ventilation, check local rules first.
- Keep a real contingency. I would reserve 15% to 20% of the budget, and more if the home is older or the subfloor is questionable.
- Check for lead if the home predates 1978. That matters before sanding, scraping, or demolishing old painted surfaces.
The cheapest bathroom is usually the one that does not get redesigned three times. Once the plan is stable, the room becomes much easier to build correctly, which brings me to the part that protects the entire project from moisture failure.
Ventilation and waterproofing are what keep the remodel from failing
This is where I get strict. Bathrooms do not fail because the paint was the wrong shade; they fail because moisture was allowed to live where it should not. For fan sizing, I follow the Home Ventilating Institute’s rule of thumb: about 1 CFM per square foot for bathrooms up to 100 square feet, with a 50 CFM fan as a practical minimum for smaller rooms. Larger bathrooms need more capacity, especially if the shower or toilet is in its own enclosed space.
The vent should exhaust outdoors, not into an attic, crawlspace, or between floors. The duct path should be as short and straight as possible, because every extra bend reduces airflow and increases condensation risk. That is not a place to improvise.
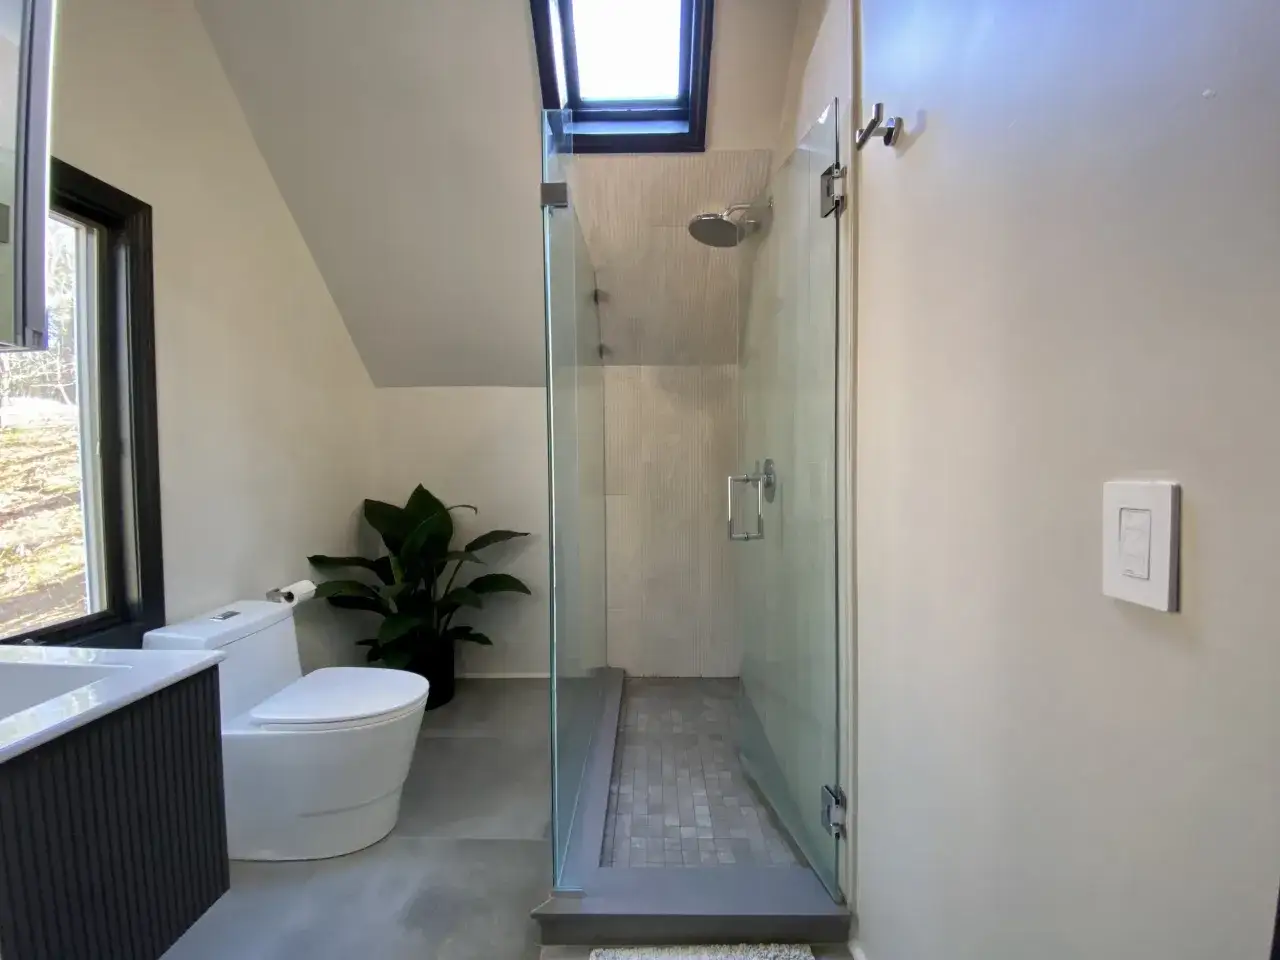
Waterproofing is the other half of the equation. Tile backer board is not waterproof by itself, and grout is a finish, not a moisture barrier. In a shower, I want a proper membrane or a board system designed for wet areas, sealed seams, and a pan that slopes correctly to the drain. A curbless shower, meaning one without a raised threshold, is especially unforgiving if the slope is wrong.
If the room cannot breathe and the wet zone is not truly sealed, the remodel will age badly no matter how good the tile looks on day one. Once those protection layers are planned, the build itself can follow a clean sequence.
The sequence I use from demolition to trim
- Shut off water and power, then photograph everything. I want a record of valve locations, wire runs, and plumbing before anything disappears behind new walls.
- Demolish in a controlled way. Remove fixtures, trim, flooring, and wall finishes, then clear debris quickly so hidden damage stays visible.
- Inspect the structure. This is the moment to check for soft subfloors, rot, mold, damaged studs, or odd plumbing shortcuts.
- Do the rough-in work. Plumbing, electrical, vent fan placement, and blocking for grab bars or heavy accessories all belong here.
- Install backer materials and waterproofing. This is the stage that decides whether the shower lasts or leaks.
- Tile, grout, and paint. I like to work from the most permanent surfaces outward so the room starts to look finished in layers.
- Set fixtures, caulk, and test. Install the vanity, toilet, faucet, mirror, lights, and hardware, then run water and inspect every joint before calling it done.
The sequence matters because it keeps you from finishing a beautiful room that still hides a bad subfloor or a leaky shower. It also makes the next decision easier: what you should actually do yourself, and what is smarter to hand off.
What I would do myself and what I would hire out
| Task | DIY-friendly? | My take |
|---|---|---|
| Painting, trim, and caulk | Yes | These are manageable, reversible, and forgiving if you work slowly. |
| Replacing a vanity, mirror, faucet, or toilet | Usually yes | Good first-time DIY work if the layout stays the same and the shutoffs cooperate. |
| Floor tile | Sometimes | Fine for patient homeowners with a flat subfloor and a willingness to learn layout and cuts. |
| Shower waterproofing and tile | Only if you are methodical | This is the part I would not rush, because hidden mistakes are expensive. |
| Moving drain lines or supply lines | No, usually hire out | Plumbing changes can turn a simple remodel into an expensive correction job. |
| New electrical circuits or major rewiring | No, usually hire out | Bathrooms combine water and electricity, so I want the work clean and code-compliant. |
| Roof penetrations or long vent duct runs | Usually hire out | If you are not comfortable working on the roof or through finished ceilings, this is not a good place to learn. |
I have no problem with a homeowner doing visible finish work. I become much more conservative when the task affects structure, drainage, or the shower assembly itself, because that is where a small mistake turns into a leak you will not discover for months. Once you know where your personal line is, budgeting gets a lot more realistic.
Budget and timeline for a U.S. bathroom
For planning purposes, I would think in terms of time and cash together. A bathroom that keeps its footprint and plumbing layout can move quickly; a room that changes shape, adds tile work, or needs hidden repairs moves much more slowly. Labor is usually what makes a contractor quote look high, but material choices can still push a DIY job upward fast.
| Project type | Typical DIY out-of-pocket | Time estimate | What drives the cost |
|---|---|---|---|
| Cosmetic refresh | $1,500 to $4,000 | 2 to 5 days | Paint, lighting, mirror, hardware, faucet, minor repairs |
| Standard remodel | $5,000 to $12,000 | 1 to 4 weeks of part-time work | Tile, vanity, toilet, flooring, fixtures, permit fees, disposal |
| Full gut remodel | $12,000 to $25,000+ | 3 to 8 weeks or more | Waterproofing, shower build, plumbing changes, electrical updates, structural fixes |
I always add a contingency of at least 15% and I do not treat it as spending money unless I need it. If the room is in an older home, has a weird subfloor, or needs custom tile cuts, I would stretch that reserve closer to 20% or 25%. Tool rentals, blades, leveling systems, grout sealer, extra caulk, and disposal fees also add up in quiet little ways that are easy to ignore until the last invoice lands.
Because the budget is never the only risk, the next section is about the mistakes that cause the most damage, not just the most inconvenience.
The mistakes that cause the most damage
Most bathroom disasters are not dramatic. They are slow, boring failures caused by one bad assumption repeated across a few steps.
- Undersized ventilation. The room feels fine for a while, then paint peels, mirrors fog constantly, and mildew appears in corners.
- Confusing tile with waterproofing. Tile looks like a shield, but the real protection is the layer behind it.
- Skipping subfloor repair. If the floor flexes, grout cracks and tiles loosen no matter how expensive they were.
- Buying before measuring. A vanity that blocks a door swing or a toilet that misses the rough-in wastes time and money.
- Ignoring old-home hazards. The EPA treats pre-1978 homes as a lead-paint concern, so I would test before sanding or demoing old painted surfaces.
- Rushing caulk and cure times. Fast finishing is tempting, but water finds the weak point much faster than you think.
Most of these mistakes are preventable if you slow down at the right moments. The last checks are not glamorous, but they are the difference between a room that merely looks finished and one that actually holds up.
The last checks I make before I call it finished
Before I stop working on a bathroom, I run a short but disciplined final pass. The exhaust fan should move steam out of the room and vent outdoors. The GFCI outlets should test correctly. The shutoff valves should be accessible, the toilet should sit stable, and the vanity doors and drawers should open without fighting the room.
I also check every visible seam: around the tub, along the shower pan, at fixture penetrations, and under the vanity after a full water test. If anything looks soft, wobbly, or suspicious, I fix it immediately instead of telling myself I will come back to it later. I keep leftover tile, extra paint, model numbers, and a few spare fixtures in a labeled box, because matching a bathroom three years later is harder than it should be.
If I had to reduce the whole project to one rule, it would be this: protect the room from water first, then spend on the finishes that change how the space feels every day.