The quickest repair depends on the valve inside the wall
- A spout drip usually points to a worn internal seal, not a drain problem.
- Compression faucets usually need a washer, and sometimes a valve seat, to seal properly.
- Cartridge faucets often need a new cartridge and fresh O-rings.
- Mineral buildup can mimic a bad part, so I always inspect and clean before replacing hardware.
- A one-drip-per-second leak can waste 1,661 gallons a year and cost up to $35 in hot-water energy if the leak is on the hot side.
- Household leaks can add up fast, and the EPA says the average family can waste about 9,400 gallons a year from them.
Figure out which faucet you have first
I start by watching the handle movement, because that tells me more than the brand name does. A faucet that turns several full rotations is usually a compression style, while a shorter-turn or quarter-turn handle often means a cartridge or ceramic-disc valve. If the tub spout drips only when the shower is running, the diverter may be part of the problem instead of the main shutoff valve.| Faucet type | What it usually looks like | Most likely leak point | Typical fix | Typical DIY time |
|---|---|---|---|---|
| Compression | Separate hot and cold handles with several turns | Rubber washer or valve seat | Replace the washer, inspect the seat, renew the O-ring if needed | 30 to 60 minutes |
| Cartridge | Single handle or short-turn control | Cartridge or cartridge seals | Swap the cartridge and O-rings | 30 to 90 minutes |
| Ceramic-disc | Smooth, quarter-turn operation | Seals or debris on the disc assembly | Clean the valve body or replace the seal set | 45 to 90 minutes |
| Diverter issue | Water changes direction poorly between tub and shower | Spout diverter or diverter cartridge | Clean or replace the diverter parts | 30 to 60 minutes |
This matters because the wrong replacement part wastes time and often makes the leak worse. If you are unsure, pull one handle apart first and compare the stem or cartridge to the old part before you buy anything. Once you know the valve type, the rest of the repair is mostly careful disassembly.
Turn off the water and set up a clean work area
Before I touch the stem, I shut off the water. If there is a local shutoff near the tub, I use it; if not, I close the main house valve and open the faucet to relieve pressure. A towel in the tub, a rag in the drain, and a small tray for screws will save you from losing the tiny parts that always seem to roll toward the edge.My basic tool kit for this job is simple: a screwdriver set, an adjustable wrench, needle-nose pliers, Allen keys, plumber's grease, white vinegar, a soft toothbrush, and the correct replacement washer, O-ring, cartridge, or diverter part. A cartridge puller and a seat wrench are worth having if the faucet is older or stuck. The escutcheon, which is the trim plate covering the valve opening, may need to come off for access.
I also keep the parts in order as they come out. That sounds obvious, but it is the easiest way to avoid rebuilding the valve backward. With the water off and everything laid out, the actual repair becomes much easier to control.
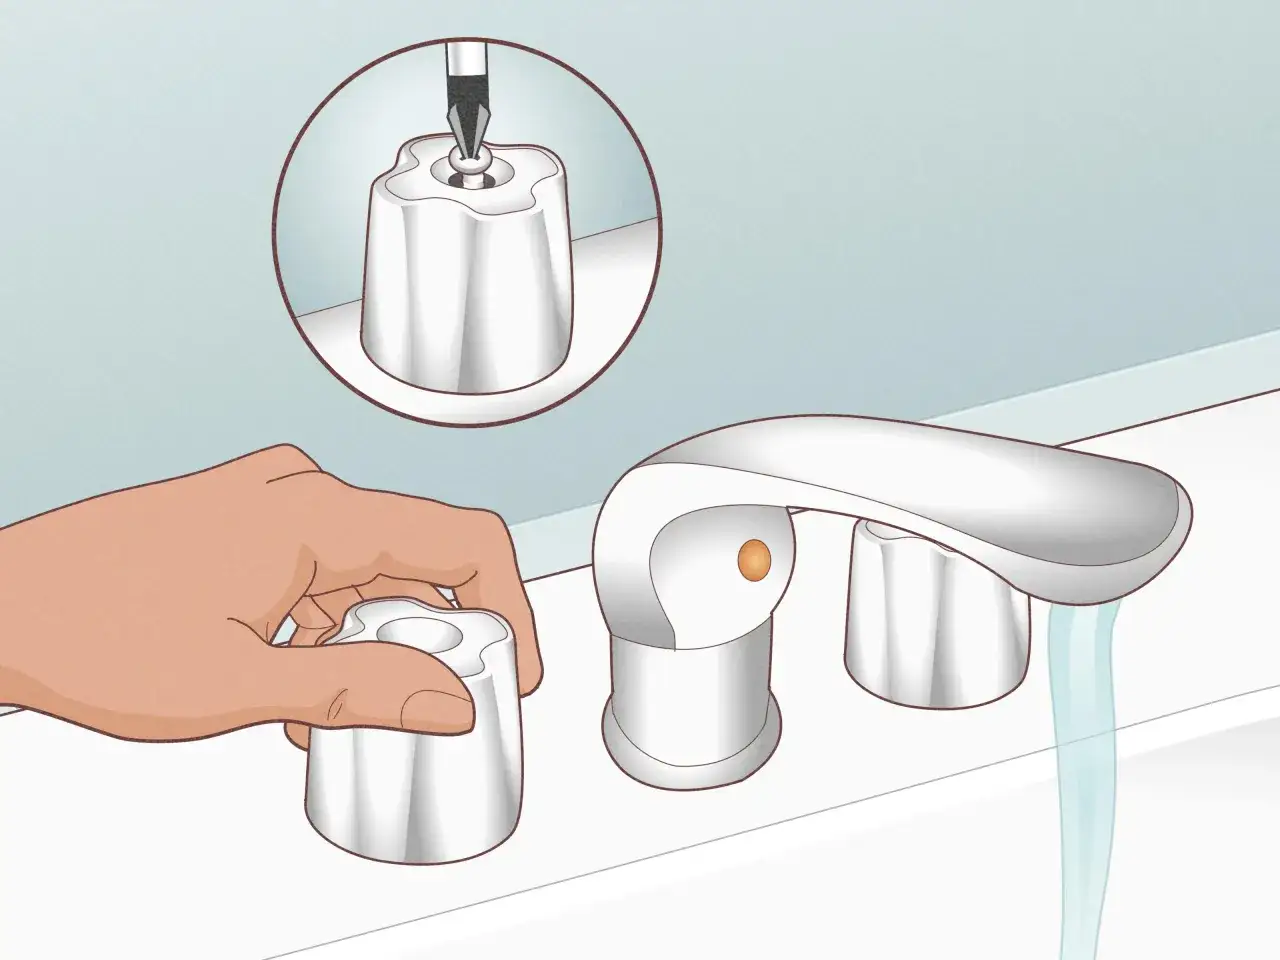
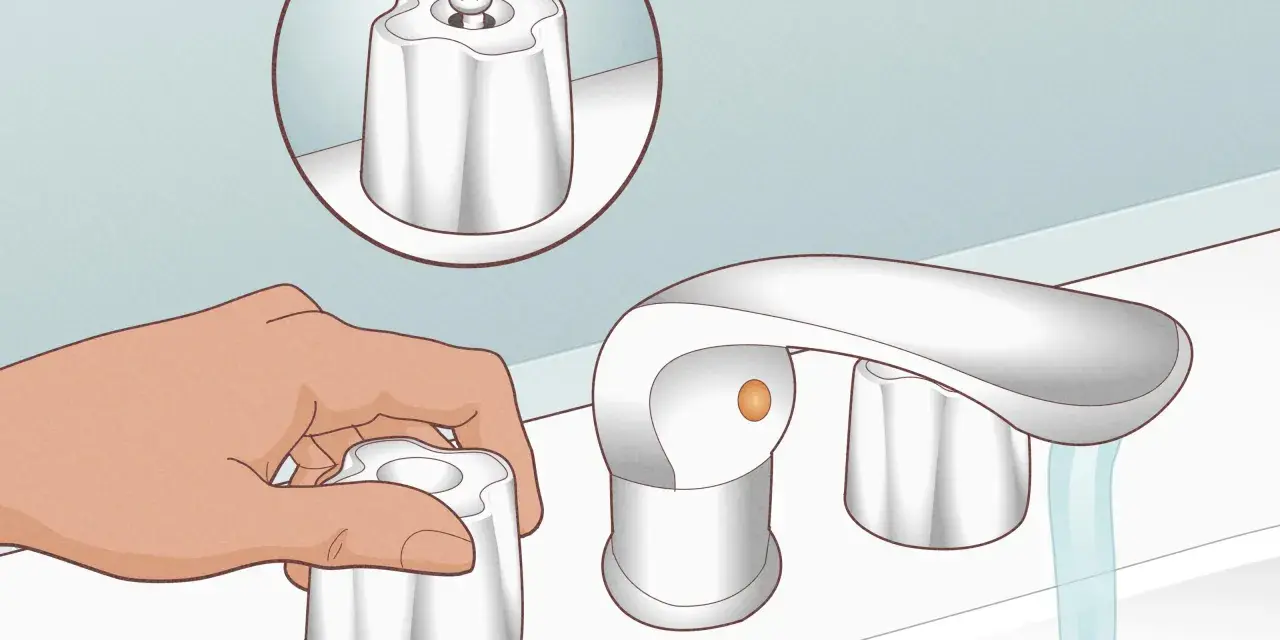
Replace the worn parts in a compression faucet
Compression faucets are still common in older U.S. bathrooms, and they are usually the simplest to repair. The washer at the end of the stem seals against the valve seat, so if the washer is flattened, cracked, or missing a chunk, the faucet will drip even when the handle feels tight.
- Pry off the decorative cap, remove the handle screw, and lift off the handle.
- Unscrew the packing nut and back the stem out of the faucet body.
- Remove the screw that holds the washer in place and compare the old washer to the new one.
- Replace the washer with the exact same size and type. A close match is not good enough here.
- Inspect the O-ring and packing washer around the stem, and replace them if they are stiff or cracked.
- Look at the valve seat inside the faucet body. If it is grooved or pitted, dress it lightly or replace it.
- Reassemble the stem with a light coat of silicone plumber's grease and snug the packing nut without forcing it.
- Turn the water back on and test both hot and cold sides.
The seat is the hard surface the washer seals against, and it is the part most people overlook. If the seat is scarred, a new washer alone often buys only a temporary fix. I also avoid over-tightening the handle, because that crushes new rubber faster than most people expect. If your faucet uses a cartridge instead, the parts and sequence are different, but the logic is the same: remove the worn sealing piece and reinstall everything cleanly.
Swap a cartridge in a single-handle faucet
A cartridge is the replaceable valve core that controls both flow and temperature. In many newer tub setups, the handle movement is shorter and smoother because the cartridge does the real work, not a rubber washer grinding against a seat. When these faucets drip, the cartridge itself or its O-rings are usually the first things I suspect.
- Remove the handle screw and lift the handle off.
- Take off the escutcheon or trim ring to expose the retaining clip or nut.
- Pull the clip, loosen the retainer, and remove the cartridge straight out. If it is stuck, twist it gently first and use a cartridge puller instead of brute force.
- Match the old cartridge by brand, shape, and length before buying the replacement.
- Replace any O-rings that came with the new part, and coat them lightly with silicone grease.
- Slide the new cartridge in the correct orientation, reinstall the retainer, and reassemble the trim.
- Restore the water slowly and test hot, cold, and shower mode if the valve has a diverter.
If the old cartridge crumbles on removal, stop and clean the valve bore before installing the new one. Dirt or mineral flakes left inside the body can keep a fresh cartridge from seating properly. And if the new part goes in cleanly but the drip continues, I start looking harder at the valve body or the sealing seat rather than blaming the cartridge again.
Clean buildup and inspect the valve seat before you reassemble
Mineral scale can keep a good seal from closing fully, especially in homes with hard water. I usually soak removable metal parts in white vinegar for 30 to 60 minutes, then scrub them with a toothbrush and wipe the valve body clean before putting anything back together. The goal is simple: no grit, no crust, and no rough edge where the washer or cartridge needs to seal.- Wipe scale off the stem, retaining parts, and cartridge housing before reassembly.
- Inspect the threads and packing area for rust or bent metal.
- Use a seat wrench to check the valve seat if the faucet is a compression style.
- Redress a lightly rough seat, but replace a seat that is badly pitted or oval-shaped.
- If the handle area leaks, tighten the packing nut just enough to stop the seepage without binding the handle.
- If the spout drips only when the shower is active, clean or replace the diverter part as well.
This is the section that saves the most repeat visits. A faucet can have a brand-new washer or cartridge and still drip if scale or a damaged seat is holding the valve open by a fraction of a millimeter. I treat that tiny gap seriously, because that is usually where the leak really lives.
Know when the repair belongs to a plumber
I stop DIY work when the valve body is corroded, the shutoff will not close, or the cartridge is fused so tightly that pulling it risks cracking tile or breaking a pipe stub. I also stop if I see water behind the wall, on the ceiling below, or around the tub surround, because that is no longer a simple faucet repair. The EPA says the average family can waste about 9,400 gallons a year from household leaks, so I do not let a stubborn drip sit around for long.
- The stem is stripped or the cartridge will not budge after normal removal steps.
- The valve body is cracked, heavily corroded, or leaking behind the wall.
- The shutoff valve does not fully stop the water.
- You have already installed the correct part and the faucet still drips.
- The tub is older enough that the trim or valve may no longer match modern replacement parts.
That is the point where a plumber is cheaper than breaking tile, patching drywall, and buying the wrong parts twice. If the repair has moved from trim work to wall access, I hand it off without hesitation. A clean handoff is better than a bigger mess.
How to keep a rebuilt tub valve quiet
Once the faucet is dry, I give it one more test after 24 hours. If it stays quiet, the repair was probably the right one. If the drip returns, the last piece I would recheck is the seat or cartridge alignment, because those are the parts most likely to look fine while still failing under pressure.
- Close the handles gently instead of cranking them hard.
- Replace stiff washers, O-rings, and cartridges before they seize in place.
- Keep a spare part from the same model if the faucet is older and hard to match.
- Clean mineral buildup every 6 to 12 months, especially if your water is hard.
- Look for seepage around the handle or trim after baths and showers, not just at the spout.
- If you soak scale away, give the part 30 to 60 minutes rather than forcing it loose dry.
A rebuilt tub valve should feel smooth, shut off cleanly, and stay dry at the spout. If it does, the repair is done; if it does not, the faucet is telling you something useful, and it is usually better to listen before the leak turns into a wall or ceiling problem.