The roof lasts or leaks depending on a handful of details
- Standard asphalt shingles belong on roofs at 2:12 slope or steeper; lower slopes need special low-slope methods or a different roof system.
- Good roof prep matters more than speed: repair the deck, add drip edge, then install underlayment and ice-and-water protection where water is most likely to back up.
- A proper starter course at the eaves and rakes is not optional; it helps lock the first row and keeps wind from getting under the shingles.
- Most standard asphalt shingles use four nails per shingle, with some high-wind or code-required installations using six.
- Flashing around chimneys, walls, vents, and valleys does more leak prevention than any extra bead of sealant.
Check the roof before a single shingle goes up
Before I think about laying shingles, I check three things: slope, deck condition, and weather. According to the Asphalt Roofing Manufacturers Association, standard asphalt shingles should not be used below a 2:12 slope without special low-slope procedures, because water drains too slowly on shallow pitches. If the slope is acceptable, I inspect the roof deck for rot, soft spots, popped fasteners, or broken sheathing; shingles can hide a bad deck for a while, but they cannot fix one.
I also plan the work around a dry stretch, because wet decking, damp underlayment, or a cold snap that keeps seal strips from bonding can turn an otherwise clean job into a leak hunt. If the roof has major sagging, brittle sheathing, or more than a few compromised sections, I stop and repair the structure first. That is the part many homeowners skip, and it is the part I trust least if I do not see it with my own eyes.
- Measure the pitch first. A quick check saves you from buying the wrong material for the roof you actually have.
- Look for weak deck sections. Soft plywood or OSB needs replacement before any underlayment goes down.
- Choose stable weather. Dry, mild conditions make it easier for shingles and seal strips to behave the way they should.
- Confirm the roof layout. Valleys, dormers, chimneys, and sidewalls add complexity long before the first bundle is opened.
Once the roof is safe to cover, the next decision is not color or style but the complete set of components that make the system work together.
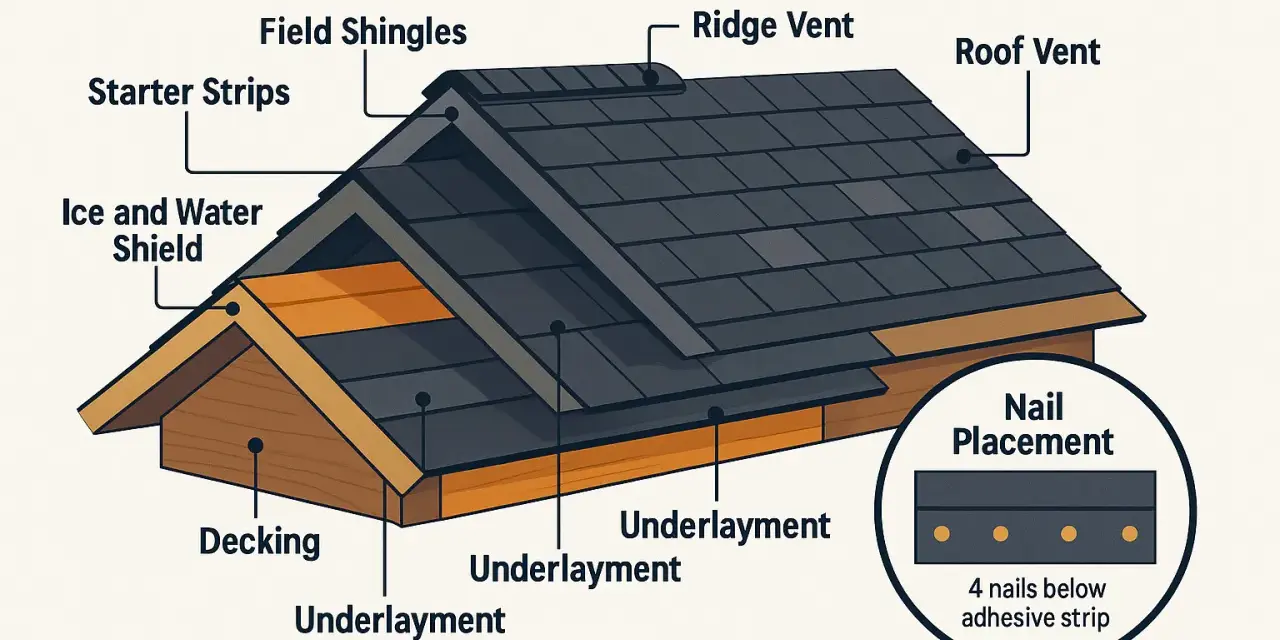
Gather the full roofing system, not just the shingles
A shingle roof works because several layers share the job. I never treat shingles as the only product that matters, because they are really just the visible top layer of a system.
| Component | Why it matters |
|---|---|
| Starter strips | Create a sealed first row and reduce wind uplift at the roof edge. |
| Underlayment | Adds a secondary water barrier over the deck. |
| Ice-and-water membrane | Gives extra protection at eaves, valleys, and penetrations where water can back up. |
| Drip edge | Directs runoff away from the fascia and supports the shingle edge. |
| Flashing | Protects transitions, walls, chimneys, skylights, and vents. |
| Roofing nails | Hold the shingles in place; length and placement matter as much as quantity. |
| Ridge caps | Finish the peak and protect the ventilation opening if the roof uses a ridge vent. |
Use nails long enough to penetrate at least 3/4 inch into the roof deck, and match the exact fastener type to the shingle instructions you are using. In practice, I like to lay out every component before I start so I am not improvising on the roof edge with half a bundle in one hand and a missing flashing detail in the other. That preparation is what keeps the install moving once the first courses begin.
Install the roof in the right order
The cleanest way to install shingles is to work from the edge up and keep each layer overlapping the one below it. That sounds obvious, but most roof leaks are built by people who rushed or reversed one part of the sequence.
- Set the edge metal and underlayment. Many systems start with drip edge at the eaves, then underlayment, then the rake metal, but the exact order should follow the product instructions and local code.
- Protect weak points first. Place ice-and-water membrane where ice dams, wind-driven rain, or runoff concentration are most likely: eaves, valleys, and penetrations.
- Snap chalk lines. Horizontal lines help you keep courses straight. On a long roof plane, a small drift at the bottom becomes obvious near the ridge.
- Lay the starter course. Starter strips go at the eaves and rakes, and they should be aligned so the adhesive strip works with the first field course instead of against it.
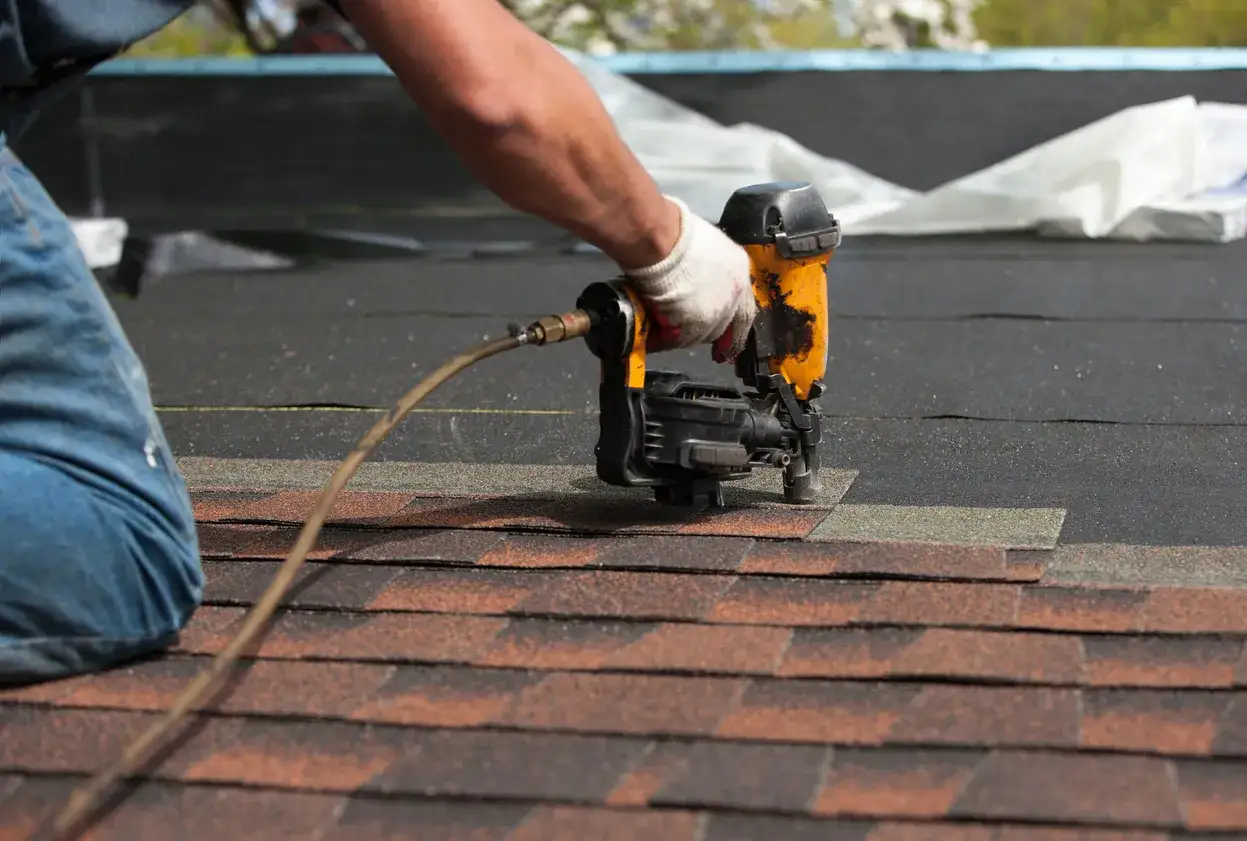
- Run the field shingles in staggered courses. Keep side joints offset, maintain the intended exposure, and avoid repeating vertical seams. I usually prefer a stair-step pattern because it is easier to keep aligned and it avoids the repetitive look of a racked layout.
- Nail in the proper zone. Standard installations use four nails per shingle; high-wind or special-code jobs may use six. Drive nails straight, flush, and fully seated, not sunk into the mat and not left proud.
- Finish hips, ridges, and ventilation. Use matching ridge caps or cut field shingles into caps, then install ridge vent parts exactly as the ventilation system requires.
The biggest rhythm to remember is simple: water should always meet an overlap, never an opening. Once that pattern is set, the details around valleys and flashing become the places where the roof either stays tight or starts to fail.
Pay special attention to valleys and flashing
If a roof leaks early, I first suspect a transition: a valley, a chimney, a sidewall, or a plumbing vent. These are the places where shingles stop being the main defense and flashing takes over.
| Detail | What I look for | Common mistake |
|---|---|---|
| Valleys | A clean, protected water path with underlayment or membrane beneath the shingle cut | Cutting shingles too tight or leaving a weak, exposed channel |
| Sidewalls | Step flashing interwoven with each course so water cannot run behind the shingles | Trying to seal the wall with caulk instead of metal flashing |
| Chimneys | Base flashing plus counterflashing set into the masonry joints | Relying on surface sealant where metal should do the job |
| Pipe vents | A boot that sits flat and is tied cleanly into the surrounding shingles | Cutting the opening too large or folding the flange |
On a chimney or wall, flashing is the waterproof detail; shingles are only the cover. I have seen plenty of roofs where the field shingles were fine but the sidewall leaked because someone treated caulk like a permanent solution. The better habit is to think like water: if it can turn a corner, it will eventually test that corner.
Avoid the mistakes that shorten the roof’s life
Most shingle failures are not dramatic. They come from small errors repeated across a whole roof. I see the same ones over and over, and they are preventable.
- Driving nails too high or too low. Too high can miss the reinforced zone; too low can cut into the shingle below.
- Overdriving nails. A sunken nail head weakens the hold and can let wind lift the tab.
- Underdriving nails. Proud fasteners keep courses from laying flat and can telegraph through the shingles.
- Skipping starter strips. The first course loses its lock and the roof edge becomes easier to lift in wind.
- Stacking joints. Repeating end joints creates visible lines and leak paths.
- Using sealant as a substitute for overlap. Sealant is a backup, not the primary waterproofing method.
- Rushing the layout. A crooked first course can haunt the entire roof.
My rule is simple: if a mistake changes water flow, it matters. If it only makes the job slower, it is probably still worth fixing, because roof repairs are expensive in the places where shortcuts hide. That is why I would rather stop and correct a detail now than explain it later to a homeowner after the first hard rain.
Know when the job stops being a DIY project
Some roofs are manageable for a careful homeowner with the right tools, but others cross into pro territory fast. Steep pitches, more than one story, rotten decking, and roofs with several dormers or chimneys all raise the risk and the chances of a bad detail.
- Steep or awkward slopes. If the roof no longer feels comfortable to walk and cut on, it is time to back off.
- Multiple penetrations. Skylights, chimneys, vents, and sidewalls multiply the number of places that can leak.
- Deck replacement is needed. Once you are repairing structure, the job is no longer just shingling.
- Local code or permit questions are unclear. If the inspection rules are fuzzy, a pro can save you from having to redo the work.
- Weather is unstable. A roof left open overnight is a problem, not a project plan.
If I were advising a homeowner, I would be blunt here: a simple gable roof with sound decking is one thing; a tired roof with valleys, chimneys, and hidden rot is another. The more transitions you have, the more value there is in paying for experience instead of learning on your own roof.
The checks I would not skip before calling it done
The job is not finished when the last shingle is nailed. I still want to see straight lines, secure edges, and no obvious weak points at the transitions. That final inspection is where a good install becomes a dependable one.
- Check for exposed nails, lifted corners, and uneven exposures across each course.
- Inspect the ridge and hips for full coverage and consistent overlap.
- Look in the attic on a bright day for daylight around vents, valleys, or wall transitions.
- Clean up loose nails and shingle scraps so they do not end up in gutters or tire treads.
- Confirm that ventilation openings are not blocked by insulation or misplaced materials.
If the roof is dry, the lines are straight, and every transition is layered correctly, the job is probably better than most quick replacements. That is the standard I use: not just a roof that looks finished, but a roof that would still make sense to me after the first hard rain.