A well-built DIY deck box solves a very ordinary problem: outdoor clutter needs a home that can handle sun, rain, and daily use without falling apart after one season. In this guide, I focus on the details that matter most in real yards in the United States, from size and material choices to drainage, hinges, finish, and the mistakes that shorten a box’s life. If I were building one for a patio, porch, or deck today, I would treat it less like a cute storage project and more like a small weatherproof structure.
The practical details that matter before you start cutting
- Start with the items you want to store, because cushions, toys, and tools all need different dimensions.
- Cedar looks better and resists rot well; pressure-treated pine is cheaper and tougher on a budget.
- A wooden box should shed water and breathe, not try to trap every drop out like a plastic bin.
- Use exterior-rated hardware, and upgrade to stainless or hot-dip galvanized parts in wet or coastal climates.
- A lid that is too heavy becomes annoying fast, especially if the box doubles as a bench.
- Most failures come from skipped finish work, poor drainage, and undersized hardware rather than the basic frame itself.
Start with what the box will actually store
Before I cut a single board, I decide what has to fit inside. That sounds obvious, but it is where most outdoor storage projects go wrong. A box for seat cushions needs different proportions than one for hose nozzles, kids’ toys, or garden tools, and a box that doubles as seating needs a stronger top than a plain storage chest.
| What you want to store | Practical internal size to aim for | Why it matters |
|---|---|---|
| Seat or lounge cushions | About 48 to 60 inches wide, 24 inches deep, 20 to 24 inches high | Most cushions lie flatter than people expect, and they need room to slide in without being crushed. |
| Garden tools and hand tools | About 30 to 42 inches wide, 18 to 20 inches deep, 20 to 24 inches high | A narrower box is easier to place near a wall or fence and keeps tools from scattering. |
| Pool toys, games, and misc. patio items | About 36 to 48 inches wide, 20 to 24 inches deep, 20 to 24 inches high | This size is flexible enough for awkward items without becoming bulky on a small deck. |
| Bench-storage hybrid | Seat depth around 16 to 20 inches, lid built for load-bearing use | The lid has to support people, not just weight from the weather, so the frame needs extra reinforcement. |
I also leave a little clearance around the contents instead of building to a perfect squeeze. In practice, an extra inch or two on width and depth makes the box easier to use and less annoying when the humidity changes and the wood moves. Once the size is clear, the next decision is the material, because that choice controls both cost and lifespan.
Choose materials that match your climate and budget
For an outdoor storage box, I look at the wood first and the hardware second. The right material depends on whether the box will sit in direct rain, on a covered porch, or under a deck with some shelter. A wooden box can look better than most resin options, but only if the species and finish match the environment.
| Material | What it does well | Trade-off | Best use case |
|---|---|---|---|
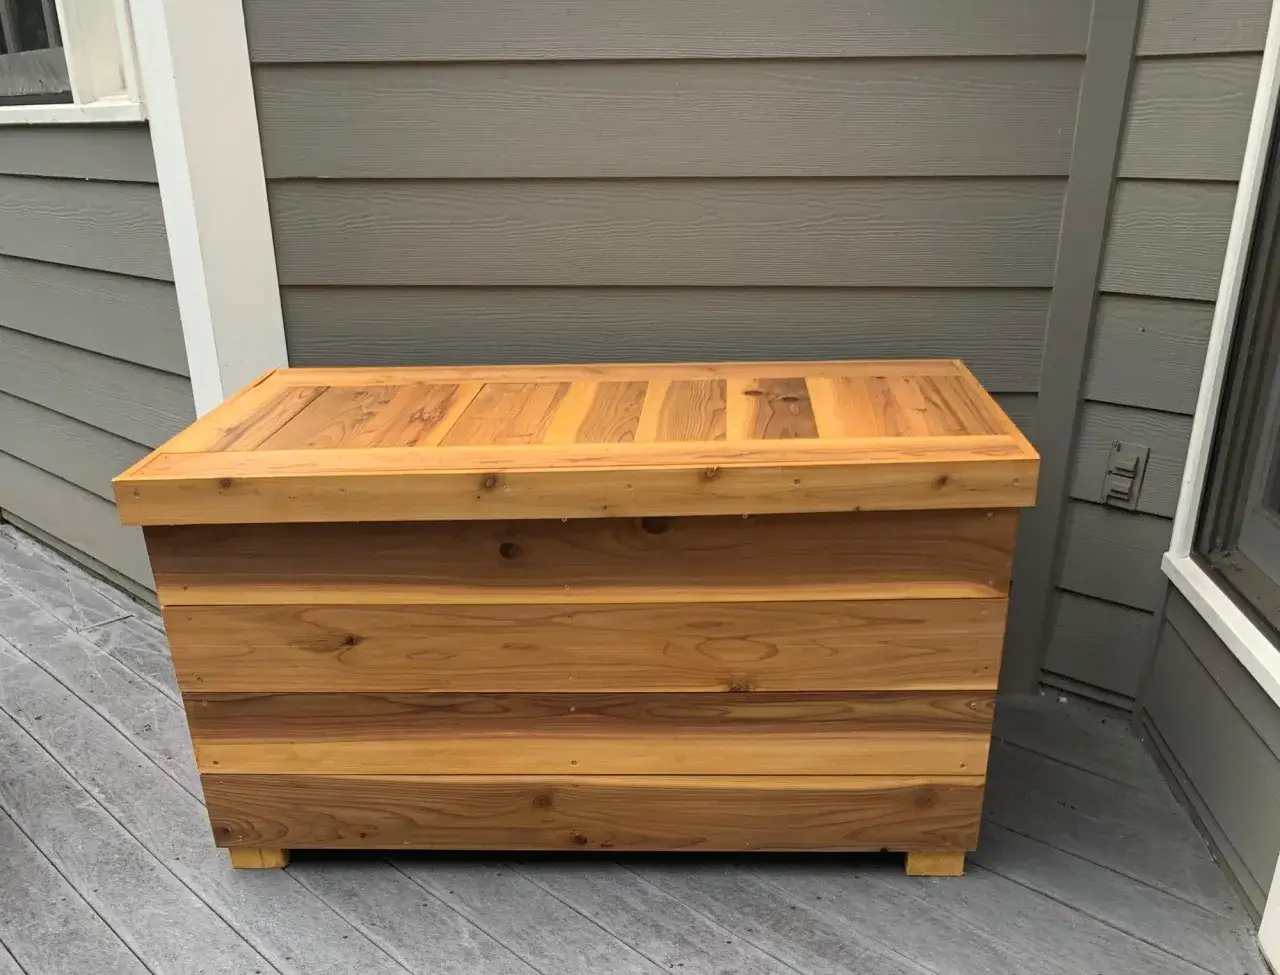
| Cedar | Stable, naturally rot-resistant, and attractive with stain or clear finish | Costs more than basic lumber and will gray over time if left unfinished | Visible patio or deck boxes where appearance matters |
| Pressure-treated pine | Budget-friendly and made for outdoor exposure | Heavier, rougher, and should dry thoroughly before painting | Utility-first boxes and larger builds where price matters more than grain |
| Exterior plywood with solid trim | Good for painted projects and clean panel work | Edges need careful sealing or they can wick moisture | Boxy, modern designs with a painted finish |
| Resin or plastic | Best if you want near-zero maintenance and stronger water resistance | Harder to customize and usually less satisfying if you want to build it yourself | When waterproof storage matters more than woodworking |
For hardware, I prefer stainless steel or hot-dip galvanized screws, exterior-rated hinges, and a lid support if the top is wide. If the box will live near the coast, on an uncovered deck, or in a humid region, I would spend a little more on corrosion resistance up front. As a rough planning range in the U.S., a simple pine build may land around $120 to $250 in materials, while cedar and better hardware often push the project into the $200 to $400 range. With the material chosen, the build itself is mostly about keeping the structure square and the lid light enough to use every day.
The build sequence I would follow on a first box
I like simple framing because it is easier to keep square and easier to repair later. The cleanest DIY builds usually follow the same logic: build the frame, add the skin, then fit the lid and finish. That order keeps the project manageable and reduces the chance of a lid that rubs, binds, or leaks along the seam.
- Draw the box around the contents. I sketch the internal dimensions first, then add the thickness of the boards to get the outside size. That keeps the box from shrinking on paper and then becoming useless in the shop.
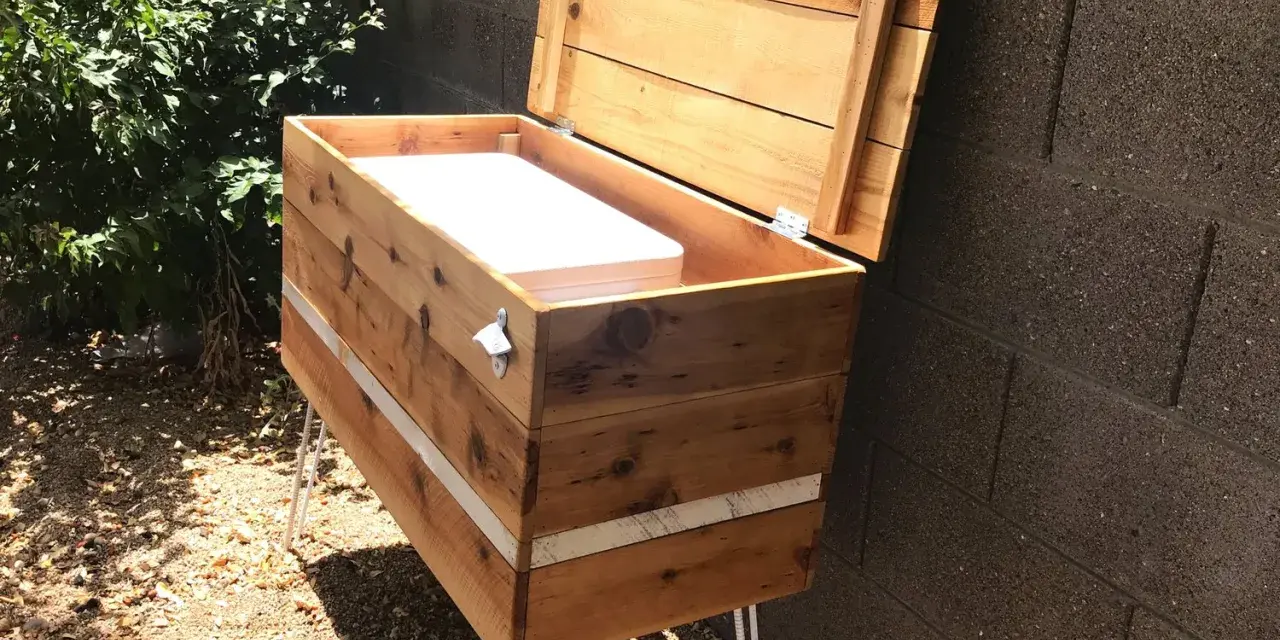
- Cut the main frame pieces. For many outdoor boxes, 1x4s or 2x2s are enough for the body, while a bench-style top usually needs more support. If I expect people to sit on it, I reinforce the top before I think about trim.
- Assemble the rectangular frame and check for square. Pocket holes, exterior screws, and waterproof wood glue all work here. I clamp the frame and measure diagonally corner to corner; when both diagonals match, the box is usually square enough to behave well later.
- Add the side slats or panels. On a wood box, I leave small gaps for drainage and movement, usually around 1/8 to 1/4 inch depending on the design. Tight panels look neat for a week, then seasonal movement starts forcing problems.
- Build the lid separately. This is where many people make the box too heavy. A framed lid with slats or a lightweight panel is easier to lift than a thick solid top, and it puts less stress on the hinges.
- Install the hinges and test the motion. I want the lid to open smoothly, stop safely, and close without forcing the frame out of alignment. If the lid is large, a lid stay or gas strut can make the whole box feel much more polished.
- Dry-fit everything before finishing. Once the finish is on, small geometry problems become annoying to fix. I always test the lid, hardware, and clearances before I seal the wood.
If I were copying one design strategy for a first-time builder, I would keep the lines simple and spend the saved time on alignment. A box that is square, light, and easy to open will feel better than a decorative one that drags its lid every time you need a towel or a cushion. Once the frame is solid, the real difference between a box that lasts and one that fails is how you manage water and movement.
Details that keep wood boxes dry without trapping water
This is the part people usually underestimate. A wooden storage box does not need to be sealed like a submarine, and in fact I would avoid trying to make it perfectly airtight or watertight. Water that sneaks in eventually needs a way out, or you end up with trapped moisture, swollen boards, and stale-smelling cushions.
| Detail | What I do | Why it helps |
|---|---|---|
| Feet or risers | Lift the box about 1/2 to 1 inch off the deck | Prevents the base from sitting in puddles and improves airflow underneath |
| Panel gaps | Leave small, even gaps between slats | Lets water escape and gives the wood room to expand and contract |
| Lid overhang | Allow a modest overhang, usually around 1/2 inch or slightly more | Helps shed rain away from the seam instead of funneling it into the joint |
| Weather stripping | Add it only where it improves the seal, not around every single seam | Reduces splash-in while still letting the box breathe |
| Finish on all faces | Seal the bottom and the hidden edges, not just the visible surfaces | Unfinished end grain drinks moisture faster than the faces of the boards |
| Hardware choice | Use corrosion-resistant screws and hinges | Rust stains and frozen hinges show up fast outdoors, especially in humid regions |
My rule is simple: block direct rain, but do not trap damp air. That distinction is what keeps wooden outdoor furniture from smelling musty after a wet week. If the box will live in a place with heavy rain, freeze-thaw cycles, or full sun all afternoon, I would also lean toward a UV-resistant exterior stain or paint and recoat it on a regular schedule. The next issue is less glamorous, but it saves more projects than any finish ever will: avoiding the mistakes that quietly ruin the build.
The mistakes I would avoid and the upgrades worth paying for
Most bad deck boxes do not fail because the idea was wrong. They fail because the builder made one or two small decisions that made the whole thing harder to live with. I see the same problems over and over: undersized hardware, no drainage, lids that are too heavy, and finishes that protect the faces but ignore the edges.
- Do not use interior screws or hinges. They are cheaper for a reason, and they corrode quickly outdoors.
- Do not build the lid heavier than necessary. If the lid is hard to lift, the box stops being useful and starts getting ignored.
- Do not skip predrilling in cedar or near the ends of boards. Split corners are common, and once they split, they keep splitting.
- Do not seal every gap shut on a wooden box. A box that cannot dry out will eventually hold moisture inside.
- Do not size the box to the exact item list with no extra room. Real life adds awkward angles, wet cushions, and larger-than-expected items.
When I think about upgrades, I focus on the ones that change daily use instead of just appearance. A lid stay or gas strut is worth it on a wide lid. A locking hasp makes sense if the box sits on an open patio. Reinforced lid framing matters if you want seating. And if you know the box will live through harsh weather, I would rather buy better hardware and a better finish than spend that money on trim. Those small choices are what separate a box that feels homemade in the best way from one that just feels unfinished.
What makes the finished box feel built for real outdoor use
If I were building one this year, I would keep the design simple, choose cedar for a visible patio piece, choose pressure-treated pine for a budget build, and spend my extra money on hardware, finish, and drainage before I spent it on decoration. That is the balance that usually works best in American backyards: practical proportions, weather-aware construction, and a top that opens easily enough that people actually use the storage.The best outdoor storage box is not the most complicated one. It is the one that matches the space, protects what matters, and stays easy to live with after the first rainstorm, the first humid week, and the first season change. Build for those conditions, and the box will keep doing its job long after the project itself stops feeling new.