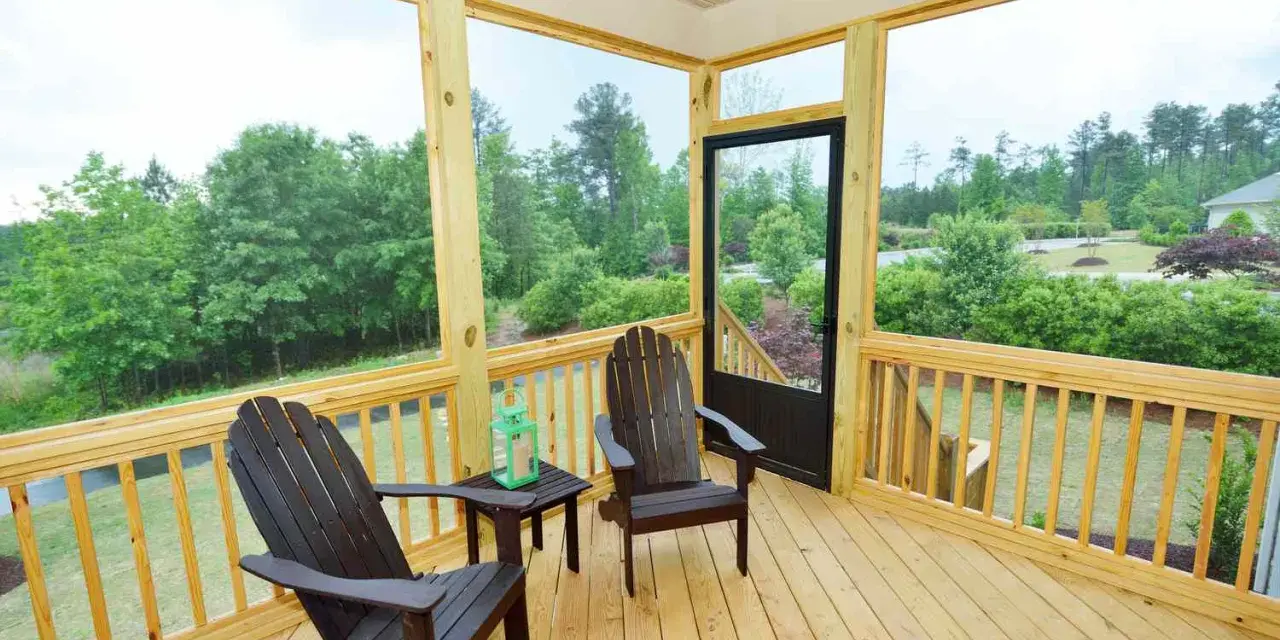
Screening a porch is one of those projects that changes how a house feels without changing its footprint. The practical answer to how to screen in a porch starts with the frame, not the mesh: if the structure is sound, the rest of the job becomes much easier. In the guide below, I walk through the planning, material choices, installation steps, cost ranges, and the small details that keep the enclosure tight through heat, rain, and heavy use.
Key takeaways for a durable screened porch
- Start with the structure. Screens do not fix rot, flex, or bad drainage, so inspect posts, beams, and the roof first.
- Base-and-cap systems are the cleanest DIY option for most existing porches because they hold the mesh securely and look finished.
- Fiberglass screen is the easiest material to work with; aluminum lasts longer, and pet-resistant mesh is worth it where claws or foot traffic are a problem.
- Buy 10% extra screen for trimming and mistakes, and measure every opening more than once before you cut anything.
- Expect costs to vary widely. A screened enclosure on an existing porch is much cheaper than building a new screened structure from scratch.
- Small finishing details matter. Door alignment, edge trim, and tension control are what keep a porch usable after the novelty wears off.
Start with the porch structure, not the screen
I always begin by checking whether the porch can actually support an enclosure. Screens are light, but the system around them is not forgiving if the posts are loose, the beam is undersized, or the floor slopes in a way that traps water. If the porch already has a roof and a solid frame, you are probably in good shape; if it does not, this stops being a screening job and starts becoming a building project.
Look closely at the posts, railings, ledger board, and any exposed wood at the base of the framing. Rot, insect damage, and soft spots need to be repaired before you add screens, because the new work will only hide the problem for a while. I also check flashing and runoff: if water already hits the porch in hard rain, the screens will not solve that, and they may make it harder to notice where moisture is collecting.
One rule saves a lot of frustration: do not trust the mesh to make up for a frame that is out of square. A screen can be pulled tight; a warped opening cannot be made straight by force. Once the structure is solid, you can choose the right screening method with much more confidence.
Choose the screening method that fits the frame
There is more than one way to enclose a porch, and the best choice depends on the shape of the openings, the age of the framing, and how clean you want the finished look to be. For most homeowners, a surface-mounted screening system is the best balance of speed, appearance, and serviceability. Home Depot's installation guidance uses a base-strip and cap-strip setup, which is cleaner than stapling and easier to repair later.
| Method | Best for | Main advantage | Main drawback |
|---|---|---|---|
| Base-and-cap screening system | Existing wood-framed porches with regular openings | Clean finish, easy rescreening, good tension control | Needs reasonably straight framing and careful measuring |
| Individual framed screen panels | Custom openings, uneven bays, or replaceable sections | Strong visual control and simpler panel-by-panel repair | More carpentry work and more cut pieces |
| Stapled screen with trim | Budget repairs or temporary fixes | Lowest upfront cost | Harder to maintain, less polished, and more likely to sag |
Mesh choice matters just as much as the frame. Fiberglass is the easiest material for DIY work because it is flexible and inexpensive. Aluminum is stiffer and more durable, which makes sense on porches that take more wear or sun exposure. Pet-resistant mesh is thicker and less subtle, but it is a practical tradeoff if the lower panels are going to get kicked, scratched, or leaned on. If you live near salt air or want maximum corrosion resistance, stainless steel is the premium option, although it is not the first choice for most projects.
The key is to match the mesh to the problem you are actually trying to solve. If your goal is a quiet sitting porch with normal foot traffic, fiberglass usually wins. If the porch takes abuse, spend more on durability up front and save yourself a full rescreen later.
Measure each opening before you buy materials
Most screening mistakes happen before the first screw goes in. I measure each bay separately, even when the openings look identical, because small differences in width and height become obvious once you start cutting screen and trim. A porch that looks symmetrical from the yard often is not symmetrical at all once you put a tape measure on it.
Use this sequence:
- Measure the width and height of every opening at more than one point.
- Record the smallest dimension for each bay so the finished panel fits without forcing it.
- Sketch the porch and label every opening, post, corner, and door location.
- Buy 10% extra screen for trimming waste, re-cuts, and the occasional mistake.
Stock lengths also matter. Many porch screening systems come in 8-foot sections, and screen rolls are commonly sold in widths from about 3 feet to 8 feet. That means the smartest layout is often the one that minimizes awkward seam positions, not the one that simply uses the fewest pieces. If you have a long run with unusual spacing, think about adding support posts or subdividing the opening before you commit to materials.
I also pay attention to the smallest details people forget: door swing, step clearance, and where furniture will actually move through the opening. A porch can be perfectly measured and still feel wrong if the door hits a chair or the threshold sits too high. Once the layout makes sense on paper, the installation itself becomes much more predictable.
Install the panels so they stay tight
The most reliable DIY approach is the one that puts the screen under controlled tension and then locks it in place without overworking the mesh. The base-strip system does exactly that. In simple terms, spline is the flexible cord that presses the screen into the groove, and the cap strip hides the fasteners while protecting the edge.
Attach the base strips
Start by removing any old screen and hardware. Cut the base strips to fit, then screw them to the porch framing with the fasteners recommended for the system you are using. Do not crank the screws down so hard that the strip bows; a warped base makes the screen harder to tension evenly. At corners, most systems butt together cleanly, so you usually do not need to miter those joints.
Stretch the screen with control
Cut each piece of mesh slightly larger than the opening. Then roll the screen into the top groove first, followed by the sides and the bottom. Keep steady hand tension on the mesh while you work so the weave stays even. If you are using fiberglass, a .175-inch spline is commonly used; aluminum screen typically calls for a .160-inch spline. That small detail matters, because the wrong spline size can leave the mesh loose or crush the edge.
I prefer to work slowly rather than try to pull the screen drum-tight on the first pass. A screen that is pulled too aggressively can distort the weave or pop loose at the corner later. A firm, even tension is better than brute force.
Read Also: Fence Post Installation - Build a Straight, Lasting Fence
Snap on the cap strips
Once the mesh is seated correctly, tap the cap strip into place with a rubber mallet. This gives the porch a finished look and keeps the edge protected from weather and casual contact. If you make a mistake, most systems let you pry the cap off, re-roll the spline, and try again without replacing the whole frame. That repairability is one of the biggest reasons I prefer the modern base-and-cap approach over stapling.
When the last panel is in, step back and check the lines from a few angles. If one bay looks looser than the rest, fix it now. It is much easier to correct tension before the trim and door work are finished.
Finish the edges, door, and weather details
A porch can be screened perfectly and still feel unfinished if the transitions are sloppy. The door is usually where that shows up first. I want a screen door that closes cleanly, latches without rubbing, and does not leave a gap at the bottom edge. If the door drags or sticks, the problem is usually the frame, not the mesh, so adjust the hinges before you blame the screening.
Pay attention to the lower edge of the porch too. If the area gets pets, dropped tools, or a lot of foot traffic, the bottom panels take more abuse than the upper ones. That is where pet-resistant mesh can earn its keep, even if you use fiberglass everywhere else. It is also smart to keep the threshold and any wood trim protected from standing water so the enclosure does not start failing from the bottom up.
Use weatherproofing carefully. I do not like sealing every screen edge with caulk, because the screen system needs to remain serviceable. Instead, focus on the real leak points: flashing, trim joints, and door gaps. In windy or wet climates, a porch that sheds water well will stay cleaner, and the screens will last longer because they are not constantly being hit with debris and moisture.
Small finishing decisions make the space feel intentional. A properly aligned door, a neat corner detail, and a clean transition to the floor do more for daily comfort than decorative extras ever will.
What it costs in 2026 and when to hire a pro
Cost depends on whether you are rescreening an existing structure or building something new. Angi's 2026 pricing snapshot puts a screened enclosure on an existing porch at roughly $2,000 to $4,000, while a new screened porch commonly lands around $25 to $120 per square foot. Permits, when required, often add another $150 to $300, and electrical or flooring upgrades can push the budget higher very quickly.
| Project scope | Typical cost range | When it makes sense |
|---|---|---|
| Screen an existing porch | $2,000 to $4,000 | The roof and structure are already in place and in good condition |
| Build a new screened porch | $25 to $120 per square foot | You need new posts, framing, roof work, or a full addition |
| Permit fees | $150 to $300 | Your local code office requires approval for structural or electrical changes |
I would bring in a pro if the porch is elevated, the framing is not square, the roof needs modification, or you are tying the enclosure into siding, masonry, or electrical work. That is especially true in the U.S., where permit rules vary by city and county and the moment you change structure or wiring, the job may no longer count as simple screening. If the porch is already solid and you only need mesh, a motivated DIYer can handle the work; if the porch needs repairs before it can be screened, the savings shrink fast.
The best budget move is to spend on the parts that are hard to change later: straight framing, quality fasteners, a proper door, and a mesh type that matches your climate and usage. Decorative upgrades are easy to add later. Structural fixes are not.
The small decisions that keep the porch useful for years
The long-term win is not just a porch that looks good on day one. It is a porch that still feels easy to use after the first storm season, the first summer of heavy sun, and the first accidental tear from a chair leg or pet paw. That is why I like to inspect screens every spring and again before fall weather sets in. A quick check for loose spline, lifted cap strips, or small punctures can prevent a minor fix from becoming a full replacement.
Keep the mesh clean with mild soap and water, trim back any plants that brush against the panels, and avoid stacking furniture where it can rub the screen from the inside. If the porch sits in a harsh climate, keep a small repair kit on hand with matching mesh, spline, and a roller tool. That makes it easier to patch damage before it spreads.If I were doing this on my own house, I would spend a little more on straight framing, a solid screen door, and the right mesh for the worst conditions around the porch. Those three choices do more for comfort, durability, and maintenance than any cosmetic upgrade, and they are what turn a screened porch from a one-season project into a space you actually use.