Building DIY fence panels is one of those outdoor projects that looks straightforward until you start dealing with slope, wind, post depth, and local rules. The right approach depends on whether you want privacy, a cleaner front-yard look, or a durable boundary that will not sag after the first wet season. In this guide, I cover the panel styles that work best, the materials I would actually choose, the build sequence, the real-world cost range, and the mistakes that usually shorten a fence’s life.
The best results come from planning the structure before you buy wood
- Solid privacy panels block the most view, but they also catch the most wind.
- Shadowbox panels are a smarter pick on exposed lots because air can move through them.
- Pressure-treated pine is usually the budget-friendly choice; cedar is the cleaner-looking upgrade.
- Posts come first; panels should only go on after the concrete has cured and the line is true.
- Layout matters more than speed if the yard slopes, turns, or has odd dimensions.
Choose a panel style that matches the job
I start with style because it changes everything else: post strength, spacing, wind resistance, and even how much time the fence will take to build. A panel that looks perfect in a flat brochure can be frustrating in a real yard if it fights the grade or loads up in a storm.
| Panel style | Best for | Tradeoff |
|---|---|---|
| Solid privacy panels | Blocking views, pets, and street noise | Highest wind load and the least forgiving on weak posts |
| Shadowbox panels | Privacy with a little airflow | Not fully opaque, so they are a softer visual screen |
| Picket panels | Front-yard boundaries and lighter decorative runs | Less privacy and often less useful for backyard screening |
| Lattice-topped panels | Adding height without building a full wall | The top section can still catch wind if the frame is too light |
| Horizontal slat panels | A cleaner, modern look | Needs straighter lumber and tighter layout than many people expect |
For windy yards, I usually prefer shadowbox or a partially open style unless the posts are oversized and set properly. Solid privacy sections are absolutely doable, but they should be treated like a structural element, not just a decorative finish. Once the style is settled, the next question is what the panels are actually made from.
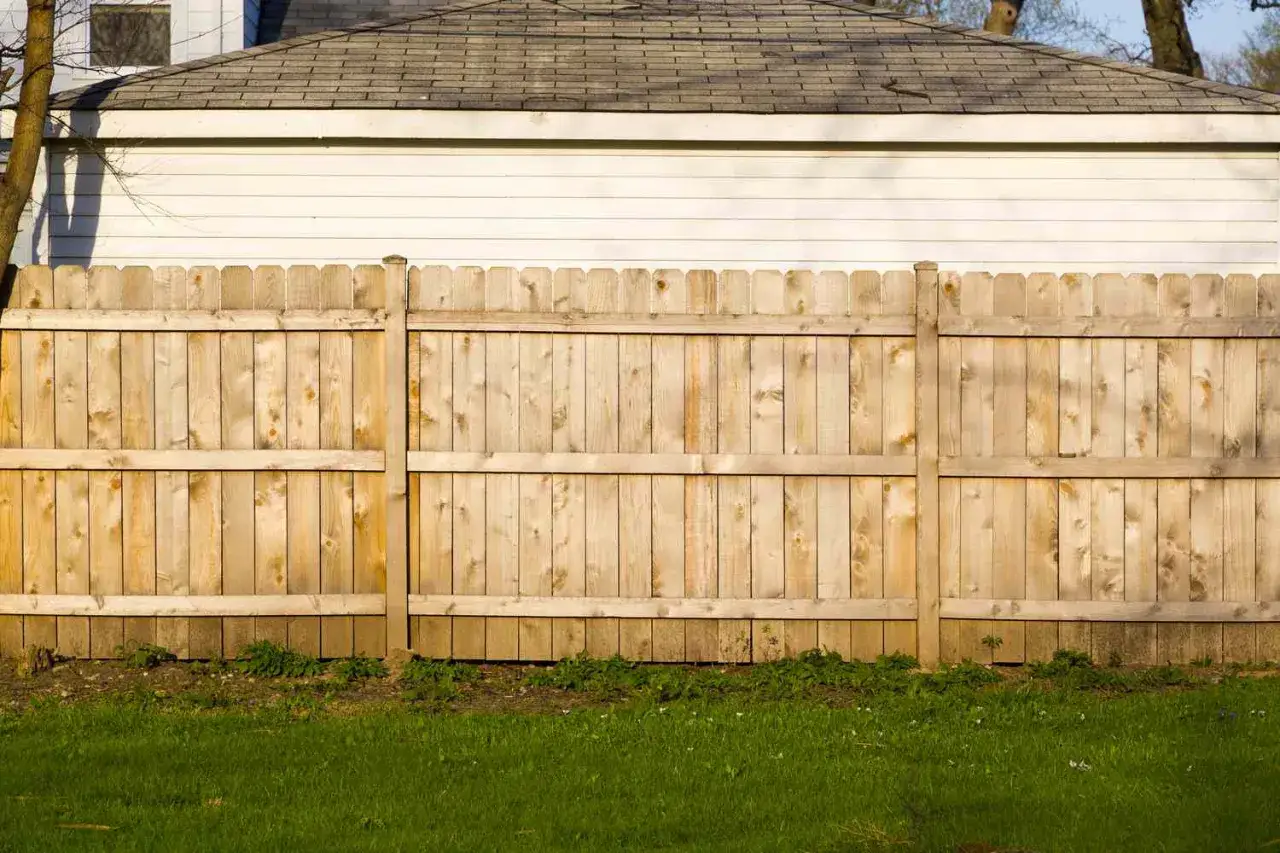
Pick the material and dimensions before you cut a single board
For most homeowners in the U.S., wood is still the easiest material to adapt into custom panels. It cuts cleanly, accepts screws well, and lets you adjust awkward spans without waiting for a proprietary system to arrive. Standard prefabricated panels are commonly sold in 6- or 8-foot lengths, and the most common finished heights are 4, 6, and 8 feet.
| Material | Why I would use it | Watch out for |
|---|---|---|
| Pressure-treated pine | Lowest-cost wood option, easy to cut and fasten | Can twist as it dries and needs sealing or stain |
| Cedar | Cleaner look, better natural resistance, less prone to ugly staining | Costs more and still needs finishing if you want it to stay sharp-looking |
| Composite | Low-maintenance and consistent in appearance | Heavier, pricier, and often tied to a specific system |
| Vinyl | Easy to clean and good for a bright, uniform finish | Less forgiving on slopes and not as flexible to modify on site |
As a rough market reality, recent homeowner cost guides from Family Handyman put pressure-treated pickets around $1 to $4 each and cedar around $1 to $6 each. Better Homes & Gardens places wood fences around $5 to $20 per linear foot, while vinyl and composite commonly sit higher, around $15 to $50 per linear foot. The number that matters most is not the cheapest board price; it is the total cost of the whole run, including posts, concrete, fasteners, stain, and the waste from cuts.
For framing, the nominal lumber sizes matter. A “4x4” post is actually about 3 1/2 by 3 1/2 inches, and a “2x4” rail is about 1 1/2 by 3 1/2 inches. That sounds minor, but it affects hole size, bracket choice, and the way the panel lands against the post. With the material picked, the layout can be done once and done correctly.
Lay out the fence so the panels fit the yard instead of fighting it
The quiet part of fence building is that most of the quality comes before the first board is cut. I would rather spend an extra hour on layout than spend a weekend fixing crooked posts. A neat line starts with clear boundaries, accurate spacing, and a post plan that matches the actual panel width.
- Call 811 before you dig and confirm your property line before you place a single stake.
- Mark the corners with stakes and pull a tight string line between them.
- Square the corners with the 3-4-5 method, which uses a simple right-triangle check to keep the layout true.
- Measure your real panel width, then space the posts to fit that width instead of guessing.
- Dig the holes wide enough for the post and local code requirements, then set corner and gate posts first because they carry the most load.
- In colder regions, set depth according to the frost line; local conditions matter more than a generic rule of thumb.
- Use gravel at the base for drainage, set the post plumb, and brace it until the concrete cures.
One detail I would not skip is hole sizing. A common practical target is a hole about two times the post diameter, with depth driven by local frost requirements and the finished height of the fence. That is not just paperwork trivia; shallow posts are one of the fastest ways to get a fence that leans after one winter. If the yard slopes, mark that before you set the first hole so you know whether the fence will step or rack.
Stepping means each section stays level and drops at the post. Racking means the panel follows the grade. Racking can look cleaner on gentle slopes, while stepping usually works better on steeper runs and with fully framed sections. Once the posts are set, the actual panel build becomes much easier.
Build the panels on flat ground, not while juggling them on the posts
I prefer to assemble the panels on a driveway, garage floor, or another flat surface. It is simply easier to square a frame on the ground than to try to force it into shape after it is hanging between posts. A panel that starts square is far less likely to twist, rack, or gap unevenly later.
- Cut the top and bottom rails to the same length and check each one before fastening anything.
- Clamp the frame square and compare the diagonals until they match.
- Add a middle rail if the panel is taller than 4 feet or if the pickets are heavy enough to need more support.
- Keep the top and bottom rails roughly 6 inches in from the panel edges so the frame has enough bite.
- Use exterior screws or galvanized fasteners, and pre-drill the rail ends so the wood does not split.
- Attach pickets with a spacer block so the spacing stays consistent from top to bottom.
- Keep the bottom edge off the soil; direct contact with damp ground shortens the life of any wood fence.
On a straight run, this is mostly repetitive work. On a sloped site, it becomes a design decision. The point is not to force every panel into the same shape. The point is to keep the line visually clean and structurally honest. That is why I prefer making a test panel first if the run has any odd transitions or unusual widths.
For a taller fence, the structure matters even more. A 6-foot privacy section should not be treated like a decorative border, because it behaves more like a sail in the wind. Strong posts, tight rail joints, and careful fastening do more for longevity than any stain color ever will.
Budget for materials, tools, and the workday you are actually buying
DIY saves money mainly on labor, not on the lumber itself. That is the part people underestimate. A contractor quote can look high because it bundles layout, digging, post setting, cleanup, and warranty risk into one number; when you do it yourself, those tasks just move into your weekend.
For a basic wood run, I would budget for the following:
- Posts, rails, and pickets for the full line, plus about 10% extra for waste and bad cuts.
- Concrete mix and gravel for every post hole.
- Exterior screws or galvanized nails sized for the actual lumber thickness.
- A post-hole digger or auger, a drill/driver, a circular saw, a level, a tape measure, stakes, and string.
- Stain, sealer, or paint if the fence is wood and you want it to last beyond the first few seasons.
On time, I usually think in two stages: layout and setting on one side, then panel fabrication and hanging on the other. A modest backyard section can take a full weekend to prepare, and concrete curing adds waiting time before the panels should be loaded. If the run includes a gate, expect the timeline to stretch because gates need extra alignment and hardware tuning.
The most practical cost range is still the broad one: wood tends to be the lower-cost path, while vinyl and composite cost more up front but reduce maintenance later. That tradeoff is worth considering before you buy a single board, because the cheapest fence to build is not always the cheapest fence to own.
Avoid the mistakes that turn a fresh fence into a repair job
Most early fence failures come from a small group of predictable mistakes. I see the same ones over and over: posts that were never deep or straight enough, panels that were built too lightly for the wind, and wood that was left unprotected where it meets the ground. None of those problems are mysterious, which is exactly why they are frustrating.
- Skipping permit and boundary checks can create expensive do-overs even when the fence itself is well built.
- Setting posts too shallow leads to leaning and heaving, especially in colder climates or wet soil.
- Ignoring wind load turns a solid privacy fence into a lever during storms.
- Using weak or mixed fasteners can cause loose rails and squeaks long before the wood fails.
- Fastening wet or warped lumber often locks distortion into the finished panel.
- Letting wood sit in soil speeds up rot far more than most people expect.
Another common problem is pretending every yard is flat. On a mild slope, a racked panel can look elegant. On a steeper slope, a stepped layout is usually cleaner and easier to maintain. The wrong choice is not always structurally fatal, but it often looks awkward enough that people want to rebuild it later. A fence should look deliberate, not improvised.
There is also a finishing mistake I would avoid: staining too early. Pressure-treated lumber often needs time to dry before it accepts finish properly. Rush that step and the coating can fail unevenly. Once the panels are up, the fence still needs a little care to stay sharp.
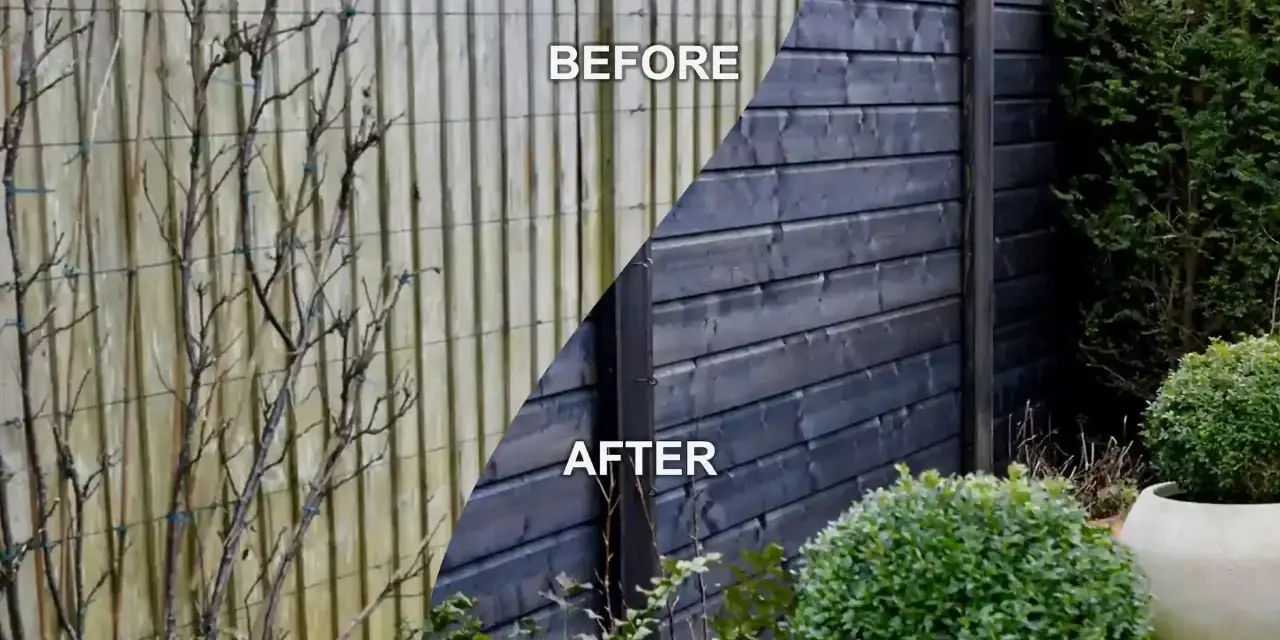
The smartest finishing moves before weather starts working on the wood
The last stage is the difference between a fence that looks new for one season and one that still looks intentional after a few years. I treat this as protection work, not decoration. The goal is to slow moisture entry, reduce UV damage, and make hardware easier to maintain later.
- Apply wood preservative around base posts and any cut ends that were exposed during assembly.
- Wait for pressure-treated lumber to dry before staining or painting it.
- Use a stain or finish that matches the exposure level of the fence, not just the color you like on day one.
- Add post caps if you want a small upgrade that helps shed water and reduces end-grain exposure.
- Plan to refresh coatings every 2 to 3 years if the fence is fully exposed to sun and rain.
- Check fasteners after the first season, because wood movement can loosen a few connections even on a well-built run.
If you want the lowest-maintenance route, the honest answer is not always more labor on custom panels. Sometimes it is choosing a pre-engineered vinyl or composite system and concentrating your effort on layout, posts, and alignment. That is the part of the job that creates the straight line people notice first. The finish can be pretty, but the structure is what makes it last.
In practice, the cleanest results come from treating the fence as a system: layout, posts, rails, panels, and finish all have to agree with each other. If you get the line true, choose a panel style that suits the site, and protect the wood from the first day, the fence stops feeling like a chore and starts looking like a real improvement to the yard.