Fascia board replacement is one of those exterior jobs that looks simple from the driveway and becomes much more serious once you climb a ladder. The board at the roof edge does more than finish the trim: it supports the gutter line, protects the rafter tails, and helps keep wind-driven rain out of the roof structure. In this guide, I cover the warning signs, the actual replacement sequence, the materials that make sense in U.S. homes, and what the job usually costs in 2026.
The practical takeaways before any roof-edge work begins
- Look beyond the paint. Soft wood, sagging gutters, and dark staining usually mean moisture has already reached the edge framing.
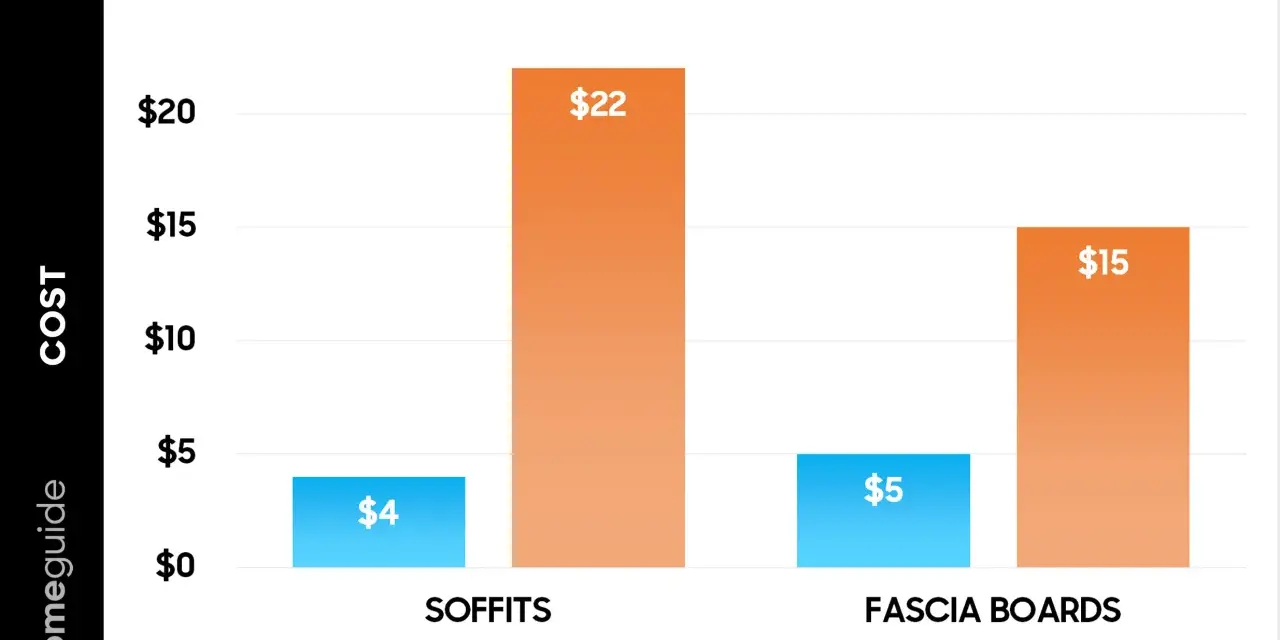
- Most jobs are priced by linear foot. Straightforward U.S. replacements commonly land around $7 to $22 per linear foot, with difficult access pushing higher.
- Wood is cheap, aluminum is durable. Wrapped systems can reduce maintenance, but only if the underlying board is still sound.
- Replacement is not just trim work. Gutters and drip edge usually come off first, and hidden rot must be checked before new boards go up.
- Safety changes the decision. Steep roofs, two-story walls, and damaged rafter tails are strong reasons to hire a roofer.
What fascia boards do and why they fail
At the roof edge, the fascia is the vertical board that closes off the ends of the rafters or trusses. It gives the eaves a finished look, but its real job is protection: the board helps hold gutters, keeps pests from nesting in open cavities, and limits direct exposure to rain and snow. I treat fascia problems as water-management problems first and trim problems second, because the damage usually starts long before the paint fails.
That is also why this part of the roof is so easy to underestimate. The soffit, which is the underside of the overhang, and the drip edge, the metal flashing that directs water into the gutters, work with the fascia as one system. When one piece stops doing its job, the others pick up the slack until something gives.
Common failure points are predictable: clogged gutters, persistent overflow, damaged drip edge, ice dams, and untreated nail holes that let water reach bare wood. Once the board starts to soften, warp, or split, the next question is whether the damage is isolated or already moving into the framing behind it.
When repair is enough and when replacement is the better call
I would still consider a repair if the damage is limited to a short section, the board is still firm, and the sub-fascia and rafter tails are dry. A replacement becomes the better call when the wood feels soft, fasteners no longer hold, or the gutter line is pulling away from the roof edge.
- Soft or spongy wood means rot has likely moved past the surface.
- Paint that keeps blistering or peeling usually signals recurring moisture.
- Gutters that sag or separate often mean the board is no longer gripping the hangers properly.
- Dark stains, mold, or insect activity suggest the area is staying wet longer than it should.
- Cracks and splits at corners often spread after one season of freeze-thaw cycles.
My rule is simple: if the board is failing in one short spot and the surrounding wood is dry, patching may buy time; if several sections are compromised, full replacement is usually the cleaner and cheaper long-term answer. That decision determines how much of the roof edge has to come apart, which is why the sequence matters.

The replacement sequence I would follow
1. Remove the attached system
Start by taking down gutters, downspouts near the work zone, and any existing drip edge sections. Save what you can, but do not force bent metal back into service if it is already rusted or warped. Working in pairs makes this safer and keeps long gutter runs from twisting as they come down.
2. Strip the damaged board and inspect the structure
Cut out old caulk, then pry the fascia free near the nail lines. If a board has to come down in sections, that is usually fine; trying to save a rotten full-length piece is often more trouble than it is worth. Once the board is off, check the sub-fascia and rafter tails for softness, punky wood, or insect damage. This is the point where many jobs stop being a trim project and become a framing repair.
3. Fit the new board correctly
Measure twice, cut once, and dry-fit the first piece before fastening anything permanently. Use corrosion-resistant fasteners, keep joints tight, and prime or seal cut ends before installation. If you are working with wood, cedar and redwood hold up better in damp conditions than basic pine, but any wood board needs proper primer and paint. Wrapped options can work too, but only when the underlying framing is still in good shape.
Read Also: Crystal Clear Pool Water - Your Ultimate Guide
4. Seal, paint, and put the roof edge back together
Caulk joints where boards meet, then finish with primer and two coats of paint if you are using bare wood. Reinstall the drip edge so it directs water into the gutter line, not behind it. When the gutters go back up, check the slope carefully; a new board does not help much if the gutter still overflows onto the fascia during every heavy rain.
Once the parts are back in place, the next big question is which material will give you the best balance of durability, cost, and maintenance.
Which material makes sense for your roof edge
The best choice depends on climate, style, and how much upkeep you want to own. In older U.S. neighborhoods, I often see wood chosen for appearance and easy matching; in wetter or lower-maintenance projects, aluminum-clad or fully wrapped systems usually win because they shed water better and reduce repainting.
| Material | Best for | Strengths | Trade-offs |
|---|---|---|---|
| Wood | Budget-conscious repairs and traditional homes | Easy to cut, easy to match, low material cost | Needs priming, painting, and more frequent inspection for rot |
| Cedar or redwood | Homes that need a more moisture-tolerant wood option | Better natural resistance to decay than basic pine | Costs more and still benefits from paint or sealant |
| Vinyl or PVC | Low-maintenance projects in milder climates | Moisture resistant and does not need paint | Can look less traditional and may move with temperature swings |
| Aluminum | Long-term durability and wrapped systems | Low maintenance, weather resistant, good for capping existing trim | Higher upfront cost and can dent |
| Fiber cement | Homes that need durability and a paintable surface | Stable, durable, and good at holding paint | Heavier and more labor-intensive to install |
One detail worth remembering: wrapped or capped systems are not a fix for rotten framing. They are a protection layer, not a structural rescue. If the wood underneath is already failing, the board still has to come out.
That material choice feeds directly into the budget, because labor and access usually matter as much as the board itself.
What the job usually costs in the United States
Current 2026 U.S. cost guides put straightforward fascia replacement around $7 to $22 per linear foot, with taller or more complex roofs climbing to about $40 per linear foot. The wide range makes sense once you remember that this is ladder work at the roof edge, not a simple piece of interior trim.
| Cost item | Typical range | What pushes it higher |
|---|---|---|
| Materials and labor for a straightforward run | $7 to $22 per linear foot | Easy access, short runs, simple roofline |
| Complex or tall roofs | Up to about $40 per linear foot | Two-story walls, steep pitch, awkward corners, scaffold or lift time |
| Material only | Wood $1 to $3, vinyl $5 to $8, aluminum $8 to $20 per linear foot | Upgrades in durability and finish |
| DIY supplies on a modest project | About $600 | Primer, paint, fasteners, caulk, replacement drip edge, and tool rental |
| Full-home project | Often in the low thousands | Hidden rot, gutter replacement, and longer linear footage |
The hidden costs are the ones homeowners miss first: replacing sections of drip edge, removing and reinstalling gutters, patching rafter tails, and paying for disposal if the old board is badly rotted. If those pieces are still sound and the run is short, the bill stays much closer to the lower end. If not, the number can rise fast, which is why I like to inspect before I ever talk about final price.
That cost gap is also the best clue for deciding whether this stays a do-it-yourself project or becomes a job for a roofing crew.
When I would do it myself and when I would call a pro
I would consider doing the work myself only if the roof is low, the run is short, and I have a second person to help with lifting and ladder control. A one-story house with one damaged section is a very different problem from a steep two-story gable with rotten corners and integrated gutters.
- DIY can make sense when the damage is localized, the board is easy to reach, and the framing underneath is still firm.
- Hire a pro when the roof is steep, the home is tall, the gutters are hard to remove cleanly, or the board is carrying obvious hidden damage.
- Bring in a roofer immediately if you see soft rafter tails, active leaks, mold in the attic, or signs that multiple roof-edge components failed together.
Safety is not a side note here. Proper ladder setup, gloves, eye protection, and a roof-safe work plan matter, but they do not remove the risk of working high off the ground with long boards and metal pieces. In practical terms, if the job requires guessing about hidden rot or working in a place where one mistake becomes a fall, I would rather hand it to a licensed roofer or a gutter specialist.
Once the new board is in place, maintenance is what determines whether you get ten good years out of it or another repair much sooner.
How to keep the new board dry long after the repair
The fastest way to shorten the life of a new fascia is to ignore the water around it. I would keep gutters clear, check that downspouts move water away from the foundation, and inspect the drip edge after major storms or ice events. In climates with heavy rain or freeze-thaw cycles, those checks matter more than most people think.
For wood fascia, repaint or reseal before bare spots spread. For wrapped systems, look for loose seams, bent metal, or areas where fasteners have backed out. If gutters start to sag again, that is not a cosmetic issue; it is often the first sign that water has started working on the board underneath.
If you treat the roof edge as part of the drainage system instead of just exterior trim, the repair lasts longer and costs less over time. That is the difference between a one-time fix and a cycle of repeated damage.