Noise control works best when you think like a builder, not like a decorator. Knowing how to soundproof a room starts with a simple rule: stop air leaks first, then add mass, then reduce vibration paths. In practice, that means sealing gaps, upgrading the weakest openings, and only then spending money on heavier construction.
The fixes that make the biggest difference first
- Seal gaps before you buy materials. Small leaks around doors, windows, trim, and outlets often cause the biggest losses.
- Upgrade the weak points. Hollow-core doors and leaky windows usually matter more than decorative wall panels.
- Know the difference between absorption and isolation. Foam and fabric reduce echo, but they do little to stop outside noise.
- Use mass, damping, and decoupling for real transmission control. Those are the tools that help when sound is moving through the structure itself.
- Expect budgets to vary widely. Basic sealing can stay under $100, while ceiling or wall rebuilds can move into the low thousands.
- Match the fix to the noise. Voices, traffic, footsteps, and bass all travel differently and need different solutions.
What soundproofing really changes in a room
I usually separate the problem into two jobs. Sound isolation keeps noise from entering or leaving the room, while acoustic treatment improves how the room sounds inside. They are related, but they are not the same thing.
That difference matters because a lot of products look impressive and do very little for transmission. Acoustic foam can tame echo, for example, but it will not turn a thin wall into a quiet one. For blocking sound, I care more about three things: mass, which makes it harder for sound to move through; damping, which reduces vibration; and decoupling, which breaks the direct path between surfaces.
Two ratings come up often in this work. STC describes how well an assembly blocks airborne sound like voices, TV, and music. NRC describes how much a material absorbs inside the room. If you remember only one rule, make it this one: use STC-minded fixes when the goal is less noise in or out, and use NRC-minded materials when the goal is less echo.
Once that distinction is clear, the rest of the job becomes much easier to prioritize.
Start with the small openings that leak the most noise
If I had to improve one room on a tight budget, I would start with air sealing. Sound behaves like air in the sense that it follows the path of least resistance, so a small gap can undo a lot of expensive materials.
In many U.S. homes, the usual weak points are the perimeter of the door, window trim, outlets on shared walls, baseboards, and penetrations for pipes or cables. If you can feel a draft, there is a good chance sound is using that path too.
- Door perimeter - Add weatherstripping and a door sweep. Typical DIY cost is about $25 to $100, and the job usually takes 1 to 2 hours.
- Window trim - Seal cracks with acoustic caulk or high-quality paintable caulk. Expect roughly $20 to $60 for a room, depending on how many gaps you need to close.
- Outlet and switch boxes - Use foam gaskets behind the cover plates. These are cheap, usually under $20 for a room, and they help on shared walls.
- Baseboards and casing - Caulk hairline gaps where trim meets drywall. This is low-cost work, but it removes a surprisingly common leak path.
- HVAC and pipe penetrations - Seal around the opening, but do not block ventilation or combustion requirements. This is one place where sound control has to respect the room’s other needs.
I like this step because it rarely wastes money. Even if the room still needs larger upgrades later, sealing the leaks improves every other layer that comes after it.
Once those openings are closed, the door and window assemblies themselves decide how much more noise you can stop.
Use the right upgrade for doors and windows
Doors and windows are usually the weakest parts of the envelope, especially in older homes and apartments. A hollow-core door looks normal, but acoustically it behaves like a much thinner barrier than a solid-core unit. Windows are similar: a single pane with loose trim can leak a lot of traffic noise, even if the wall around it is fairly solid.
| Upgrade | Best use | Typical DIY cost | What it does well | Main limit |
|---|---|---|---|---|
| Weatherstripping and door sweep | Gaps around an existing door | $25 to $100 | Closes air leaks and stops rattling | Does not change the door’s mass |
| Solid-core door | Hallway noise, voices, TV sound | $150 to $500+ for the slab | Adds real mass and improves blocking | Still leaks if the perimeter is loose |
| Door jamb seal kit | Rooms where the perimeter matters more than the slab | $50 to $200 | Creates a tighter seal than basic foam strips | Needs careful installation |
| Window insert or secondary glazing | Traffic, sirens, lawn equipment | $75 to $350 per window for DIY inserts | Adds an air gap and another barrier | Heavier curtains cannot match it |
| Heavy curtains | Light to moderate noise and echo | $40 to $200 per window | Softens reflections and helps a little with high frequencies | Not true sound isolation |
The biggest practical mistake I see is buying soft furnishings before fixing the opening itself. A thick curtain may make the room feel calmer, but it will not compensate for a leaky door or a single-pane window with loose trim.
If the room is still too loud after the openings are sealed and upgraded, the problem is usually in the wall or ceiling assembly itself.
Add mass and damping when the wall itself is the problem
When sound keeps getting through after the easy leaks are fixed, I move to the structure. This is where construction details matter more than accessories. You are trying to slow vibration, absorb some of it in the cavity, and keep one side of the assembly from shaking the other side directly.
| Material or method | What it does | Best use | Typical DIY cost |
|---|---|---|---|
| Mineral wool in cavities | Damps resonance inside wall or ceiling voids | Open walls or ceilings during renovation | About $1 to $2.50 per sq ft of wall area |
| Extra drywall | Adds mass | Major wall or ceiling upgrades | Roughly $1.50 to $4 per sq ft installed with materials |
| Damping compound | Turns vibration into heat between two rigid layers | New drywall layers | Often adds a noticeable premium to the drywall layer |
| Mass-loaded vinyl | Adds limp mass in a thinner profile | Tight retrofits where thickness is limited | Usually one of the pricier retrofit options |
| Resilient channel or isolation clips | Decouples drywall from the framing | Walls and ceilings where vibration is the issue | Moderate material cost, higher labor if you are learning as you go |
Mineral wool is useful because it helps control resonance inside the cavity, but it is not a magic barrier by itself. Extra drywall adds mass, and damping compound helps that mass work better. Resilient channel and isolation clips matter because they reduce the direct mechanical path that carries vibration from studs or joists into the finished surface.
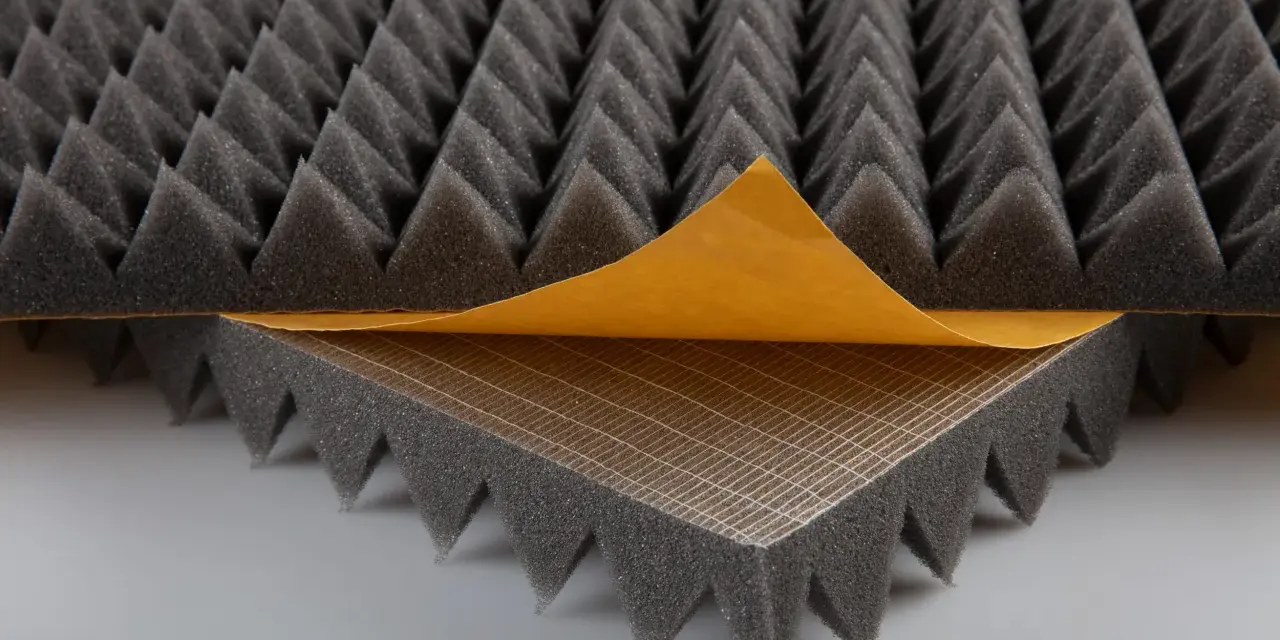
I would not use acoustic foam panels as the centerpiece of a soundproofing plan. Foam absorbs reflections inside the room; it does not meaningfully block sound transmission through a wall. That is why it can make a room sound less echoey while the neighbor next door still hears the same TV through the partition.
If you are opening the wall anyway, this is the point where a drywall-based assembly can finally make a real difference.
Quiet floors and ceilings without rebuilding everything
Floors and ceilings matter because not all noise travels sideways. Footsteps, chair movement, dropped objects, and low-frequency vibration often come through the structure above or below the room, not through the wall in front of you. That is where impact noise becomes harder to solve.
For floors, the easiest wins are soft and dense. A thick area rug with a substantial pad can help a lot with footfall and room echo. Carpet with quality underlayment is even better if you are already replacing the floor. If you are working on a new floor system, acoustic underlayment can improve the result, but it should be paired with a floor covering that actually has some mass.
For ceilings, the fixes are more construction-heavy. Adding insulation in an open joist cavity helps, but the bigger gains usually come from decoupling the ceiling and adding a second layer of drywall. That is why ceiling sound control gets expensive quickly: you are fighting vibration through framing members, not just air gaps.
- Rugs and pads - Good for footfall and echo, not enough for heavy bass or loud upstairs noise.
- Carpet and underlayment - Better than bare wood or laminate when the goal is to soften impact sound.
- Acoustic underlayment under new flooring - Useful in remodels, especially in condos or second floors.
- Ceiling clips and channel systems - More effective when footsteps or voices from above are the main complaint.
- Double drywall on a ceiling - Adds mass, but it works best when paired with damping or decoupling.
When the noise is overhead, I treat the ceiling as a structure, not a surface. That mindset prevents a lot of wasted spending on products that are too light to matter.
Knowing the noise type helps even more, because different sources behave differently in the real world.
Match the fix to the kind of noise you hear
One reason soundproofing feels confusing is that people talk about it as if every noise were the same. It is not. Speech, traffic, bass, and footsteps all travel differently, so the best fix changes with the problem.
| Noise problem | What usually works best | What usually disappoints | Practical note |
|---|---|---|---|
| Voices or TV from the next room | Seal gaps, upgrade the door, add mass to the wall if needed | Thin foam panels and light curtains | Air leaks matter more than most people expect |
| Traffic, sirens, or leaf blowers | Window inserts, perimeter sealing, heavier glazing if replacing windows | Decorative panels on the opposite wall | Windows are often the dominant weak point |
| Footsteps from above | Rugs, carpet pad, ceiling decoupling, added drywall | Wall panels and curtains | This is impact noise, so structure matters more than absorption |
| Music or bass | Mass, damping, and decoupling together | Single layers of soft material | Low frequencies are harder to stop and need more build-up |
| Echo inside the room | Rugs, curtains, bookcases, fabric panels | Heavy structural work done only for acoustics | This is where NRC-style treatment helps more than isolation |
That last row is important. A room can sound bad because of echo, or because sound is leaking through the shell, and those are different jobs. I would never spend renovation money on structural fixes when the real problem is just a hard, reflective room surface.
That brings me to the mistakes that waste the most money.
Where homeowners waste money and how I avoid it
Most bad soundproofing jobs fail for the same few reasons. The first is buying the wrong product. The second is skipping the weakest point in the room. The third is expecting one material to solve a system problem.
- Buying acoustic foam for isolation - Foam helps with echo, not transmission.
- Ignoring flanking paths - Flanking paths are side routes sound takes through ceilings, floors, ducts, and framing, not straight through the wall you can see.
- Upgrading the wall but not the door - A strong wall with a leaky door still performs poorly.
- Overlooking ventilation - A room that is too sealed can become stuffy or violate code requirements.
- Choosing looks over function - A decorative panel can improve the feel of the room while doing almost nothing for noise control.
- Expecting perfection from a light retrofit - Some noise reduction is realistic; total silence usually is not without major construction.
If I had to name the most common waste, it would be this: people buy visible products before they fix invisible leaks. A $40 sweep and a few tubes of sealant often do more than a wall of thin panels.
Once you avoid those traps, the right order of work becomes much clearer.
A quieter room starts with the weakest link
For most homes, I would use a simple order. First, seal every obvious gap. Second, fix the door or window that leaks the most. Third, add soft furnishings if the room also has echo. Fourth, move to mass, damping, and decoupling only if the room still feels too exposed.
That order keeps the budget focused where it changes the sound. A basic sealing job can stay under $100. A better door, curtains, or rug setup often lands somewhere in the $100 to $600 range. Once you move into wall or ceiling construction, the price can climb into the low thousands fast, especially if a contractor is involved.
If the room is in a rental, I would stay with reversible fixes unless you have written permission to do more. If it is your own house and the noise is severe, I would treat the opening, the shell, and the flanking paths as one system instead of one product problem. That is the practical answer to how to soundproof a room without wasting money.