Replacing a worn or outdated door handle is one of the easiest home repairs to get right, and one of the easiest to botch if you skip the measurements. This guide walks through the full process: choosing the right replacement, removing the old hardware cleanly, installing the new set, and fixing the small alignment issues that usually cause trouble later. I’m keeping it practical and US-focused, so you can finish the job without guessing at parts or forcing anything into place.
The quick version before you start
- Match the hardware type first whether you need a passage, privacy, keyed entry, or dummy set.
- Measure the backset and door thickness before buying anything new.
- Most US doors use a 2-1/8-inch bore and a 2-3/8-inch or 2-3/4-inch backset.
- Replacement usually takes 20 to 45 minutes if the door already has the correct holes.
- Do not force the latch if the new handle does not line up; fix the fit instead.
- Test the door several times before you call the job done.
What matters before you buy the replacement
The first mistake I see is people buying a handle because it looks right, then discovering it does not match the door’s function. Interior and exterior hardware are not interchangeable in the way most people expect. A hallway door, a bathroom door, and a front entry door all need different types of trim and, often, different latch assemblies.
| Handle type | Best use | What to watch for |
|---|---|---|
| Passage | Closets, hallways, rooms without locks | No locking function; easiest swap if the door already has standard holes |
| Privacy | Bathrooms and bedrooms | Locks from the inside only; make sure the emergency release matches your set |
| Keyed entry | Exterior doors and some secure interior spaces | Must match the latch, strike plate, and door thickness |
| Dummy | Closet pulls, inactive door panels, decorative use | Does not latch; often mounted differently from working hardware |
For lever-style handles, I also check whether the set is reversible or handed. A reversible lever can work on either side after you swap the parts correctly, which is convenient if you are replacing a worn unit. If you are buying for a front door, pay extra attention to finish, security grade, and whether the new set includes a deadbolt or only the handle portion. That decision matters more than the color of the metal, and it leads directly into the measurements you need next.
Measure the door and latch so the replacement fits
Before you remove the old hardware, take a few measurements. They take less than five minutes and save far more time than returning a wrong part. In the US, most residential doors use a 2-1/8-inch bore hole for the handle and a backset of either 2-3/8 inches or 2-3/4 inches. The backset is the distance from the edge of the door to the center of the hole.
- Door thickness: many interior doors are 1-3/8 inches thick, while many exterior doors are 1-3/4 inches thick.
- Backset: measure from the door edge to the center of the existing bore hole.
- Latch size: check whether the latch is adjustable or fixed.
- Door swing: confirm whether the door opens left or right, especially with lever handles and entry sets.
If your existing hardware already fits well, I prefer to buy a replacement with an adjustable latch. That gives you more room for error and is useful when the old handle has worn holes or the door is slightly out of square. If the current set is an older mortise lock or an odd antique pattern, stop here and match the style carefully before you start unscrewing anything. The wrong replacement can turn a 30-minute task into a repair project. Once the fit is confirmed, removal is straightforward.
Remove the old handle cleanly
Removing a handle is usually simple, but the exact method depends on how it was fastened. I like to keep a small tray or magnetic bowl nearby so the screws do not disappear into the floor trim. If the door is painted, score around the trim gently with a utility knife first so the finish does not chip when you lift the plates.
- Open the door and keep it steady with your free hand or a wedge under the bottom edge.
- Look for a visible set screw, usually on the underside or inside edge of the lever or knob.
- If there is a small release hole, press the detent with a paperclip, pin, or small screwdriver.
- Pull both sides of the handle apart once the retaining point is released.
- Remove the two long through-bolts or faceplate screws, if your set uses them.
- Slide the latch out of the edge of the door.
- Check the strike plate on the jamb and keep it if the new set uses the same size.
The main thing I avoid is prying against the wood. If the trim plate does not come off easily, you are probably missing a hidden screw or release point, not fighting a stubborn part. Forcing it is how you enlarge the hole before you have even installed the new hardware. With the old set removed, you can focus on installing the replacement in the right order.
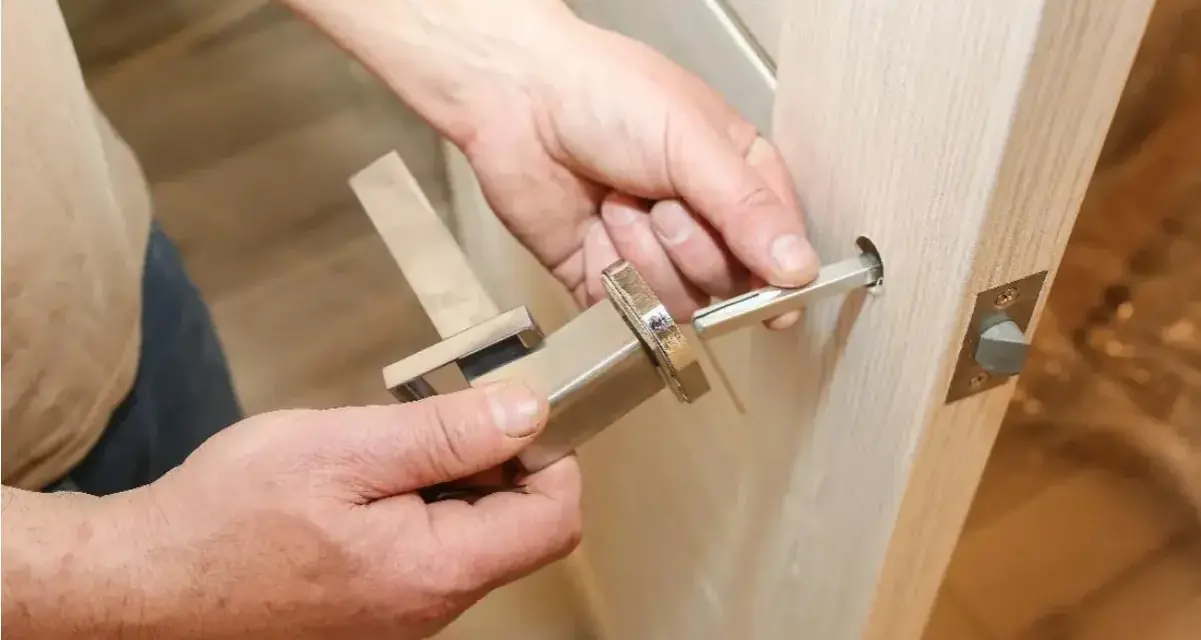
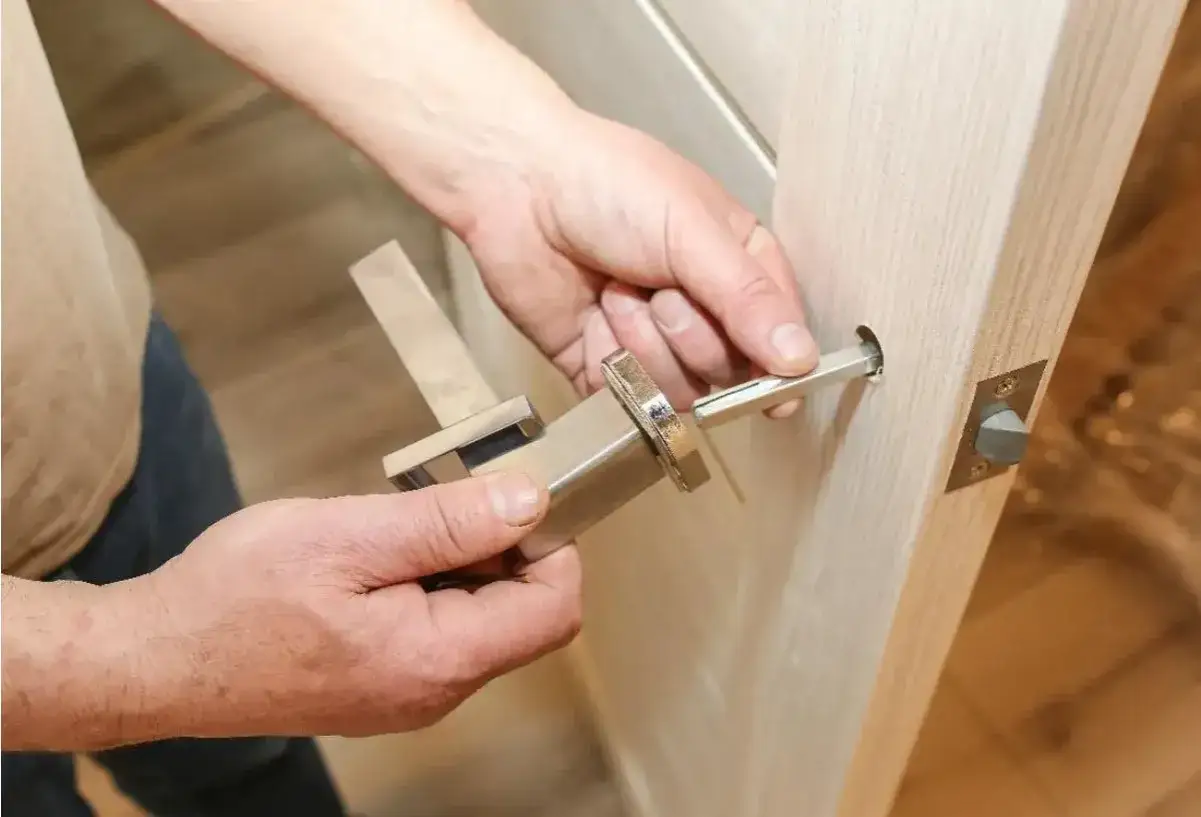
Install the new handle and latch
Installation is mostly about alignment. The parts will usually fit if you matched the backset and door thickness, but a few millimeters of misalignment can make the handle feel cheap or make the latch bind. I always dry-fit the latch first and test the handle before fully tightening the screws.
- Insert the new latch into the edge of the door, with the beveled side facing the strike plate.
- Adjust the backset on the latch if the model allows it.
- Secure the latch with the provided screws, but do not overtighten them yet.
- Slide the exterior and interior handle halves into place through the bore hole.
- Line up the spindle or connecting shaft so both sides engage properly.
- Install the through-bolts or mounting screws and tighten them evenly.
- Cycle the handle several times before tightening everything fully.
On some lever sets, the handles need to be swapped left-to-right so the lever points the correct way for the door handing. That detail is easy to miss, and it is one reason people think the product is defective when it is not. If the handle feels loose after installation, tighten the mounting screws again rather than adding washers or improvising with random spacers. A good install feels solid without being crushed into the door skin. Once the hardware is on, the final step is making sure the latch and strike plate are cooperating.
Fix alignment problems before they become annoying
Most post-install complaints are not about the handle itself. They are about the latch not catching, the door rubbing, or the strike plate sitting a few millimeters too high or too low. If the new handle closes but the latch does not fully engage, look at the strike before anything else.
| Symptom | Likely cause | Practical fix |
|---|---|---|
| Latch will not catch | Strike plate is out of alignment | Loosen the plate, shift it slightly, then retighten |
| Door sticks or scrapes | Door is swollen, warped, or the latch is sitting too deep | Check hinges, then confirm the latch size and backset |
| Handle feels wobbly | Mounting screws are not fully seated | Tighten evenly from both sides of the door |
| Latch only works if the door is slammed | Strike opening is too small or too far from the latch | Reposition the strike or file the opening slightly |
I only file the strike plate as a last small adjustment, and I do it carefully. If you need to remove a lot of material, the real problem is likely the position of the plate or a hinge that has sagged over time. For exterior doors, I am stricter about this than I am with interior doors because a poor latch fit affects both security and weather sealing. If the door is fire-rated, heavily warped, or built with unusual hardware, that is the point where a professional replacement makes more sense than repeated adjustments.
Make the installation last with a few final checks
After the new handle is mounted, I test it more than once. I open and close the door slowly, then with normal use, then a few more times with the latch under pressure. That tells me whether the latch is smooth or just barely catching. I also make sure the screws are not overcompressed into the door, because a handle that starts loose on day one usually gets worse, not better.
One habit I recommend is saving the old hardware until the new set has passed a full test. If the replacement proves incompatible, or if the finish does not suit the room, you have a fallback while you reorder. Keep the old screws too, even if you do not reuse them immediately; sometimes the included fasteners are not the best match for older doors. A little patience here prevents a second round of drilling, patching, and repainting later.
If you want the job to look finished rather than merely installed, clean the fingerprints off the new finish, tighten the strike plate, and make sure the lever sits level. Those small details are what separate a quick swap from a proper repair, and they are usually the difference between a handle that feels right and one that annoys you every time you open the door.