What matters most before you start
- Start with the least aggressive method that can still lift the rust.
- Light surface rust often responds to vinegar, baking soda, or an oxalic-acid cleaner; heavier buildup usually needs abrasion or a commercial remover.
- Drying is part of the repair; leaving bare metal damp can trigger flash rust almost immediately.
- Stainless steel, cast iron, plated parts, and painted surfaces all need different handling.
- After cleaning, protect the surface with oil, wax, primer, or paint depending on where the item lives.
Why rust behaves differently on different metals
Rust is the flaky orange-brown corrosion that forms when iron or steel meets moisture and oxygen. That means the real issue is not just the stain on top; it is the metal underneath slowly breaking down. I separate jobs into three buckets: light surface rust, rust that has started to bite into the metal, and deep corrosion with pitting or flaking.
That distinction matters because surface rust can often be lifted with mild cleaners, while pitted rust may need sanding, a rust converter, or even replacement if the part is structural. Stainless steel is a special case: it resists corrosion far better than plain steel, but it can still get rust spots from contamination or damaged finish. Once you know what you are dealing with, the next step is choosing the method that fits the level of damage instead of overworking the surface.
Which method works for which kind of rust
I usually pick a method by looking at three things: how much rust is present, how delicate the finish is, and whether the part can be soaked, scrubbed, or only wiped in place. The table below gives a practical starting point.
| Method | Best for | Typical time | Approximate cost | Main tradeoff |
|---|---|---|---|---|
| Dish soap and water first | Any rust job before treatment | 5-10 minutes | Usually under $1 | Does not remove rust by itself |
| White vinegar soak | Light to moderate rust on removable parts | 30 minutes to overnight | $1-$5 | Can be too slow for stubborn buildup |
| Baking soda paste | Small spots, stainless steel, gentle cleaning | 20-60 minutes | $0-$3 | Works slowly and needs scrubbing |
| Oxalic-acid cleaner | Rust stains on sinks, tools, and stainless surfaces | 1-10 minutes per application | $5-$15 | Needs careful handling and good ventilation |
| Sandpaper, wire brush, or steel wool | Heavy rust and paint-prep work | Minutes to an hour | $5-$20 | Can scratch or remove good metal and finish |
| Commercial rust remover or converter | Stubborn rust or paintable surfaces | 10 minutes to overnight | $10-$25 | Must follow the label closely |
| Electrolysis | Heavily rusted tools and parts | Several hours to overnight | $20-$60 for a basic setup | More technical and not ideal for every home setup |
For light rust, I lean toward vinegar or baking soda because they are cheap, predictable, and easy to control. For stainless steel, I prefer a gentler cleaner and a soft pad, since harsh abrasion can leave permanent scratches. For heavier rust, I stop thinking in terms of “cleaning” and start thinking in terms of restoration: that is when abrasive tools, rust removers, or a rust converter become the better choice.
Commercial products usually save time, but they are not magic. A rust converter, for example, does not simply erase corrosion; it changes the rust into a more stable layer that can be painted over. That is useful on outdoor metal, but it is not the same thing as returning a decorative finish to bare metal.
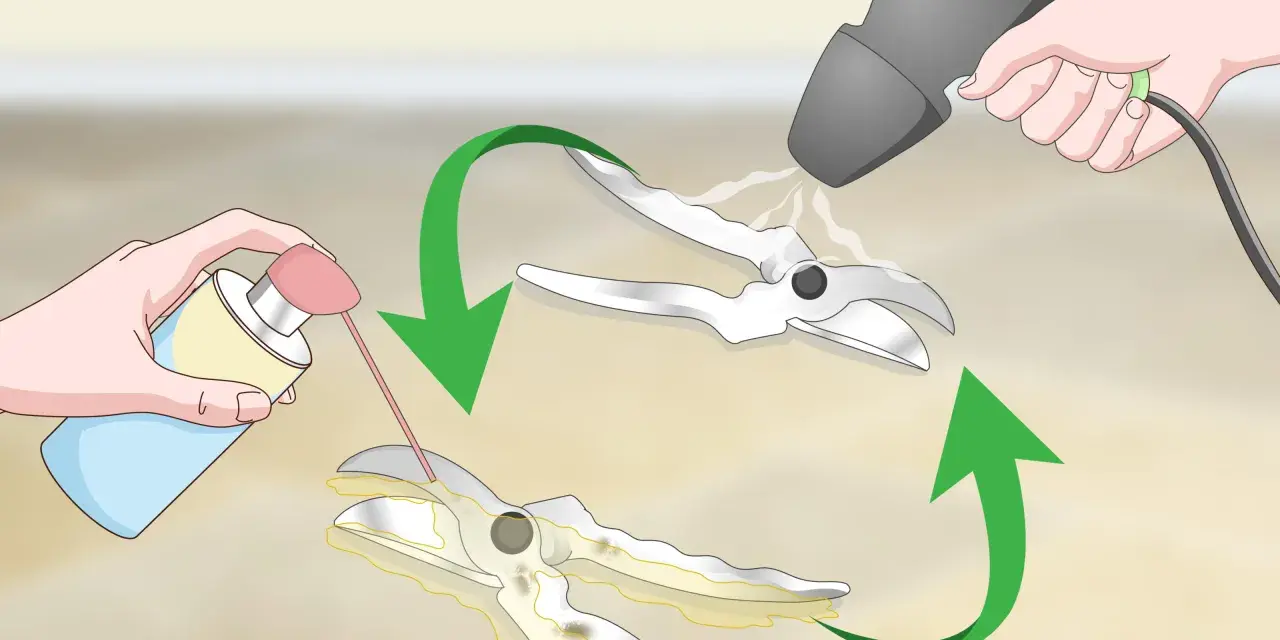
A practical step-by-step process that avoids unnecessary damage
This is the workflow I use most often for household metal, hand tools, shelving brackets, and similar items. It is simple, but it cuts down on wasted effort.
- Wash off dirt, grease, and loose debris with dish soap and warm water.
- Dry the surface completely before you do anything else.
- Test your chosen method on a hidden spot if the finish matters.
- Apply the treatment and give it time to work. For example, a vinegar soak may need 30 minutes to several hours, while a baking soda paste usually needs 20-60 minutes.
- Scrub gently with the least aggressive tool that still works. I use a nylon pad for delicate surfaces, a brass brush for tougher areas, and steel wool only when I am comfortable removing more than just the rust.
- Rinse or wipe away all residue, then dry the piece immediately.
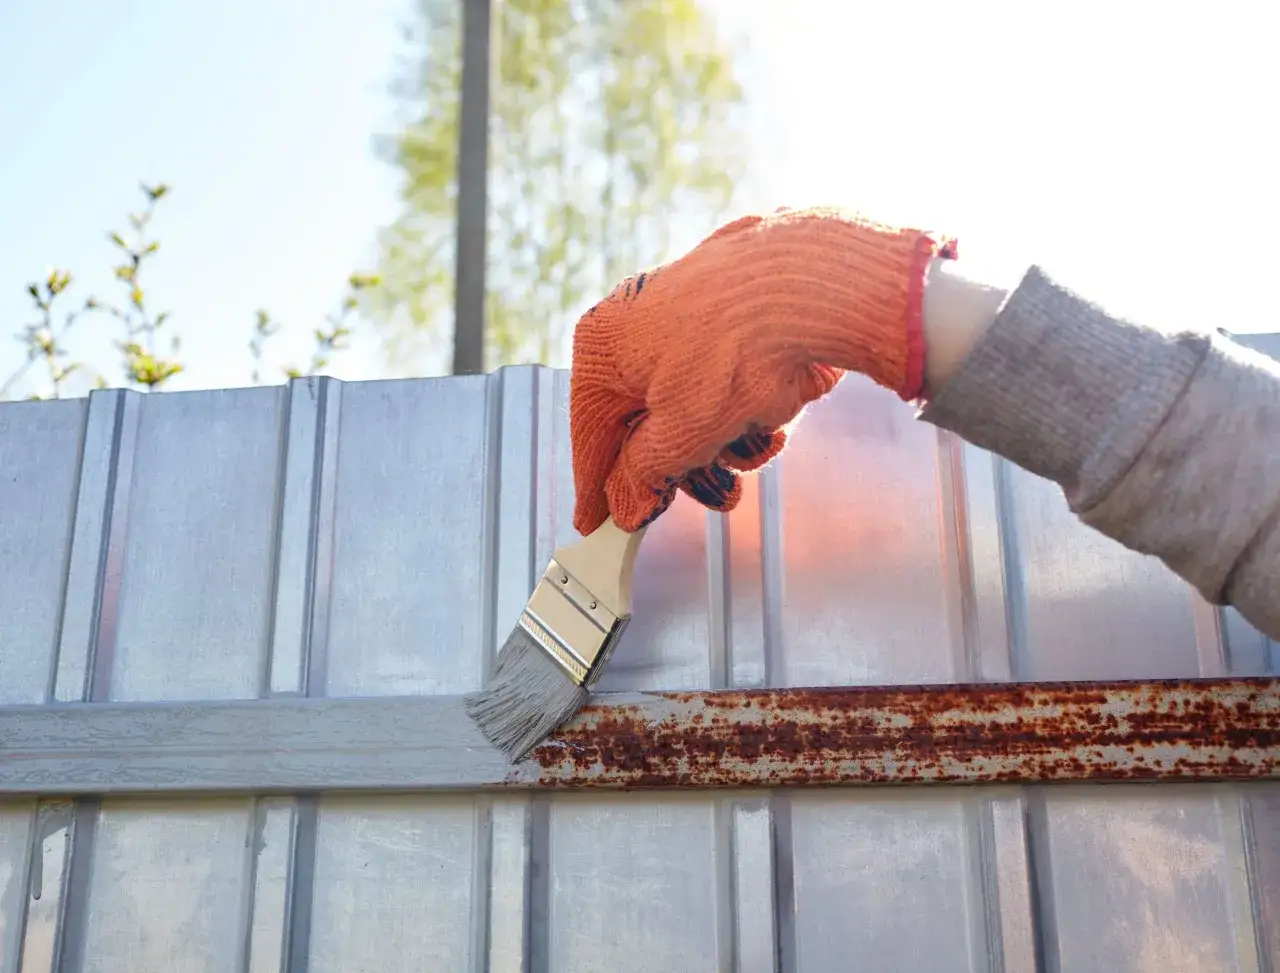
- Protect the bare metal with oil, wax, primer, or paint as soon as the surface is clean enough to accept it.
If the rust is still sitting in pores or pits after the first pass, I repeat the treatment instead of forcing it off with harder pressure. That approach usually preserves more of the base metal and gives a cleaner final finish.
Common mistakes that make the problem come back
The fastest way to lose time is to treat rust like a stain instead of a corrosion issue. I see the same mistakes over and over: skipping the degreasing step, leaving moisture behind, and using a rough pad on a finish that should have been preserved.
- Soaking plated or painted parts too long and lifting the good finish along with the rust.
- Using a heavy hand on stainless steel and leaving visible scratches behind.
- Mixing cleaners. In particular, I never combine acids with bleach or ammonia.
- Relying on one pass when the rust has already pitted the surface.
- Cleaning the metal and then setting it aside while it is still damp.
- Applying paint or oil over residue, which traps contamination and shortens the life of the repair.
There is also a timing issue people underestimate. Once bare steel is exposed, it can begin to show fresh oxidation quickly if the room is humid or the part is left wet. That is why drying and protection are not optional finishing steps; they are part of the rust-removal process itself.
How to keep metal from rusting again
Rust prevention is mostly about control: control moisture, control storage, and control how long bare metal stays exposed. In a garage or utility room, I prefer open hooks, labeled bins, and dry shelves over sealed containers that trap damp air. Tools tossed into a closed box after use are a classic way to restart the problem.
For hand tools, wipe them down after use and add a light coat of oil if they are bare steel. For outdoor metal, inspect it a few times a year, especially after wet seasons, and touch up chipped paint before water reaches the metal underneath. If the item lives in a kitchen or bathroom, dry it after washing and avoid storing it in standing water or in a constantly damp sink area.
If you are organizing a workspace, keep rust-prone items together so they are easy to check on a regular schedule. A small maintenance station with microfiber cloths, a nylon pad, a light lubricant, and a rust remover saves more time than hunting for supplies every time you spot a problem.Know when cleaning has reached its limit
Sometimes the honest answer is that the item is beyond simple cleanup. If the metal is deeply pitted, swelling, flaking, or losing strength, I treat that as a repair-or-replace decision rather than a polishing job. Decorative rust on a garden bracket is one thing; corrosion on a load-bearing part, a knife blade, or a safety-critical fastener is something else entirely.
My rule is simple: if the rust is mostly cosmetic, clean and protect it; if the rust is changing the shape, thickness, or function of the part, stop expecting a cleaner to solve it. That is the point where a converter, a professional repair, or a replacement will usually deliver a better result than more scrubbing. Once you make that call, the rest is just good maintenance: keep the metal dry, inspect it regularly, and deal with small spots before they have room to spread.