Replacing a worn cartridge is one of the cleanest fixes in residential plumbing, and this guide explains how to replace faucet cartridge parts safely, choose the right replacement, and verify that the leak is actually gone. I treat this as a part-matching job first and a wrench job second, because the wrong cartridge can waste time fast. If you work methodically, most straightforward faucet repairs stay well within a DIY weekend.
The repair works best when the cartridge matches the valve exactly
- Shut off the water at the sink stops; if they do not hold, shut off the main supply.
- Confirm the faucet uses a cartridge valve, not a compression, ball, or ceramic-disc design.
- Remove the old part slowly and note the orientation before you buy a replacement.
- Use silicone plumber’s grease lightly on O-rings and do not force the new cartridge into the valve body.
- Most cartridge swaps take 30 to 60 minutes when the part is on hand and the valve is not seized.
Make sure the faucet actually uses a cartridge valve
Not every leaky faucet needs the same fix. A cartridge faucet uses an internal replaceable cylinder or stem assembly to control flow and temperature, while other faucets use different internal mechanisms that come apart in a different way. In my experience, the first mistake people make is assuming every one-handle faucet is the same.
| Valve type | What it usually feels or looks like | Why it matters |
|---|---|---|
| Cartridge | Smooth handle movement; one or two handles; water control comes from a removable internal part | This is the repair covered in this article |
| Compression | Handle often turns down firmly to stop flow | Usually uses washers and seats instead of a cartridge |
| Ball | Common in older single-handle faucets; internal ball assembly and springs | Needs a different repair kit |
| Ceramic disc | Very precise handle movement; often a firm, smooth feel | Internal discs or seals may be the failure point, not a standard cartridge swap |
If the handle style or internal layout does not match a cartridge design, stop before buying parts. Once the valve type is clear, the rest of the repair becomes much easier to plan.
Gather the exact replacement part before you pull anything apart
I always try to identify the faucet model before I remove the old cartridge, because a close visual match is not enough. Brand, model, stem shape, notch positions, and the way the retainer works all matter. Many manufacturers now provide model diagrams and parts lookup tools, which is useful when the faucet has been in the home long enough that the original paperwork is gone.
| Replacement option | Best use | Tradeoff |
|---|---|---|
| OEM cartridge | Exact brand and model match | Usually costs more, but fit is the safest |
| Aftermarket cartridge | When the specs match and the original part is unavailable | Cheaper, but fit and longevity can vary |
| Old cartridge as a sample | When no model number is visible | Most reliable way to compare size, splines, tabs, and length |
Before ordering, I recommend taking clear photos of the handle, the stem end, the retainer, and any stamped numbers on the part. If the cartridge has tabs or notches, their position matters just as much as the overall length. The next step is to get the right tools ready so you are not improvising mid-repair.
Tools and prep that make the repair easier
The actual swap is usually simple, but the setup determines whether it stays simple. I keep the workspace dry, clear the drain, and lay parts out in the order they come off so nothing gets mixed up. That matters more than most first-time DIYers expect.
- Adjustable wrench for bonnet nuts and retaining hardware
- Flathead screwdriver for trim caps and covers
- Allen key or hex wrench for many handle set screws
- Needle-nose pliers for clips, retaining hardware, and careful pulls
- Flashlight or phone light for seeing under the handle and into the valve body
- Silicone plumber’s grease for O-rings and seals
- Cartridge puller if the old part is seized or broken
- Towel, sink stopper, and a small tray for screws and clips
Turn off the hot and cold stop valves under the sink first, then open the faucet to relieve pressure. If the stops do not fully close, stop there and shut off the main supply. That one check saves a lot of water damage.
Replace the cartridge step by step
Once the faucet is open, the repair is mostly a controlled disassembly. I prefer to move slowly here, because forcing a stuck part is how a simple cartridge job becomes a cracked valve body and a much larger bill.
- Shut off the water and confirm the faucet is dead by opening the handle.
- Remove the decorative cap if there is one, then loosen the handle set screw or lift off the handle as designed.
- Take off any trim ring, bonnet nut, or retaining nut that covers the cartridge.
- Note the orientation of the old cartridge before removal. A phone photo helps more than memory.
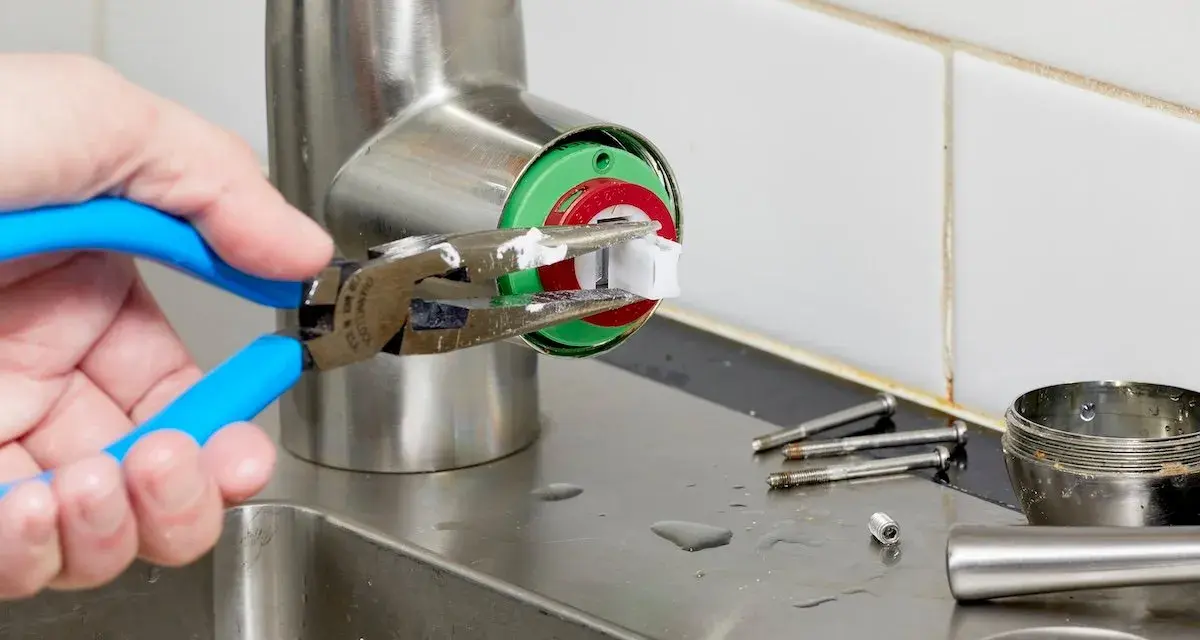
- Pull the cartridge straight out. If it resists, use a cartridge puller rather than prying against the faucet body.
- Inspect the inside of the valve body for grit, mineral scale, or torn seals, then clean it gently.
- Lightly coat the new O-rings with silicone plumber’s grease and align the cartridge tabs or notches with the valve body.
- Seat the cartridge fully, reinstall the retainer or nut, and tighten only until secure.
- Reassemble the trim and handle, then turn the water back on slowly and check for drips at the spout and around the handle.
If the faucet has separate hot and cold cartridges, keep the parts labeled as you remove them. That avoids swapping sides or mixing orientations, which is an easy mistake when the components look nearly identical.
What to do when the cartridge is stuck or the leak keeps going
Some repairs go cleanly; others need a little diagnosis after the old part comes out. In most cases, a stubborn cartridge means mineral buildup, corrosion, or a retainer that was not fully removed. A leak that continues after replacement usually points to the wrong part, poor seating, or debris left inside the valve body.
| Problem | Likely cause | Best next move |
|---|---|---|
| Cartridge will not pull out | Mineral scale, corrosion, or hidden retainer hardware | Use a cartridge puller and check for a clip or locking nut |
| Drip continues from the spout | Wrong cartridge, debris in the valve, or damaged seals | Verify part number, clean the valve body, and reseat the cartridge |
| Water leaks around the handle | Pinched O-ring, loose retainer, or cracked trim area | Remove and reinstall the cartridge with fresh grease and even pressure |
| Hot and cold feel reversed | Cartridge indexed in the wrong orientation | Pull it back out and align the tabs or stops correctly |
If the valve body is pitted, cracked, or corroded beyond a reasonable clean-up, I would not keep forcing parts into it. At that point, the better fix may be a faucet replacement or a plumber’s repair, especially in older homes where the shutoff hardware is unreliable.
What the repair usually costs in the US and when to call a plumber
For a typical US faucet, the cartridge itself often costs about $10 to $80, with specialty parts running higher. If you hire a plumber, a straightforward cartridge replacement commonly lands around $100 to $350 total, depending on access, local labor rates, and whether the part is easy to source. The job gets more expensive when the cartridge is seized, the shutoff valves fail, or the faucet has hidden hardware that slows the teardown.
| Approach | Typical cost | Best for |
|---|---|---|
| DIY part only | $10 to $80 | Accessible faucet with a known part number |
| DIY with extra supplies | $20 to $120 | When you need grease, a puller, or replacement seals |
| Professional repair | $100 to $350 | Seized cartridge, stubborn shutoff, or repeated leaking |
I would call a plumber if the stop valves do not close, the cartridge breaks during removal, the faucet body is corroded, or the leak returns immediately after reinstalling a new part. That is the point where experience and the right extraction tools save time and prevent damage.
The small details that prevent a second leak
The difference between a repair that lasts and one that starts dripping again is usually in the last 10 percent of the work. Clean the valve body before the new part goes in, use silicone grease only on rubber seals, and tighten the retainer firmly without crushing it. If the handle still feels rough after reassembly, I would recheck alignment before assuming the new cartridge is defective.
Keep the old cartridge until the faucet passes a full leak test, and save the part number somewhere useful for next time. That one habit makes future repairs much faster, especially in homes with several similar faucets. With the right cartridge, careful orientation, and a slow pressure test, this is a repair that can restore smooth control and stop a persistent drip without turning into a bigger plumbing project.