A textured ceiling can hide minor flaws, soften an uneven repair, and give a room a more finished feel without turning the whole project into a remodel. If you want a practical answer to how to texture a ceiling, the real work starts with choosing the right finish, preparing the surface properly, and applying the compound in controlled sections so the pattern looks deliberate instead of rushed. I am also covering the mistakes that most often ruin the result, because ceiling work is one of those jobs that looks simple until the lighting exposes every inconsistency.
The essentials at a glance
- Orange peel and knockdown are the easiest ceiling textures for most DIY homeowners.
- Old popcorn ceilings deserve caution; if they may contain asbestos, do not sand or scrape them casually.
- Prep matters more than the pattern: patch, sand, clean dust, and prime before texture goes on.
- Spray, roller, and trowel methods each create a different look and require a different pace.
- Drying time is not optional; most ceilings need 24 to 48 hours before painting, depending on thickness and humidity.
- Practice on cardboard or scrap drywall before you touch the ceiling itself.
Pick the finish before you touch the ceiling
The best ceiling texture is not the one with the most detail. It is the one that fits the room, the drywall condition, and the level of effort you are willing to put in. In most U.S. homes, I narrow the choice quickly: subtle textures for living spaces that need a cleaner look, heavier textures only when they serve a specific purpose such as hiding imperfections or matching an older finish.
For a lot of homeowners, the decision comes down to how much visual movement they want overhead. A light orange peel hides small flaws without dominating the room. Knockdown gives a more matte, modern, slightly rustic surface. Decorative hand-applied patterns look nicer in the right setting, but they demand more skill and better timing.
| Texture style | Look | Difficulty | Best use | Watch-out |
|---|---|---|---|---|
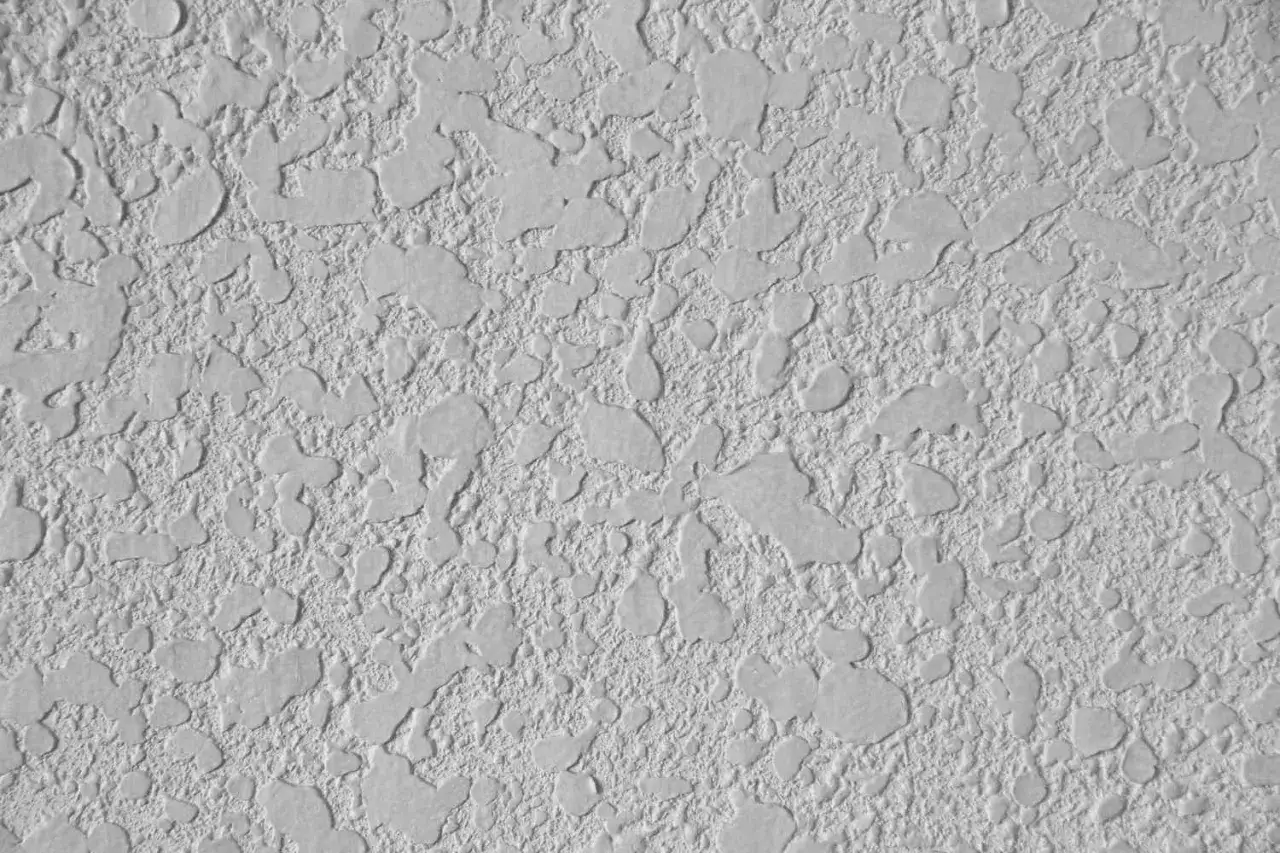
| Orange peel | Fine, dimpled, subtle | Easy | General ceiling updates, minor flaw coverage | Too heavy a spray can make it look blotchy |
| Knockdown | Soft, flattened peaks and valleys | Easy to moderate | Living rooms, bedrooms, broad ceiling areas | Timing matters; knock it down too early or too late and the pattern suffers |
| Skip trowel | Hand-crafted, layered, irregular | Moderate to hard | Accent ceilings, Mediterranean or custom looks | Easy to overwork and hard to make uniform |
| Swirl | Arcs or circular movement | Moderate | Decorative rooms, period-style interiors | Every inconsistency shows if the room is brightly lit |
| Popcorn | Very bumpy, acoustic look | Easy to spray, risky to disturb | Matching older homes | Older ceilings may contain asbestos, so testing comes first |
| Smooth | Flat, clean, modern | Hardest to perfect | Newer remodels and minimalist spaces | Shows every flaw if prep work is weak |
For most homeowners, I would rather see a well-executed light texture than an ambitious pattern that looks uneven from across the room. Once you know the finish you want, the next question is how to apply it without fighting the material.
Choose the application method that matches the look
There are three practical ways to texture a ceiling: spray it, roll it, or shape it by hand. Each one has a different learning curve, and each one produces a slightly different surface. If your goal is speed and consistency over a large room, a spray method usually wins. If your goal is a more artistic finish, trowel work gives you more control. If you are trying to keep the project simple, a roller can bridge the gap.
Spray with a hopper gun
This is the method most people picture when they think of ceiling texture. A hopper gun throws joint compound through a nozzle using compressed air, which makes it good for orange peel, knockdown, and some popcorn-style finishes. It is fast, but it is also messy, so drop cloths, plastic sheeting, and careful masking are non-negotiable.
I like spray texturing for larger ceilings because the pattern stays more even once the mix is dialed in. The trade-off is that the machine setup matters. Nozzle size, air pressure, and mud consistency all affect the finish, so you cannot rush the test board stage.
Roll on compound
A texture roller is less intimidating than a hopper gun and works well when you want a medium texture without bringing in an air compressor. It is a sensible option for smaller rooms or for homeowners who want more control and less overspray. The pattern tends to be a little softer and less aggressive than a sprayed finish.
Roll-on texture is also easier to stop and restart cleanly, which helps if you are working around light fixtures or in a room with awkward corners. I would choose this method when the ceiling is already in decent shape and the goal is to improve the look, not hide major damage.
Read Also: Change Your Door Lock Code Safely - Avoid Lockouts!
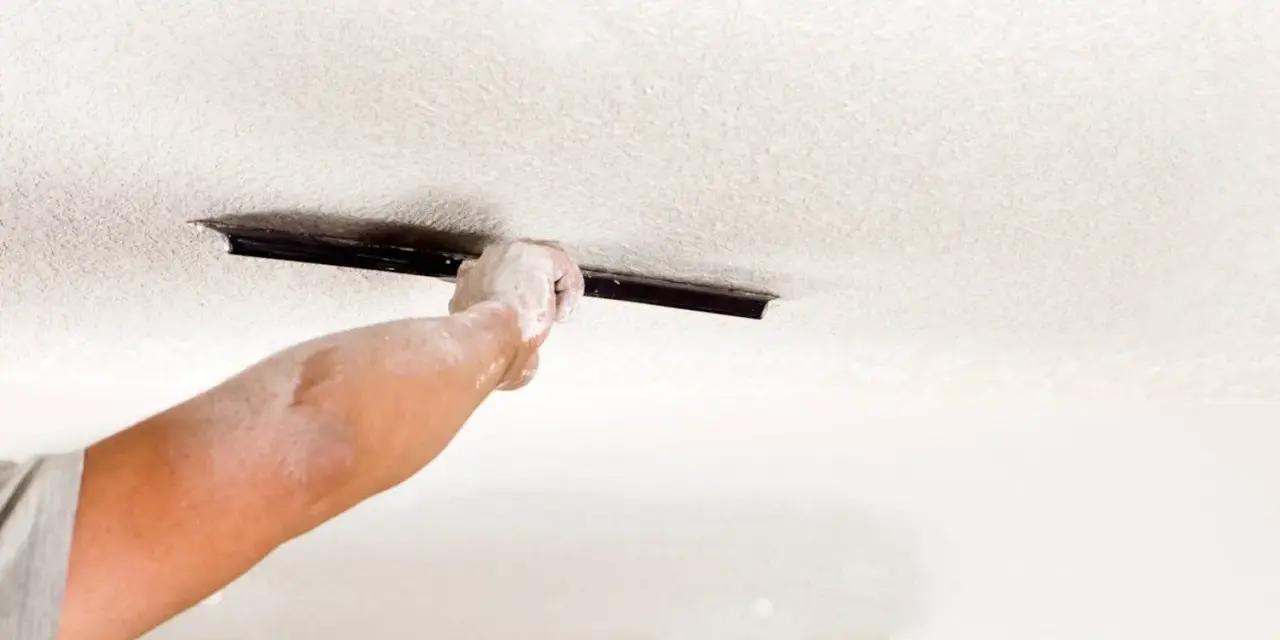
Shape it by hand
Trowel, brush, and sponge methods give you the most personality. These are the techniques behind swirl, skip trowel, and similar decorative finishes. They are slower, and they punish hesitation. Once the compound starts to set, the pattern can change quickly, which is why I only recommend them if you are comfortable working in short, controlled passes.
Hand-applied texture is best when the ceiling is part of the design, not just a problem you are covering up. That is the difference between a finish that feels intentional and one that feels like damage control.
Whichever method you choose, the real ceiling work begins before the first pass of compound goes up. Prep is where the result is won or lost.
Prep the ceiling so the texture actually sticks
Start by clearing the room as much as possible, then cover floors, furniture, and walls that do not need to be textured. Ceiling jobs throw dust, drips, and tiny compound splashes farther than most people expect. If you can remove light fixtures or ceiling fans safely, do it before the texture work starts.
Next, repair the surface. Tape seams, fill dents, patch holes, and sand down high spots. Texture is not a substitute for basic drywall finishing; it hides minor flaws, but it does not erase bad joints or loose paper. A quick skim over problem areas often saves a lot of frustration later.
If you are dealing with an older popcorn ceiling, stop and assess it before disturbing anything. The EPA advises leaving asbestos-containing material alone when it is in good condition, and not sanding or scraping it unless you know it is safe to do so. If the ceiling may contain asbestos and you need to disturb it for renovation, bring in a trained professional first.
Finally, prime the ceiling. A stain-blocking latex primer gives the texture a better surface to grab and helps the finish dry more evenly. Lowe’s recommends letting the primer dry fully before texture goes on, and that is sound advice. If the primer is still tacky, your texture can slide, clump, or pull unevenly.
Once the ceiling is patched, cleaned, and primed, the application itself becomes much easier to manage. The next step is mixing and working in a rhythm that keeps the compound usable.
Apply the texture in small, controlled sections
I like to think of ceiling texturing as a sequence of short, repeatable moves rather than one big pass. That approach reduces panic, and it keeps the texture looking consistent from one side of the room to the other.
-
Mix the compound to the right consistency.
For spray work, Lowe’s suggests starting around a 4 parts joint compound to 1 part water ratio, then adjusting as needed until the mix feels like pancake batter. That is a starting point, not a rule carved in stone. A spray mix should flow smoothly, while a hand-applied mix can be slightly heavier if you want stronger shape and less splatter.
-
Test the pattern on cardboard or scrap drywall.
This is the step many people skip and then regret. Practice tells you whether the mix is too thick, the spray is too fine, or the roller is loading too heavily. You want to solve those problems on a board, not overhead.
-
Work in small zones.
Keep each section manageable so the compound does not skin over before you can finish the pattern. In a normal room, I would rather move steadily across 4-by-4-foot areas than try to cover half the ceiling in one burst.
-
Apply the texture with a consistent motion.
For spray texture, maintain the same distance and speed. For roller texture, keep the pressure even so the pattern does not tighten in one area and flatten in another. For trowel work, stay light-handed and resist the urge to keep revisiting the same section.
-
Finish the pattern at the right moment.
Knockdown textures should be flattened after the compound sets enough to hold shape but before it hardens. Hand patterns should be left alone once the design is established. Overworking the surface usually does more harm than good.
-
Let it dry completely before painting.
Drying time depends on thickness, room temperature, and humidity, but 24 to 48 hours is a sensible expectation for most textured ceilings. If the room is cool or damp, I would give it more time rather than less.
At this point the ceiling should look textured, but the finish is not really done until you know how to protect it from the mistakes that show up a day later.
The mistakes that make a ceiling look amateur
The most common failure is not a dramatic one. It is usually a series of small decisions that stack up: a mix that is too wet, a room that was not primed properly, a section that was too large, or a texture pass that was touched twice after it had already started setting. Any one of those can leave a ceiling looking patchy instead of finished.
- Skipping primer. Bare or dusty drywall soaks compound unevenly, which makes the pattern inconsistent.
- Mixing too thin. The texture slides and runs instead of holding shape.
- Mixing too thick. The material clogs, drags, and produces harsh ridges.
- Trying to fix wet texture repeatedly. The more you touch it, the flatter and messier it becomes.
- Texturing under poor light. Raking light reveals flaws before the paint does, so use it to inspect the surface as you work.
- Ignoring the existing finish. Matching old texture by memory almost never works; test boards are faster than guessing.
One trick I use often is to step back under the same lighting the room will have once the ceiling is finished. Texture can look fine under a work light and disappointing under daylight, so the final check should happen in the real environment. That is also why repair blends need to feather farther than people expect.
Once you understand the risk points, the last major decision is whether the job makes sense as a DIY project or whether hiring out will save time and cleaner results.
What this usually costs in the U.S. and when I would bring in help
For a straightforward ceiling texture job, professional pricing in the U.S. often lands around $1 to $2 per square foot, with simpler work at the lower end and repair-heavy or hard-to-reach ceilings at the higher end. A normal room may cost only a few hundred dollars to texture professionally, but the number rises quickly if you need old texture removed, seams repaired, or the ceiling matched to an existing pattern.
DIY costs depend mostly on tools. Joint compound, primer, masking materials, and paint are not especially expensive, but a hopper gun, compressor, or specialty roller adds to the bill. If you are doing a one-room project and do not already own the equipment, buying everything can narrow the gap between DIY and hiring a pro more than people expect.
| Scenario | Typical cost range | What drives the price |
|---|---|---|
| DIY small room | About $40 to $200 in materials, more if you buy tools | Primer, compound, masking, rollers or sprayer, paint |
| Professional basic texture | About $1 to $2 per square foot | Ceiling size, texture type, prep work, access |
| Repair and match work | Higher than basic texture | Blending old patterns, patching damage, removing failing texture |
I would hire help sooner rather than later if the ceiling is vaulted, the texture needs to match an older room exactly, or there is any asbestos concern. Those are not the places where a first-time DIY attempt saves money reliably. They are the places where a small mistake costs more to fix than the original job would have cost to outsource.
What I would do on a first ceiling texturing job
If I were doing this in a real house for the first time, I would keep the finish simple, the working area small, and the expectations realistic. I would choose a light orange peel or a soft knockdown, practice on scrap until the pattern looked consistent, and then commit to the ceiling only after the mix behaved the same way twice in a row.
- Use a simple texture rather than an elaborate decorative pattern.
- Prime the ceiling and let it dry fully before any texture goes on.
- Mix the compound gradually instead of dumping in too much water at once.
- Work with a bright side light so flaws show up immediately.
- Stop as soon as the pattern looks even; do not keep chasing perfection while the mud is setting.
- Wait for full cure before painting, even if the surface feels dry to the touch earlier.
The ceiling should look like part of the room, not like a repair that got dressed up. If you keep the pattern restrained, respect the drying time, and avoid touching the finish after it starts to set, the result is usually cleaner than homeowners expect. If the room still feels busy after you sample the texture, that is a sign to go lighter or switch to smooth instead of forcing a heavier look.