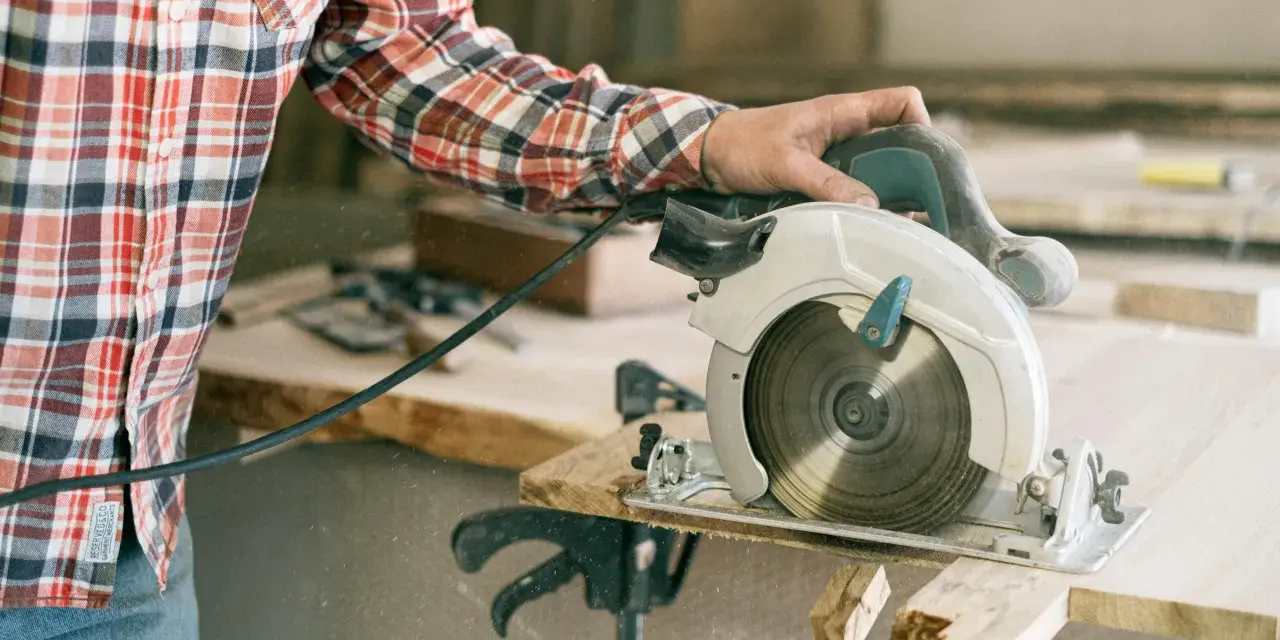
A circular saw is one of the fastest ways to break down plywood, trim framing lumber, and make straight cuts on home repair projects. The tool is simple, but it rewards careful setup: the right blade, the right depth, and solid support matter more than brute force. This guide explains how to use a circular saw safely, how to keep cuts straight, and how to avoid the mistakes that lead to splintering or kickback.
The safest clean-cut workflow starts before the trigger is pulled
- Pick the right blade for the material and keep it sharp.
- Set blade depth to just below the stock, not deep into the workbench.
- Clamp or fully support the material so the offcut can move freely.
- Let the blade reach full speed before feeding it into the cut.
- Use a square, straightedge, or guide when accuracy matters.
- Stop and reset if the cut starts to pinch or drift.
What a circular saw is good for, and where it falls short
I treat a circular saw as a straight-line workhorse. It is ideal for framing lumber, subfloor patches, decking, plywood, and quick cuts in the garage, but it is not the tool I reach for when I want furniture-shop edges or repeatable precision without a guide. For that kind of work, a miter saw, table saw, or track saw often does a better job.
My rule is simple: if I need speed and a cut that can be cleaned up later, the circular saw earns its place. If I need a finish cut that has to be perfect off the tool, I slow down and change tools instead.
Once you know where the saw fits, the next step is making sure it is adjusted correctly before the blade touches the board.
How I set the saw up before the first cut
Most of the clean-cut work happens before the motor starts. Home Depot's beginner guide recommends setting the blade about 1/4 inch below the material, and that matches the way I work: shallow enough to stay controlled, but deep enough to clear the stock cleanly.
| Check | What I want | Why it matters |
|---|---|---|
| Blade | Sharp and matched to the material | Cleaner cuts, less strain, and lower kickback risk. |
| Depth | About 1/4 inch below the stock | Less exposed blade and better control through the cut. |
| Bevel | Locked at 90 degrees unless I need an angle | Keeps the cut square and avoids accidental bevels. |
| Shoe or base plate | Flat on the workpiece | A flat base keeps the saw tracking straight. |
| Guard | Moves freely and returns on its own | It should cover the blade whenever the saw is lifted. |
| Support | Work clamped and the offcut supported | Stops the kerf from pinching the blade. |
| PPE | Safety glasses, hearing protection, dust mask | Chips, noise, and dust are part of the job. |
| Power | Unplugged or battery removed for blade changes | Prevents accidental starts during setup and maintenance. |
TPI means teeth per inch. More teeth usually mean a smoother edge and less tear-out, while fewer teeth usually mean a faster, rougher cut. That is why I keep a finer blade on hand for plywood and a more aggressive blade for rough framing work.
On plywood or laminated sheet goods, I usually put the good face down when the saw is cutting from the top side, because many handheld saws leave the cleaner face on the bottom side of the cut. I also keep masking tape nearby for surfaces that chip easily.
Before I flip the switch, I check that the blade guard moves freely, the shoe sits flat, and the work is clamped or supported so the board cannot shift when the cut opens up.
With the saw set properly, the actual cut becomes much easier to control.
How I make a straight cut without forcing the tool
- Mark the cut line clearly and mark the waste side with an X so there is no confusion.
- Set the board on stable sawhorses or a work surface and support both sides of the cut.
- Place the saw shoe flat on the material with the blade clear of the edge.
- Stand slightly to the side of the saw, not directly behind the blade path.
- Start the motor and wait for full speed before the blade touches the wood.
- Feed the saw forward at a steady pace and keep the shoe flat as you cut.
- Let the blade finish the cut, then wait for it to stop before lifting the saw.
If the saw begins to drift, I stop and reset instead of trying to bend the cut back onto the line. A circular saw wants a straight path; fighting it usually makes the edge worse and the cut less safe.
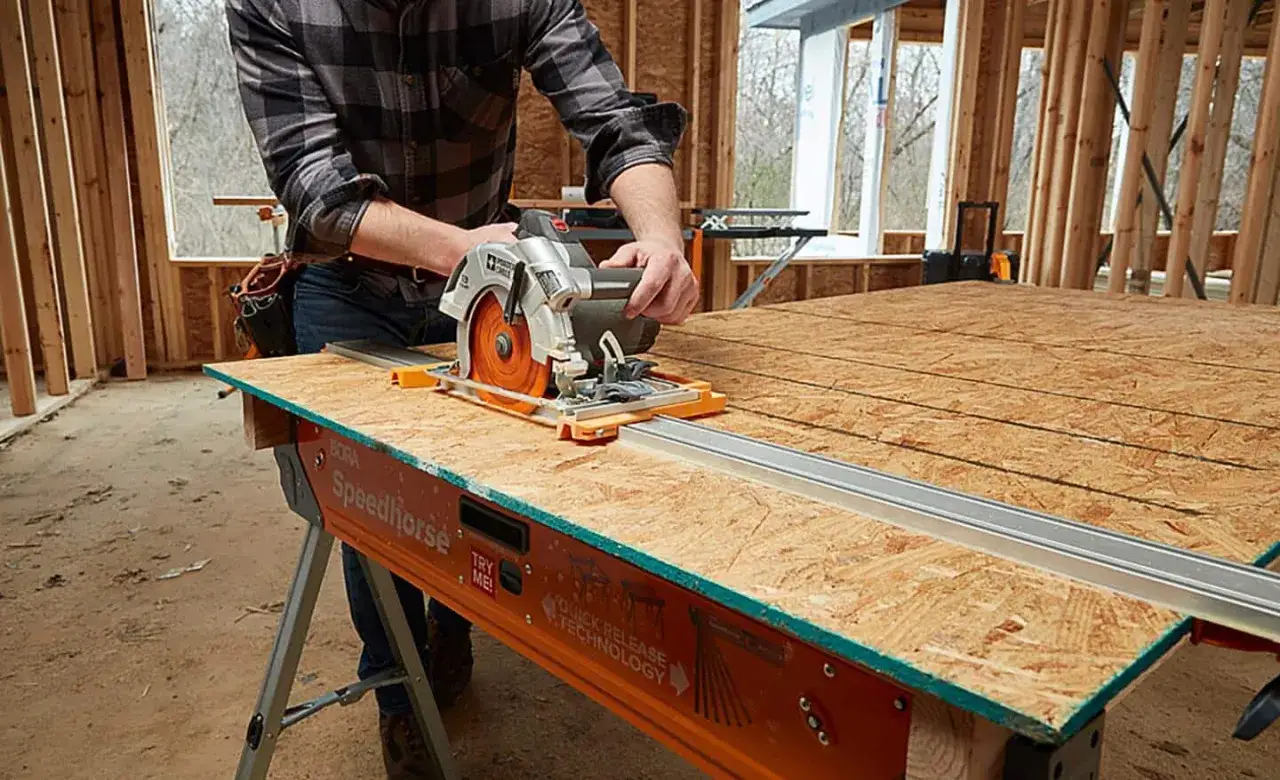
For short cuts, I like a speed square, the triangular framing square that doubles as a quick guide. For longer cuts, I clamp a straightedge and let the saw ride against it instead of trying to freehand the line.
That same discipline matters even more when the cut changes direction or runs along the length of the board.
How to handle crosscuts, rip cuts, and bevel cuts
The three cuts most DIYers make are not equally forgiving. Crosscuts across the grain are usually the easiest, ripping along the grain is more likely to pinch the blade, and bevel cuts add another setting that needs to be checked before the cut starts.
| Cut type | Best guide | What I check |
|---|---|---|
| Crosscut | Speed square or framing square | Keep the shoe tight to the square and do not twist the saw. |
| Rip cut | Straightedge, rip fence, or clamped guide | Keep the stock fully supported so the kerf stays open. |
| Bevel cut | Set the bevel before starting and confirm on scrap | The angle changes the effective depth, so recheck the setup. |
For ripping, I prefer a guide that gives the saw a path it cannot wander off. A rip fence is simply a guide that keeps the saw parallel to the edge of the board, while a clamped straightedge is often the better choice for wider plywood cuts.
OSHA's guidance on handheld circular saws is blunt about the risk here: kickback becomes more likely when ripping, when the blade is dull, or when the stock is not properly supported. That is exactly why I slow down and over-support long cuts instead of trying to rush them.
Once you know the cut type, the next job is spotting the mistakes that cause most problems in the first place.
The mistakes that turn a simple cut into a problem
Most bad cuts come from a short list of avoidable errors. They are predictable, which is good news, because it means you can design them out before the blade ever reaches the wood.
- Using the wrong blade - A crosscut or fine-finishing blade is not the best choice for every job, and a dull blade increases heat, tear-out, and kickback risk.
- Setting the blade too deep - If too much blade is exposed, the saw is harder to control and the chance of snagging goes up.
- Letting the stock move - A board that slides, twists, or sags can close the kerf, the slot the blade cuts, and trap the blade.
- Starting with the blade already buried - I always bring the blade up to speed before it meets the material.
- Forcing the feed rate - Pushing too hard does not speed things up; it usually just burns the wood and strains the motor.
- Standing in line with the cut - If the saw kicks back, I want my body out of that path.
- Ignoring a sticky guard - If the lower guard does not return cleanly, I stop and clean the saw before using it again.
The fix for most of these mistakes is boring but effective: use the right blade, keep the depth shallow, support the work, and let the saw move at its own pace.
Sometimes, though, the better fix is to admit that a circular saw is not the best tool for the whole job.
When another saw will save time and cleaner edges
I still use a circular saw constantly, but I do not force it into jobs where another tool is clearly better. That choice saves time, reduces cleanup, and often gives a safer cut.
| Job | Better tool | Why I switch |
|---|---|---|
| Repeated trim cuts | Miter saw | It is faster and more repeatable for the same angle over and over. |
| Long, cabinet-grade plywood cuts | Track saw | It usually leaves a cleaner edge and is easier to control on sheet goods. |
| Many identical rip cuts | Table saw | A fence gives better consistency for repeated widths. |
| Small finish trim | Handsaw or miter saw | There is less tear-out and less setup for a tiny cut. |
The circular saw still wins when I have to work in place, break down large sheets before moving them, or make a quick cut where a bigger saw cannot go. In other words, it is a flexibility tool first and a precision tool second.
That perspective makes the last part easier: the habits that keep the saw useful long after the project is done.
The habits I rely on after every project
After the cut, I let the blade stop fully before setting the saw down, then I clear dust from the shoe and check that the guard still moves freely. That takes less than a minute and makes the next cut feel better immediately.
- Keep a dedicated wood blade sharp and replace it when it starts burning or wandering.
- Test depth and bevel on scrap before cutting the real piece.
- Store the saw unplugged or with the battery removed and the blade retracted.
- Mark the waste side of the line so there is no second-guessing mid-cut.
- Use a guide whenever the line has to stay straight over any meaningful distance.
If I had to reduce the whole process to one principle, it would be this: a circular saw feels safer and cuts cleaner when the setup is doing the work, not your arms. Once the blade is right, the depth is shallow, and the stock is supported, the saw becomes a very predictable home-repair tool.