Wood window repair is usually less about cosmetics than about stopping moisture, rebuilding weakened parts, and getting the sash moving smoothly again. In this article, I walk through how to judge whether a wooden window is worth saving, how I approach rot, cracked glazing, and sticky sashes, and when replacement is the smarter call. I also cover cost ranges, lead-safe precautions for older U.S. homes, and the maintenance steps that keep the fix from failing again.
The essentials to know before you start
- Start with the water source. If the leak stays, the damage returns.
- Small rot, loose putty, and peeling paint are usually repairable; deep decay in corners, sills, or joints is a different story.
- Sticky sashes are often caused by paint buildup, swelling, or hardware issues, not a full window failure.
- Recent U.S. cost guides put routine repairs around $100-$600, while a single replacement averages about $477.
- If the home was built before 1978, treat disturbed paint as a lead-risk job and use lead-safe practices.
Find the cause before you touch the wood
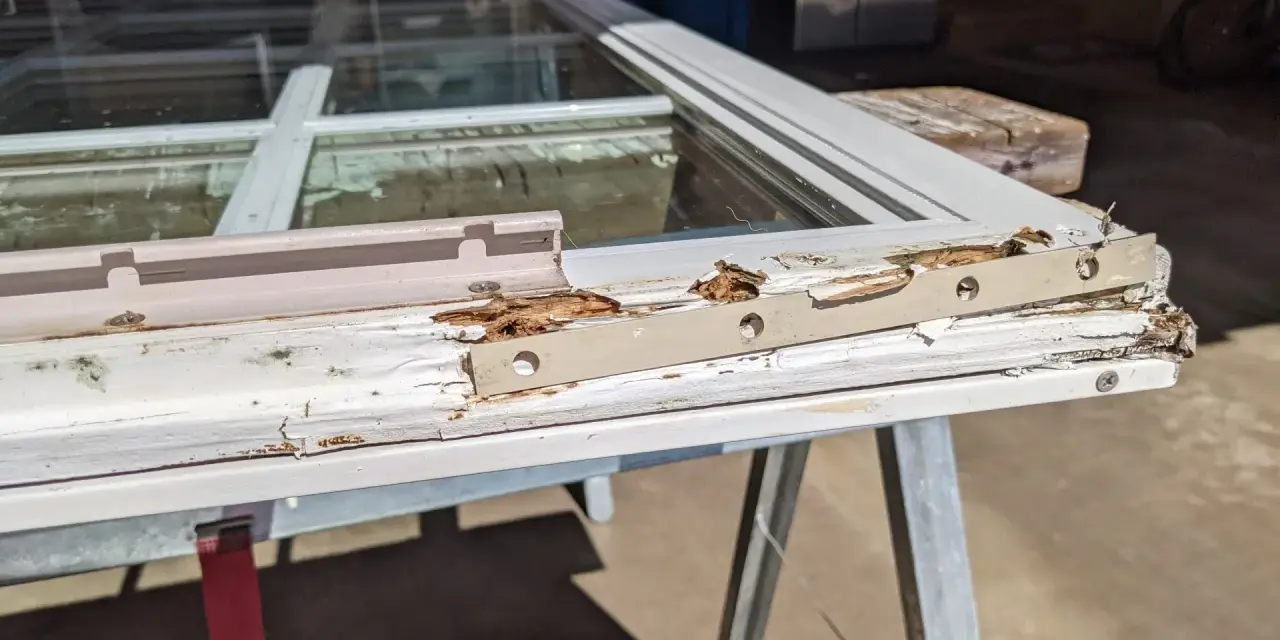
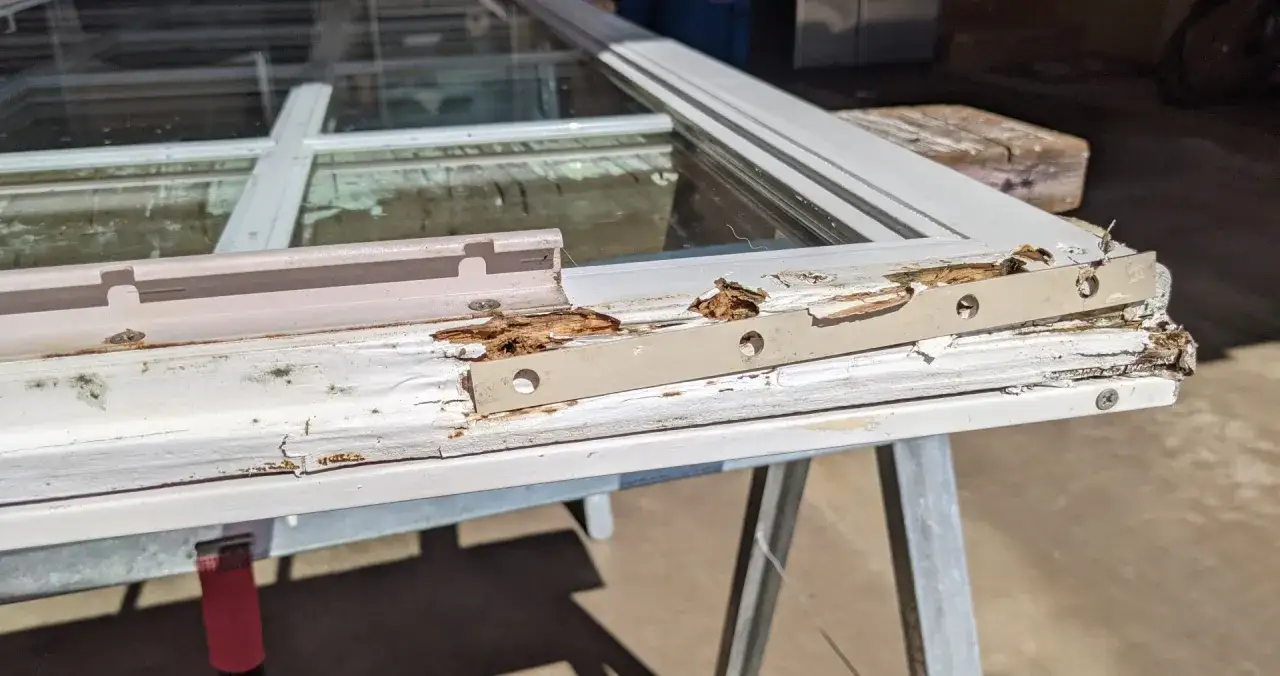
I start by looking at why the window failed, not just what looks ugly. The sill is the bottom horizontal member, the jambs are the side pieces, and the sash is the moving frame that holds the glass. If those parts are wet, swollen, or split, the visible damage is usually only half the problem.
On most homes, the trouble comes from one of a few places: failed exterior caulk, cracked paint film, a leaky drip edge, clogged gutters, condensation inside the room, or repeated UV exposure on south- and west-facing windows. I also watch for insect damage, because old wood can look sound from a distance and still be hollowing out close to the surface.
- Dark staining around the lower frame usually points to recurring water intrusion.
- Blistered paint often means moisture has been trapped under the coating.
- Soft wood at the lower sash or sill suggests the repair has moved beyond cosmetics.
- A sash that drags in one spot can mean swelling, paint buildup, or a warped member.
The screwdriver test tells me a lot: if the tip sinks in instead of meeting firm resistance, I treat that section as damaged wood, not as a paint problem. Once I know the cause, the repair sequence becomes much more straightforward.
A repair sequence that usually holds up
When the wood is dry and the leak is fixed, I work from the outside in. The goal is to remove only the failed material, rebuild the weak sections, and seal every exposed edge before paint goes on.
- Scrape away loose paint, failed glazing, and any wood that is soft enough to crumble.
- Dry the area completely. Epoxy, filler, and primer all bond better to dry wood.
- For shallow rot, apply a consolidant or hardener, then shape the area with two-part epoxy filler.
- For larger losses, use a fitted wood patch. A Dutchman patch is a shaped insert of new wood that replaces only the damaged section.
- If the pane is broken or the glazing has failed, reset the glass with new points and fresh glazing compound.
- Prime bare wood, especially the end grain, then finish with exterior paint once the product has cured.
I do not use standard interior filler outdoors, and I do not paint over damp wood. Those shortcuts fail quickly, usually after the next hard rain. Once the rebuilt section is sound, the next question is whether the sash itself is still moving well.
When a sticky sash is not a rot problem
A window that will not open smoothly is not always telling you the wood is failing. Very often, the real issue is paint bridging the moving parts, swollen timber from humidity, worn cords, or tired balance hardware. I have seen homeowners assume they need a new window when all they really needed was careful adjustment.
When a sash binds at one point, I mark the rub, remove just enough material to create clearance, and test again. If it will not stay up, I check the cords, pulleys, or spring balances before I touch the frame. Forcing the window with a pry bar usually splinters the meeting rails or breaks the muntins, which turns a small repair into a mess.
- Paint buildup between the sash and stop often causes the most common sticking problem.
- Humidity swelling is usually temporary, so I let the wood dry before planing or sanding.
- Worn sash cords can make the sash feel heavy even when the wood is fine.
- Loose weatherstripping can add drag and make the window feel tighter than it is.
Once movement is restored, the harder question is whether the repair still makes economic sense. That is where the cost side matters.
Repair or replace when the numbers start to change
In 2026, typical window repair costs in the U.S. often fall around $100-$600, with an average near $392. A single replacement averages about $477, so the gap is not always as wide as homeowners expect. That is why I judge by structure first and price second.
| Condition | What I would do | Why |
|---|---|---|
| Peeling paint, open caulk, minor putty failure | Repair | The wood is still sound, and the fix is mostly surface work. |
| Localized soft rot on one edge, rail, or sill section | Repair if the rest is solid | Epoxy or a fitted wood patch can rebuild a limited area without disturbing the whole window. |
| Broken pane or loose glazing on an otherwise square sash | Repair | Glass and glazing work is straightforward when the frame is still stable. |
| Warped frame, repeated water intrusion, or rot in corners and joints | Replace the sash or the full window | Patchwork stops being durable when the opening is no longer stable. |
My practical rule is simple: if the frame is still square and the rot is localized, repair is usually worth it. If the opening is out of square or the decay keeps coming back, replacement starts to save time, labor, and frustration. Before I make that call on an older home, I check one more issue that people often overlook.
Older homes need a lead-safe plan
The EPA says renovation, repair, and painting work in pre-1978 homes can create dangerous lead dust, so I treat any unknown paint as a lead concern until proven otherwise. If I hire the work out, I want a certified contractor. If I do it myself, I contain the area, keep dust down, and clean thoroughly.
That means I set up plastic barriers, remove curtains and rugs, keep family members out of the work zone, and use gloves, eye protection, and a respirator when scraping or sanding. I also avoid dry, aggressive sanding unless I have a proper dust-control setup. Lead-safe work adds a little time, but it prevents a repair from creating a bigger health problem.
- Seal the work area before scraping anything.
- Use wet methods where practical to keep dust from spreading.
- Bag debris carefully and clean the area again after the repair.
- Assume the paint is lead-based if the home is old and the surface has never been tested.
Once safety is handled, the focus shifts back to keeping the repair from failing again. That part is mostly discipline, not fancy materials.
The small maintenance habits that prevent the next repair
Most wooden windows fail through the same boring chain: a tiny paint crack, a little water, a season or two of swelling, then rot. I break that chain by inspecting the exterior every spring and after major storms. A quick check is a lot cheaper than rebuilding a sill or sash later.
- Keep gutters, downspouts, and drip edges clear so water does not run onto the window.
- Repaint before bare wood appears, especially on the sill and any exposed end grain.
- Use exterior caulk only where movement is minor; do not use it as a rot fix.
- Keep indoor humidity in a reasonable range, roughly 30%-50% if your climate allows it.
- Touch up exposed patches as soon as repairs cure.
- Check the window after the first heavy rain for leaks, staining, or drafts.
That routine matters because the repair itself is only half the job. The other half is making sure the same water path does not come back through the frame, sash, or trim.
The details I check after the first heavy rain
If the sash opens cleanly, the frame stays dry, and the paint line holds after a storm, I consider the repair successful. If I see fresh staining, a soft spot returning, or the sash beginning to drag again, I know the problem was deeper than the visible damage. That is usually the moment to step back and reconsider whether a patch, a partial rebuild, or a full replacement is the smarter move.
For me, the best window repair is the one that restores function without hiding the reason the wood failed in the first place. If you fix the moisture source, rebuild the damaged section with the right material, and stay disciplined about priming and paint, a wooden window can last for years without becoming a recurring project.