Wall holes look minor until the light hits the edge and the repair starts to show. The real challenge is not just filling the opening, but choosing the right method for the wall type, the hole size, and the finish you want to match. In this guide, I cover how to patch a hole in the wall, what to use on drywall versus plaster, and the finishing steps that make the repair blend in instead of announce itself.
What matters most is matching the patch to the wall and the hole size
- Small nail holes and dents usually need only spackle, a putty knife, sanding, primer, and paint.
- Holes around 1/2 to 6 inches in drywall usually do best with a mesh patch or a backing patch plus joint compound.
- Openings larger than about 6 inches usually need a cut piece of drywall, tape, and two or three thin coats of compound.
- Plaster repairs need a different approach: stabilize loose material first, then rebuild in layers with a plaster-friendly compound.
- Primer matters because raw compound absorbs paint differently, which can make a finished patch flash under light.
- If you see moisture damage, loose lath, or wiring, stop and reassess before patching.
Choose the right repair before you start
I always begin by measuring the damage and looking at what the wall is made of. A thumbtack hole, a doorknob dent, a ragged fist-sized opening, and a cracked plaster patch all need different methods; forcing them into one process usually leaves a hump, a soft spot, or a visible ring after paint.
| Damage | Best repair | Typical difficulty | What usually works |
|---|---|---|---|
| Pinholes, nail holes, tiny dents | Spackle or lightweight joint compound | Easy | Fill, let dry, sand, prime, paint |
| Small drywall openings up to about 1/2 inch | Single fill with compound | Easy | One or two thin passes with a putty knife |
| Drywall holes around 1/2 to 6 inches | Self-adhesive mesh patch or backing patch | Moderate | Bridge the opening, then feather compound over it |
| Drywall holes larger than about 6 inches | Cut-and-replace drywall section | Moderate to hard | Square the hole, add backing, tape seams, finish in coats |
| Small plaster chips and shallow cracks | Patching plaster or setting compound | Moderate | Stabilize loose material first, then rebuild in layers |
| Plaster with loose lath or deep breakage | Backing repair plus layered plaster patch | Hard | Secure the wall structure before you think about finish coat |
The goal is not just to cover the opening but to rebuild enough surface area that the repair can be sanded flat. Once that choice is clear, the rest is mostly about having the right tools.
Keep the tools simple and matched to the job
You do not need a truck full of gear to do this well. What matters is using the right filler for the depth of the hole and the right knife size for the area you are smoothing.
- Spackle for tiny holes and shallow dents that do not need structural support.
- Joint compound for larger feathered repairs; it stays workable longer and sands more smoothly.
- Setting-type compound for deeper fills; it hardens chemically and shrinks less than lightweight filler.
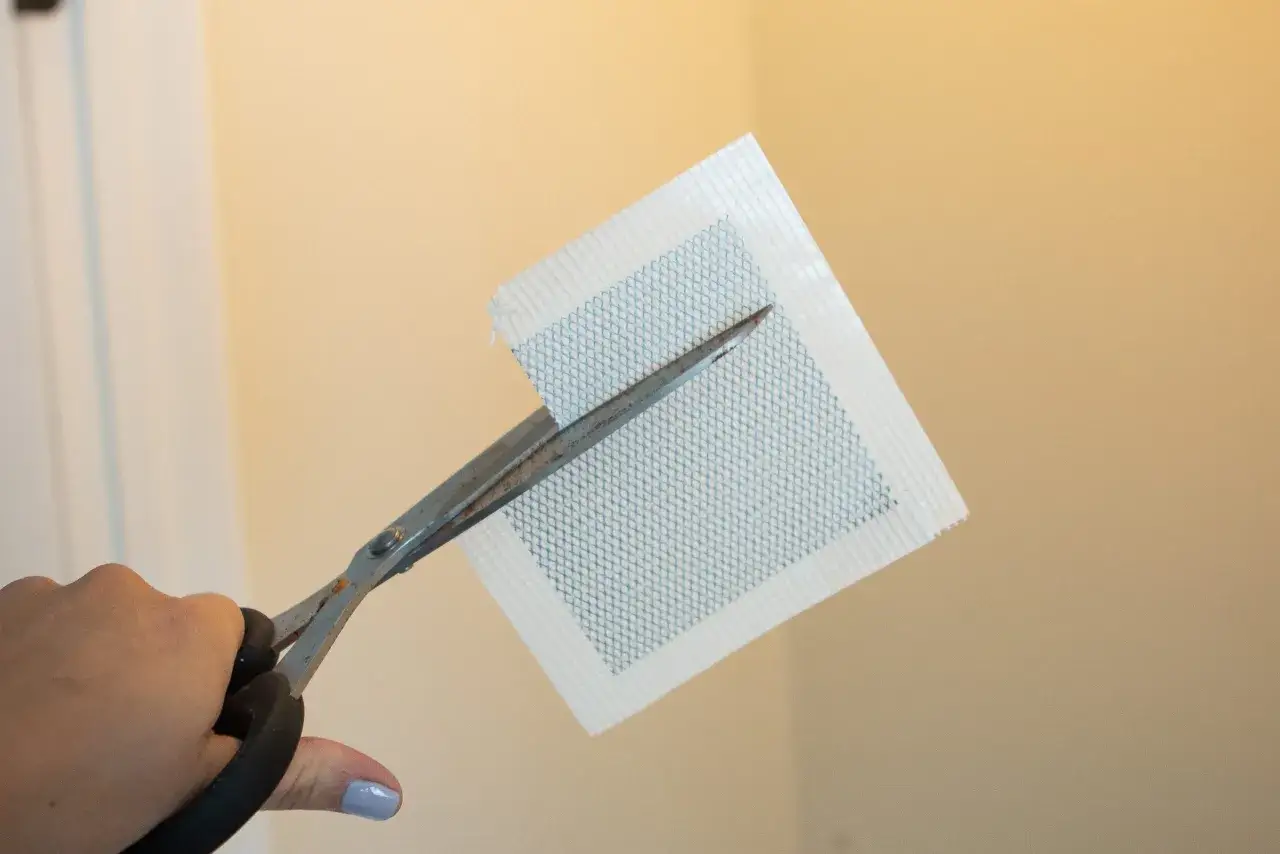
- Self-adhesive mesh patch for small to medium drywall openings where the edge is stable.
- Drywall tape for seams and replacement patches that need reinforcement.
- Putty knives in 6-inch and 10- or 12-inch sizes so you can fill and feather without leaving ridges.
- Sandpaper or a sanding sponge in 120- to 220-grit for shaping the dried patch without chewing up the wall.
- Primer and touch-up paint so the repaired spot does not flash under light.
I also keep a utility knife, a dust brush or vacuum, a straightedge, and painter’s tape nearby. That small setup covers most residential repairs, and it keeps the job from turning into a bigger cleanup than the wall ever needed. With those pieces on hand, the wall itself becomes the easy part.
Patch small drywall holes with a light hand
For nail holes, picture-frame hooks, and tiny dents, restraint matters more than force. The biggest mistake I see is overfilling a shallow hole, which creates a bulge that takes longer to sand flat than the original repair would have taken.- Scrape off loose paint, crumbly paper, and dust around the opening.
- If the edge is torn, trim it clean with a utility knife so the patch has a solid boundary.
- Load a small amount of spackle or lightweight joint compound onto a putty knife.
- Press the filler into the hole, then drag the knife lightly across the surface to leave it just slightly proud.
- Let it dry fully. For shallow holes, that may be under an hour; for deeper spots, give it longer.
- Sand with 120- to 220-grit paper until the repair feels flush with the wall.
- Repeat with a thin second coat if the surface still dips when you run a hand across it.
- Prime the patch before painting so the repair and the surrounding wall absorb paint evenly.
Feathering is the part beginners skip. It means spreading the compound thinner as it moves away from the hole so there is no hard edge left behind. If the repair is tiny, one careful pass is enough; if it is a shallow dent, two thin coats are better than one thick blob. If the opening is big enough that you can fit a finger through it, move up a method rather than adding more spackle.
Rebuild medium and large drywall holes so they stay flat
Once the hole gets larger, filler alone stops being reliable. Drywall is a paper-faced gypsum board, and without some kind of backing or replacement piece, a heavy fill can sag, crack, or telegraph through paint later.
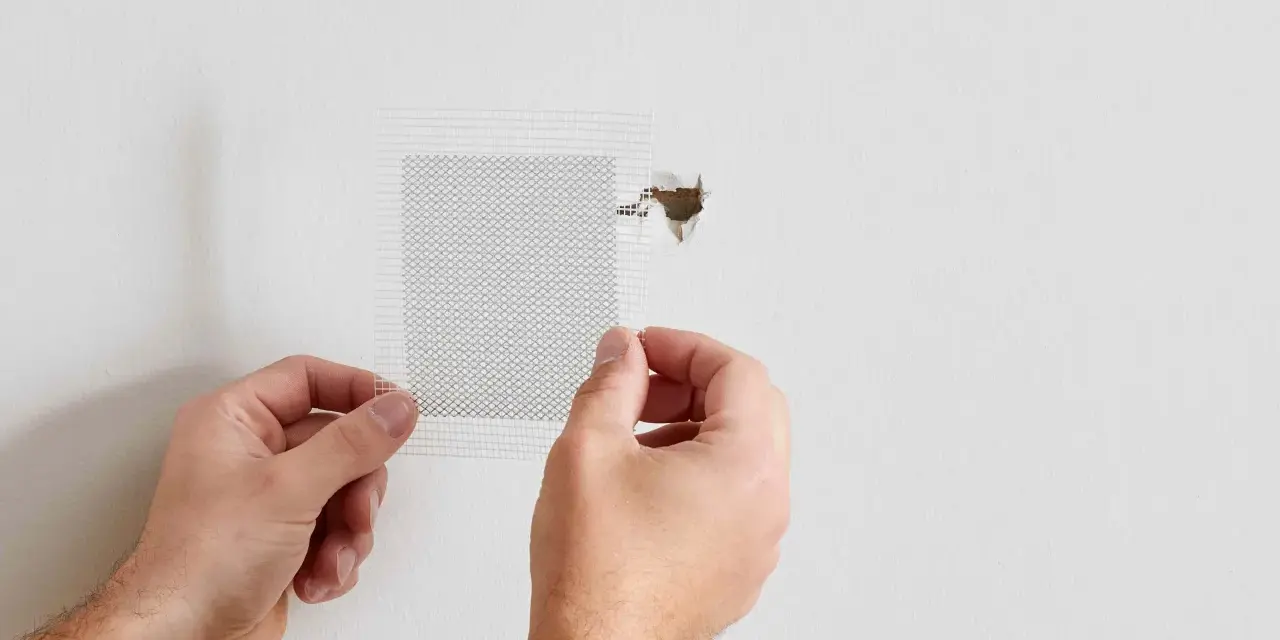
For a hole around 1/2 to 6 inches, I usually start with a mesh patch if the surrounding drywall is stable. The mesh gives the compound something to bridge, but I treat it as reinforcement, not as the repair itself. If the opening is ragged or larger than that, I cut it into a clean rectangle and install a new drywall piece with backing strips or fasteners behind it.
- Square up the damaged area with a utility knife or drywall saw.
- Remove anything loose until the edges feel firm, not fluffy or crumbly.
- Attach backing strips or a support piece behind the opening if the patch needs something to sit on.
- Cut a drywall patch to fit the opening as closely as possible.
- Secure the patch, then tape the joints if the repair has seams.
- Apply the first coat of joint compound thinly, covering the tape and patch edges.
- Let it dry, sand lightly, then add a second and sometimes third coat, each one wider than the last.
- Finish with a broad feathered pass so the repair blends into the surrounding wall.
I prefer thin coats because they are easier to control and less likely to crack. A wider knife helps here, because it spreads the compound farther out and makes the transition softer. Once the surface is rebuilt, the final look depends almost entirely on the finish work.
Treat plaster as a different material, because it is
Plaster is less forgiving than drywall, but it can still be repaired cleanly if you respect how it was built. The biggest difference is that plaster usually sits on top of lath or another backing system, so the repair is not just about the visible surface; it is also about whether the wall underneath is still holding together.
When I repair plaster, I first remove any loose bits that sound hollow or fall away with light pressure. If the damage is shallow, a bonding agent and patching plaster or setting compound can rebuild the area in layers. If the lath is exposed or damaged, I stabilize that structure before I think about finish material.
- Shallow chips and hairline cracks can usually be patched after the area is cleaned and stabilized.
- Deeper holes with intact lath need layered filler so the repair does not sink as it dries.
- Loose lath or crumbling edges usually need mechanical support before any cosmetic patch is added.
- Standard spackle is usually too light for deep plaster work and can shrink or crumble in larger voids.
One term that matters here is skim coat, which is just a thin finishing layer used to smooth the last imperfections. For plaster, that final coat often makes the difference between a repair that disappears and one that always catches the eye. Once you understand that, the sanding and painting stage starts to make a lot more sense.
Sand, prime, and paint for a finish that disappears
I can usually tell whether a patch will show long before paint goes on. If the surface is too thick, too narrow, or too glossy from over-sanding, the repair will catch light differently and stand out even if the fill itself is solid.
My finishing routine is simple: let the compound dry completely, sand lightly, remove the dust, prime the patch, and then paint. Primer is not optional if you want a clean result. It seals the fresh compound so the topcoat does not sink in unevenly, which is what causes flashing, the dull or shiny area that makes a repair visible from across the room.
- Use 120-grit to shape the patch, then move to 220-grit if you need a softer finish.
- Sand with a block or sponge so you flatten the patch instead of creating finger-shaped dips.
- Vacuum or brush away all dust before priming.
- Match the paint sheen as closely as possible; flat, eggshell, satin, and semi-gloss all reflect light differently.
- If the wall has orange peel or knockdown texture, recreate the texture before painting the final coat.
Texture is where many good repairs go wrong. A smooth patch on a textured wall looks unfinished, even if the fill is perfect. Even a good patch can look bad if one of a few common errors slips in.
When a patch is not enough anymore
Some wall damage is cosmetic, and some is a clue that something else is happening behind the surface. If the area is soft, damp, stained, or cracking again after repair, I stop treating it as a simple patch and start looking for the cause.
These are the situations that usually push a job beyond a basic DIY fix:
- Water stains, bubbling paint, or soft drywall around the hole
- Repeated cracking in the same spot after a previous repair
- Loose or missing lath in an older plaster wall
- Damage near electrical boxes, switches, or plumbing runs
- Large openings that need framing support or a full drywall replacement section