Waterproofing around a shower is one of those small home repairs that pays off quickly. Knowing how to caulk a shower matters because the right bead keeps moisture out of corners, joint lines, and trim seams where grout will eventually crack. In this guide I walk through choosing the right sealant, preparing the surfaces, laying a clean bead, and avoiding the mistakes that lead to mold, gaps, and repeat work.
The basics that make a shower seal last
- Use 100% silicone for most shower joints; it handles constant moisture far better than standard acrylic caulk.
- Remove the old bead completely before resealing, because fresh caulk will not reliably bond to residue.
- Seal changes of plane such as inside corners, tub-to-wall joints, and wall-to-pan transitions with a flexible joint, not rigid grout.
- Give the bead real cure time; many bathroom silicones are water-ready in about 30 minutes, but full cure usually takes 24 hours or more.
- Replace failed caulk early when it cracks, lifts, shrinks, or keeps growing mildew after cleaning.
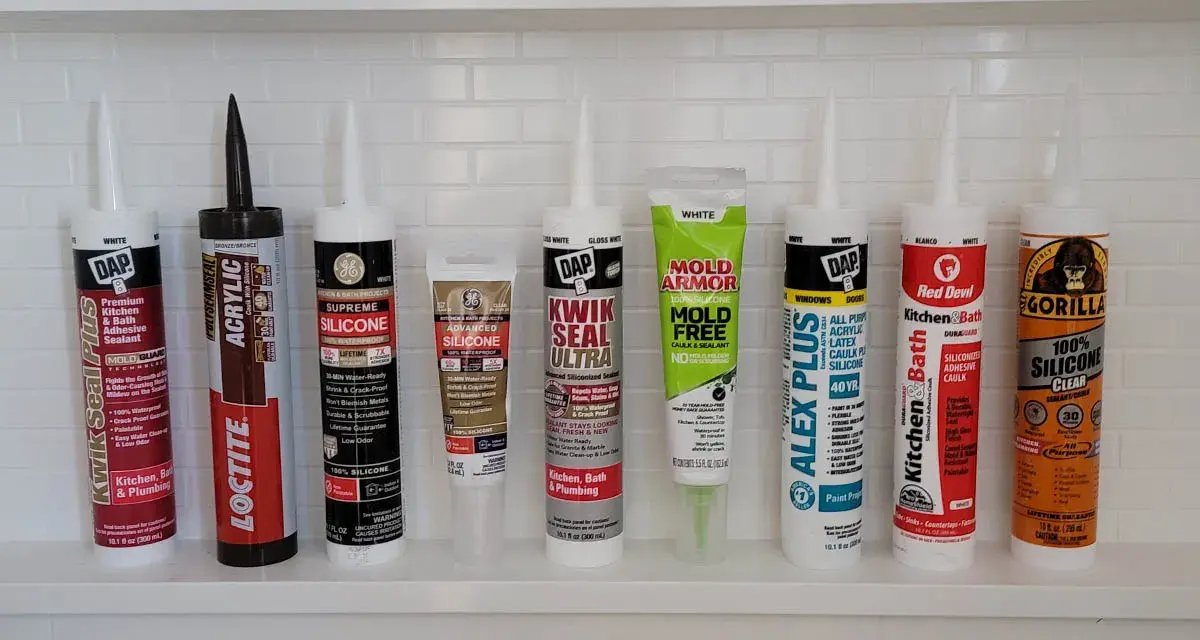
Choose the sealant that belongs in a wet area
For shower work, I default to 100% silicone. It stays flexible, resists water well, and holds up better in a constantly damp environment than paintable acrylic-latex caulk. That matters in a shower, because the joint is moving a little every day from temperature changes, vibration, and normal building movement.
There are a few sealant types you will see on the shelf, but they are not equally suited to this job. Here is the practical version I use when I am helping someone choose a product for a shower enclosure.
| Sealant type | Best use | Shower suitability | Main limitation |
|---|---|---|---|
| 100% silicone | Wet joints, corners, tub and shower seams, glass-to-tile transitions | Best overall choice | Not paintable and harder to clean up once cured |
| Siliconized acrylic-latex | Dryer bathroom trim, paintable touch-ups | Only a compromise option | Less durable in constant moisture |
| Hybrid or MS polymer | Mixed-material joints, some specialty applications | Can work if the label allows wet areas | Check the product closely; not every formula is ideal for a shower |
If the shower includes natural stone, read the label carefully and choose a formula approved for stone. I also look for mildew resistance, but I do not treat any product as mold-proof. Good ventilation and regular cleaning still matter. Once the sealant is right, the next decision is where it should actually go.
Know which joints should be sealed and which should stay flexible
Not every seam in a shower gets the same treatment. In tile work, the joints that move are the ones that need flexible sealant. That usually means inside corners, where the wall meets another wall, and changes of plane, such as where the wall meets the tub, shower base, curb, niche edge, or fixed trim.Do not use hard grout in those moving joints. Grout is rigid. It can look fine at first, then crack as the enclosure shifts a little over time. Caulk bridges that movement instead of fighting it.
There is one important exception: some framed glass shower doors, tracks, and enclosures have drainage paths or manufacturer-specific sealing instructions. Do not block weep slots or seal over parts that are designed to drain. If the door system came with directions, follow them exactly. And if a gap is wide, broken, or uneven, fix the substrate first instead of trying to bury the problem under a thick bead. A sealant line is not a structural repair.
Once you know the target joints, the rest of the job becomes much easier, because good prep is doing most of the work for you.
Remove the old bead and prep the surface
This is the part that decides whether the new seal lasts. New caulk over dirty, damp, or silicone-coated residue is a short-lived fix. I usually tell people to spend more time here than they expect, because surface prep is where most DIY shower jobs succeed or fail.
- Cut through the old bead on both sides with a utility knife or caulk-removal tool.
- Pull out the loose strip by hand if it comes free cleanly.
- Scrape the remaining film at a shallow angle so you do not gouge tile, fiberglass, acrylic, or metal trim.
- Clean soap scum, mildew, and residue from the joint and the surrounding surface.
- Dry the area completely before you open the new tube.
For stubborn silicone residue, I use a dedicated caulk remover or a cleaner recommended for the specific surface. On many shower surfaces, a small amount of mineral spirits on a rag can help lift leftover silicone, but test first and avoid flooding sensitive finishes. If you see soft drywall, swollen backer material, loose tile, or a joint that stays wet, stop and deal with the real leak instead of sealing over it.
A joint that is clean and dry gives the sealant a fighting chance. The next step is applying it with control instead of speed.
Apply the bead with control, not speed
For a shower, I want one continuous bead that bridges both sides of the joint. Cut the nozzle at about a 45-degree angle and make the opening slightly smaller than the gap you are filling. You are aiming for a neat, modest bead, not a heavy ridge. If the line is long or the tile is glossy, painter’s tape can help keep the edge crisp. I do not use tape everywhere, but I do use it when the joint is visible and I want a cleaner finish. Once the bead is laid down, tool it while it is still fresh. Many bathroom silicones give you only a short working window, so I try to smooth within the first 5 to 10 minutes.A gloved finger lightly moistened with clean water or a dedicated smoothing tool usually works well. Some silicone formulas tool better with less moisture, so I always check the tube first. The goal is simple: press the sealant into the joint, remove excess, and leave a slightly concave profile that sheds water instead of catching it. After tooling, remove any tape immediately before the skin forms.
That clean line still needs time to become a real waterproof seal, which is where patience matters more than technique.
Let the seal cure before the first shower
One mistake I see constantly is confusing water-ready with fully cured. Those are not the same. Some shower silicones can handle light water exposure in about 30 minutes, but full cure usually takes 24 hours, and sometimes 48 hours if the room is cool, humid, or the bead is thick.
During that time, keep the shower dry, run the exhaust fan, and avoid scrubbing the bead. If you hit it with water too early, the outer skin may look fine while the interior is still soft. That is how a good-looking joint ends up weak, smeared, or contaminated before it ever hardens properly.
If the label gives a longer cure time than what I have just described, follow the label. Product instructions win over any rule of thumb. Once the seal is cured, the only thing left is to avoid the habits that shorten its life.
Common mistakes that make shower caulk fail
Most failed shower seals come from a handful of repeat errors. I see them often enough that I treat them as a checklist of what not to do.
| Mistake | Why it fails | Better approach |
|---|---|---|
| Caulking over damp residue | The bead cannot bond properly and mildew comes back fast | Strip, clean, and dry the joint fully first |
| Using the wrong product | Paintable caulk and general-purpose filler break down in wet areas | Use 100% silicone for most shower joints |
| Filling a large gap with only sealant | The bead shrinks, sags, or tears away from the sides | Repair the joint or use backer rod when the gap is too deep |
| Blocking drain slots in a door track | Water gets trapped where it should escape | Leave intended drainage paths open |
| Caulking over a moving crack in the substrate | The seal fails again because the underlying problem is still active | Fix the tile, pan, or backing issue first |
If a joint keeps failing in the same spot, I assume movement or hidden moisture is the real issue until proven otherwise. That is the kind of detail that saves time, and more importantly, keeps you from sealing the same seam three times.
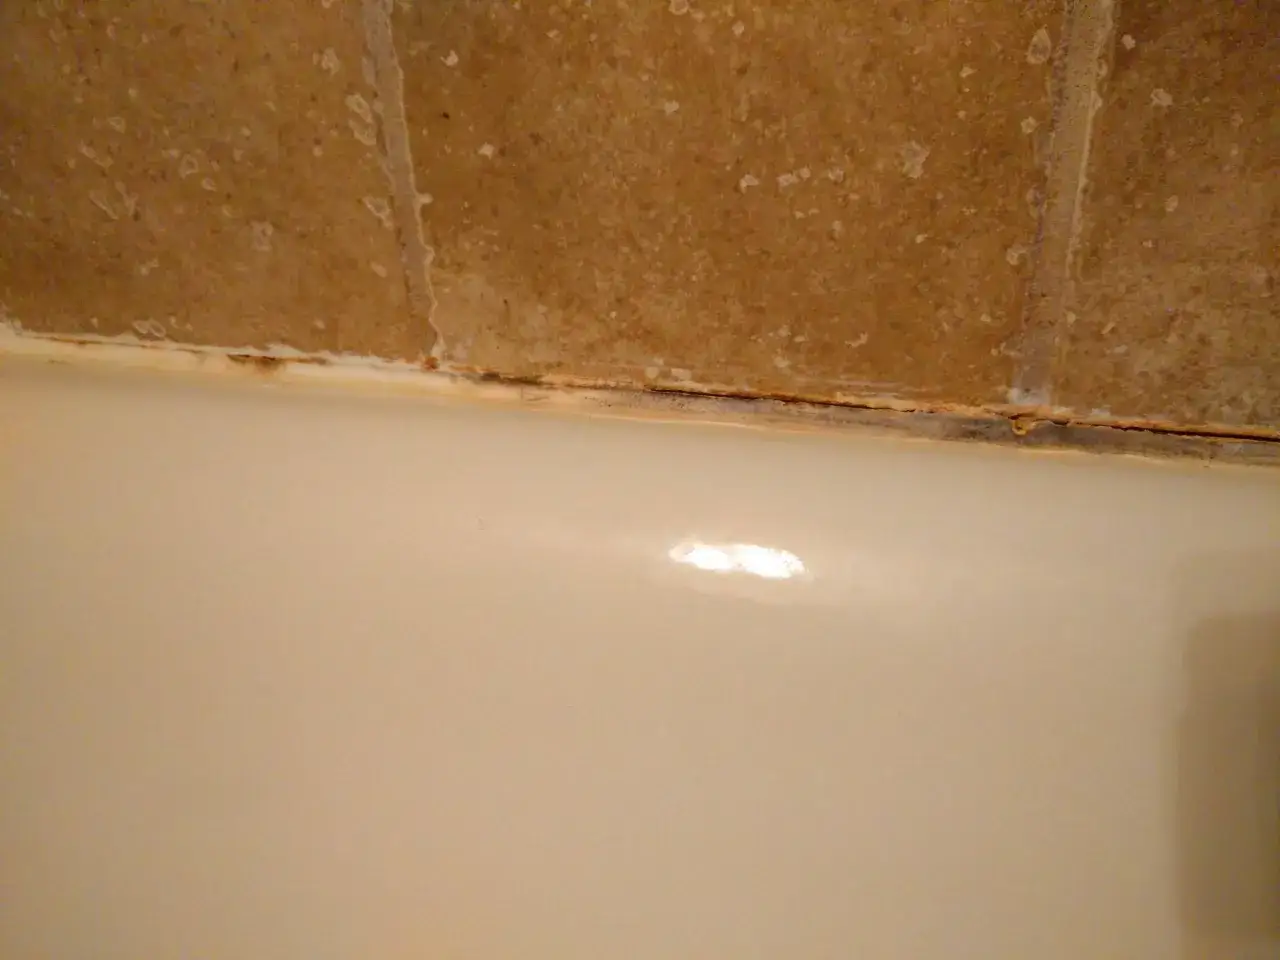
Know when to redo the seal before water gets behind it
Good silicone does not last forever, even in a well-ventilated bathroom. In a typical home, I expect a decent shower seal to last several years, and often longer if the room is dry, the shower is cleaned gently, and harsh bleach scrubbing is kept to a minimum. I still recommend a quick inspection at least once a year.
Replace the caulk when you see cracks, lifting edges, shrinking away from the tile, discoloration that will not clean off, or mildew that keeps returning after normal cleaning. If the bead feels soft, separates when you press it, or leaves water hiding behind it, do not wait. A small failure in a shower joint can turn into damaged drywall, stained framing, or loose tile much faster than most people expect.
When the same corner fails repeatedly, I look beyond the caulk itself. That is usually a clue that movement, poor ventilation, or a hidden leak is working against the seal.
Keep the shower seal looking sharp after the job is done
The final difference between a seal that looks good for months and one that looks tired after a few weeks is usually maintenance, not craftsmanship. I run the exhaust fan after showers, wipe standing water from the curb and corners, and avoid harsh abrasive cleaners on the bead. Those habits are boring, but they work.
If a tiny nick appears, resist the urge to smear a little new silicone on top. Small touch-ups rarely blend well, and fresh silicone does not bond neatly to cured silicone. For a damaged section, cut out the problem area and redo it cleanly. That approach takes a few extra minutes, but it gives you a seam that actually performs like a seal instead of looking like a patch.
Handled the right way, shower caulking is a straightforward home repair: choose the right material, prep the joint properly, lay a controlled bead, and give it time to cure. That sequence is simple, but it is also the difference between a shower that stays tight and one that keeps asking for repairs.