Brick looks simple until one piece has to fit exactly around a corner, a pipe, or the end of a wall. In practice, how to cut brick cleanly comes down to matching the tool to the job, keeping the line supported, and controlling dust before the blade ever touches the surface. I prefer the least aggressive method that still gives a straight edge, because that usually saves both the brick and my patience.
The fastest path to a clean cut is to match the tool to the job
- A cold chisel and hammer are best when you are removing one brick or breaking through mortar.
- An angle grinder is the most versatile tool for short trims, notches, and curved relief cuts.
- A wet masonry saw gives the straightest edge and the lowest dust for repeated cuts.
- Mark every face of the brick, support the work, and make shallow passes instead of forcing the blade.
- If you must dry-cut, work outdoors and treat dust control like a real safety issue, because it is.
Choose the method that matches the job
The right tool depends on whether I need a clean visible edge, a quick fit, or a brick removed from an existing wall. I always think about three things first: cut length, cut visibility, and dust. That order keeps you from renting a big saw for one small repair or trying to force a grinder through a job that really wants a wet saw.
| Method | Best for | Strengths | Trade-offs |
|---|---|---|---|
| Hammer and cold chisel | Removing one brick, rough shaping, mortar-joint work | Cheap, quiet, no power needed | Slow, rougher edge, more chance of breakage |
| Angle grinder with a diamond masonry blade | Short cuts, notches, small trim work | Portable, fast, accurate enough for most DIY repairs | Dusty when dry, limited cutting depth |
| Wet masonry saw | Repeated straight cuts, visible edges, pavers | Straighter cuts, better dust control, cooler blade | Heavier setup, water and slurry cleanup |
| Reciprocating saw with masonry blade | Tight access and demolition-style removal | Useful in awkward spots | Rough finish, slower, blade wear adds up fast |
For a typical home repair, I reach for the tool that will do the least damage to the surrounding masonry. That choice matters even more once you start marking the brick, because the setup is what determines whether the cut follows the line or wanders off it.
Set up the brick so the cut stays clean
Good cutting starts with layout. I mark the waste side of the line, then transfer that mark to every face that will be cut so I am not guessing once the dust starts flying. On a loose brick, I clamp it or pin it between scrap boards; on installed brick, I support the surrounding course so vibration does not crack the neighbors.
- Measure twice and mark with a pencil, chalk, or wax marker.
- Wrap painter’s tape around crumbly brick if the edge tends to chip.
- Decide which face will be visible and cut from that side first.
- Clear the work zone and check for hidden lines, pipes, or wiring behind the brick.
- Choose a diamond masonry blade sized for the tool and the thickness of the cut.
Support is not optional. A brick that moves while you cut is a brick that chips, breaks unevenly, or burns through blades faster than it should. Once the layout is locked in, the actual cutting becomes much easier, which is why the grinder is usually my next move for smaller jobs.
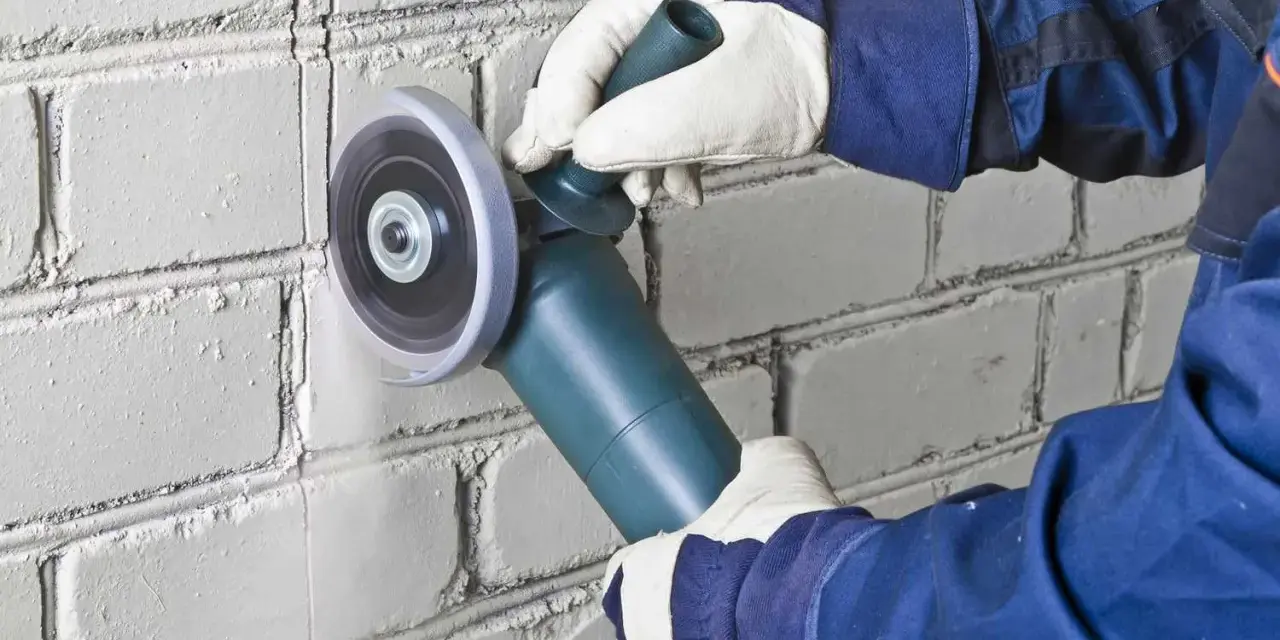
Cut with an angle grinder for small jobs
A 4.5-inch or 7-inch angle grinder is my first choice for short cuts, notches, and field adjustments. It is fast, portable, and accurate enough for most home repairs, but it is also the messiest option if you cut dry. On a standard brick, a small grinder usually will not reach all the way through cleanly from one side, so I plan on working from both faces when the brick is thick.
- Fit the grinder with a diamond masonry blade rated for the tool’s RPM.
- Clamp the brick securely and stand so the blade path is clear.
- Score the line lightly first, then deepen the cut in two or three passes.
- Let the blade do the work; do not twist or force it sideways.
- Finish from the opposite face if the brick is too thick for one pass.
Never use a wood or metal blade on brick. If you must cut dry, work outdoors, keep bystanders out of the dust stream, and wear respiratory protection suitable for silica dust. A shallow, patient pass leaves a cleaner edge than one hard push ever will, and that matters when the cut will be visible in the finished wall.
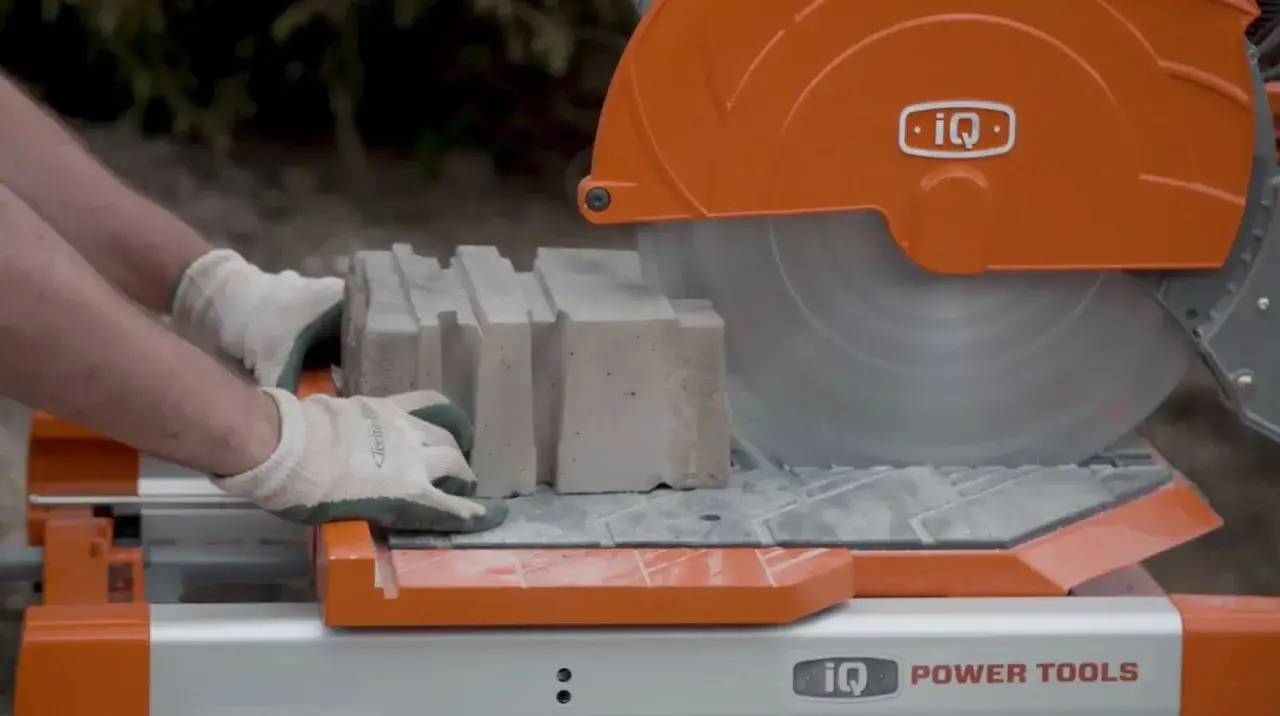
Use a wet masonry saw when straightness matters
When I need several cuts, a long straight line, or the cleanest finish possible, I rent a wet masonry saw. The blade stays cooler, the edge comes out more consistent, and water suppresses a lot of the dust at the source. OSHA notes that wet cutting has reduced average respirable dust by up to 94 percent in some studies, which is a real improvement even on a small job. The trade-off is obvious: the setup is heavier, and you have slurry to clean up afterward.
- Keep the water feed aimed at the blade and the cut line.
- Check that hoses are secure before you start the first cut.
- Move steadily enough for the blade to stay engaged, but do not stall it.
- Clean slurry while it is still wet instead of letting it dry into dust later.
I choose this route for patios, walkways, and visible trim pieces where a straight, repeatable edge matters more than speed. It also sets up the hardest case well: removing a brick from an existing wall without wrecking the masonry around it.
Remove a brick from a wall without damaging the course
Pulling a brick out of a wall is different from trimming a loose one. I start by cutting the mortar joints around the target brick, because mortar is softer than brick and gives you a controlled path. If the wall is load-bearing or supports a veneer tied back to framing, stop and confirm the repair plan before you touch anything structural.
- Score the mortar joints around the target brick with a grinder or masonry blade.
- Work from the center of the brick outward with a cold chisel and hammer.
- Break the brick into smaller pieces rather than prying on the whole unit.
- Clean the remaining mortar from the opening before setting the replacement brick.
- Dry-fit the new brick before bedding it in mortar.
This method is slower than slicing straight through, but it protects the surrounding masonry and gives you a cleaner patch line. Once you have the removal technique down, the next step is avoiding the mistakes that waste bricks, blades, and a lot of time.
Avoid the mistakes that ruin the edge and the air quality
Most bad brick cuts come from rushing the setup, not from the tool itself. I see the same problems over and over: forcing the blade, cutting only one face of a thick brick, and dry sweeping dust back into the air after the cut is done.
- Do not start with a full-depth plunge if a scoring pass will do.
- Do not clamp the brick loosely; vibration breaks corners faster than the blade does.
- Do not rely on compressed air to clean up masonry dust.
- Do not stand in the line of the dust plume if you are dry-cutting.
- Do not ignore blade wear; a glazed or worn blade cuts hotter and rougher.
OSHA’s silica rule favors water, dust collection, and proper housekeeping over dry sweeping, and that logic still makes sense for DIY work. Once the dust is under control, the tool choice becomes easier to narrow for the kind of project you actually have.
The setup I reach for most often on a home repair
For one or two visible cuts, I usually use a grinder with a diamond blade and make two careful passes instead of one aggressive cut. For a patio, walkway, or any project with repeated straight lines, I rent a wet masonry saw and accept the cleanup because the finish is better. And when the job is really about removing one damaged unit, I cut the mortar joints first, break the brick out in pieces, and leave the surrounding course as untouched as possible.
That is the practical answer for brick cutting on most home repairs: pick the least violent method that still gives the finish you need, keep the line marked on all sides, and control dust from the start. If you respect those three habits, the work is usually cleaner, faster, and less frustrating than people expect.